Welcome to episode 51. This week I’m going to continue taking a brief look at each episode to date, giving a brief mention of what was discussed and mention one or two of the main points of that Podcast. I won’t be covering all the tips and techniques of course, as it would take as long as just listening to all the original episodes. I’m hoping this will be a way to not only condense the main gist of what I’ve covered so far, but also give new comers a brief outline of what is in the archives. There are many more pearls hiding in the old episodes, but with so much listening time needed to catch up, it’s hard to think of where to start. I’ll also add a little update or extra information since first recording the episode where relevant. Hopefully for new and longer term members alike, this will give you some pointers as to what episodes you want to go back and listen to, either for the first time, or to recap on what’s been discussed in the past. Let’s pick start this week from episode 11, and see how far we can get.
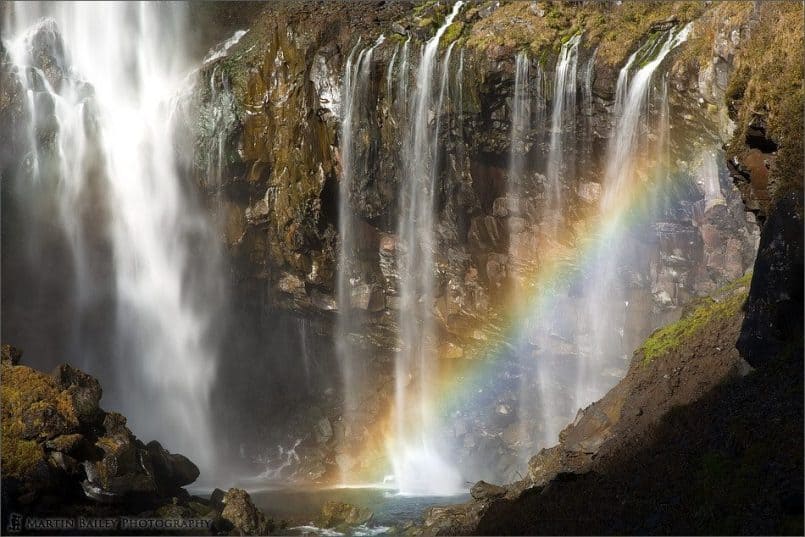
In Episode 11 I discussed the importance of good planning for a photography trip, while discussing a 5 day trip, starting with image 731. I’m not going to go into the shooting information for each shot today either, as we need to keep this concise. If you want more details, jump to the Web site and check the information below the image. In this episode I also touched on the luck aspect. The success of photography that relies partially or entirely on uncontrollable aspects like the weather or that additional element to make a shot will be based on a certain amount of luck. Of course, as photographers this may not mean having good weather. As we know, the best shots can be made in pretty inclement weather, and a clear blue sky often works against us more than in our favour. Good planning will enable you to hedge your bets, and get to the right place at the right time, but the flock of birds across the sunset, or a boat on the lake, or in this case, the rainbow at the foot of the waterfall, are not always things we plan, but they make the difference between a winning shot, and a mediocre one. When planning, it helps to know in which direction your intended subject is facing, so that you can get to the right place at the right time of day. You’ll need to find out the times for sunrise and sunset if you intend to shoot them, and ensure that you get to your location in plenty of time to prepare. Again though, whether the sun come over the horizon in full fiery glory, or it comes up behind thick cloud, making it invisible to us, will be down to luck in most cases. The important thing is, if you are stuck in your hotel bed at 4AM when the sun hits that horizon, you’ve got know change of capturing it either way, and this is what I mean by planning is essential. Doing the footwork, and making the extra effort to get out of bed before dawn is essential. Then, the last part is down to luck.
In Episode 12, I discussed my digital workflow. In general, looking back at what I said, nothing has really changed. I still shoot RAW exclusively, for the added freedom of being able to change settings like the Canon Picture Style, and also white balance in post processing, and also for benefits of getting a 16bit image, as opposed to an 8bit one that a JPEG image will produce, such as none-compressed image quality, and slightly better dynamic range. I still very much hold to the rule of getting your exposure and composition right at the time of shooting, and rely very little on post processing to adjust exposure, and cropping too much in post processing too will result in a smaller image, so your maximum print size is reduced. I still tend to use Canon’s Digital Photo Professional to export TIFF files to import into PhotoShop rather than processing the images with the Adobe Camera RAW plug-in, because it does not recognize Canon’s Picture Style settings. I did figure out how to set the Adobe Camera RAW plug-in to give very similar effects to the Landscape Picture Style, but it’s hit and miss, sometimes throwing the colours way off, so I end up going back to Digital Photo Professional anyway. One other thing I guess is that I’m using DVD backups much less now, as I find that with the volume of images I have now makes it impractical. I have two 250GB hard drives for my base copy now and two more 250GB hard drives in an external unit that I attach and sync up at regular intervals. I leave the backup copy in the office for my day job, and just take it home when I’m due to backup. This way if a catastrophe such hit, like a fire or earthquake, and I escape from it, I would hope that one of the backups stays in tact. I will also continue to make one full DVD back a year and send to my brother in the UK to keep for me as a final piece of insurance in case the whole of Tokyo goes down in an earthquake. If that happens though, I’m probably not going to be around to worry about it too much, and my brother can start to make money off of estate prints from the DVDs.
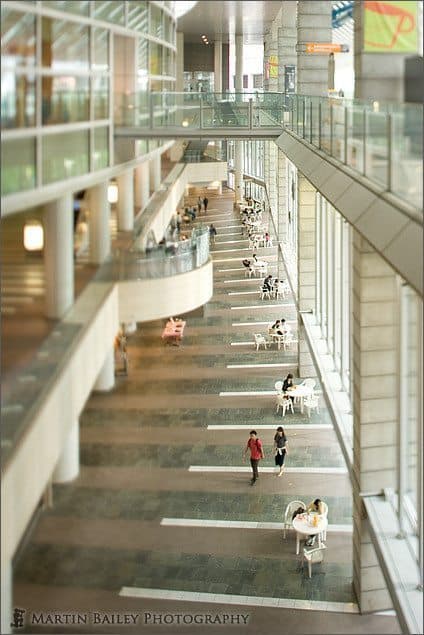
In episode 13 we looked at a few images shot with a TS-E 24mm lens. I’ve discussed shots since then made with a Tilt-Shift lens, but I’d say one of my favourites still remains image number 639, that we looked at among others in this episode. Many think that Tilt-Shift lenses are pretty much just for straightening up buildings, to stop them tapering of towards the top as we look at them from a low vantage point, and I do use my TS-E lens for that too, but another artistic use of this lens is to make the scene look more like a macro shot of a tiny model than a photograph of reality. The reason this is possible is because you can use the tilt feature of a tilt-shift lens you can move the focus plane of the lens from being parallel to the film plane, to being any degree zero, producing no effect, to up to almost 90 degrees from the film plane, almost in line with the lens axis. What this means is the depth-of-field in an image is no longer parallel to the camera, but running diagonal to it to some degree. Of course, you can use the Shift feature to straighten elements like the vertical pillars in image 639 as well to stop is looking so obviously like we are looking down or up at our subject. An alternative to a relatively expensive Tilt-Shift lens, is the Lensbaby. I have tried both the original Lensbaby and the Lensbaby 2, and both are great fun, and really inexpensive at less than a $100. They are available for just about any camera you can think of too. I’ll drop a link to the Lensbaby Web site into the show notes, but it’s basically just lensbabies.com if you are interested in talking a look.
In episode 14 I discussed White Balance. I’d say that the ability to be able to balance the colour of images shot with a digital camera without using filters as is necessary with film say when using daylight film under artificial light, is probably one of the next big benefits of digital after being able to change the ISO for each frame without loading a different roll of film. We have to White Balance to compensate for the colour of the light falling on the scene we photograph, even when it is not obvious that the colour of the light is different, because our eyes are very quick to adjust to our surroundings and we do so subconsciously. There are times when we don’t want to balance light. For example balancing out the warm glow of dawn or dusk would not make much sense. In these conditions, I use the daylight preset in my camera. I never use Auto White Balance, as although I believe it is getting much more accurate these days, I just don’t like not being in control of the white balance. If you use the presets, you are in control. The one thing that has changed in my workflow with regards to white balance is that instead of using an old 18% grey card, I now use a pocket WhiBal. The WhiBal is small and has a number of options for attaching it to your clothing or round your neck for easy access, and I find myself shooting it and setting my camera’s custom white balance using that image for probably around 1/3 of my work, when I want even more control than the presets would allow. In addition to setting the custom white balance while shooting, if you use RAW, as I always do, you can just shoot the WhiBal a few times during your shoot, as the light changes, and then set the rest of the image to a reading from that image in post processing. Again though, I prefer to do as much as possible in the field, to keep my post processing time down to a minimum.
In episode 15, I discussed using a PL, or polarizing filter to remove the reflections on water, allowing us to see into the water more clearly, and the moral dilemma of whether or not we should help an animal that is nearing the end of its life naturally. The thread in the forum that ensued on the moral dilemma was very rich in various opinions. I won’t go into the details now as I would not be able to do this topic justice in a short summary, but I will put a link to the thread in the show notes for those that are interested.
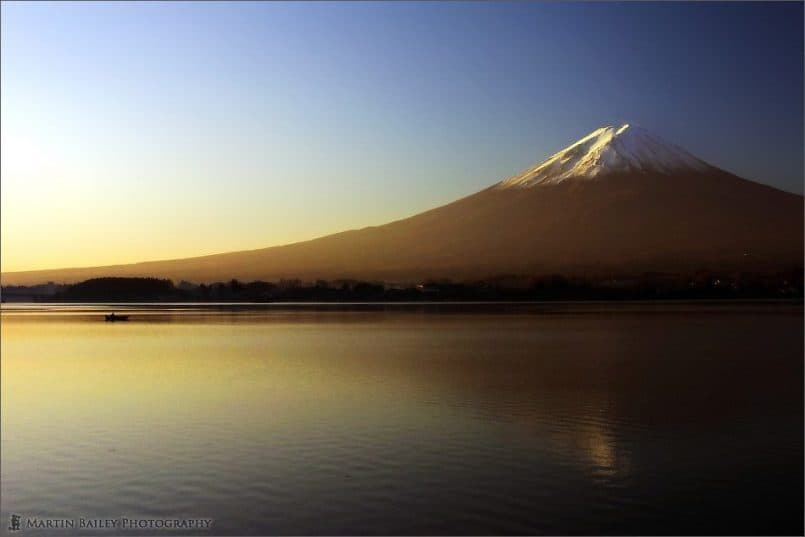
In episode 16 we looked at adding an accent in your shots to add interest and sometimes even something so small that it is not immediately obvious, giving the viewer that looks more deeply into your image an added bonus. We looked at image 71 among others. In image 71 we can see the might Mount Fuji, an icon of Japan in all it’s glory. It’s without a doubt the first thing that the viewer’s eye will move to filling most of the frame. However, once you’ve inspected the main subject, and start to inspect the rest of the shot, you’ll notice a person in a boat, right there in the shadows. Although I’ve received many, many comments about this shot over the last few years, one of the most common comments has been “I love the guy in the boat. It makes the shot”. Keeping your eyes out for that additional element and positioning it in the right place will improve your images immensely. If the element is a moving object or an animal, shooting some insurance shots as it moves through your scene is wise, but also waiting for it to move to the decisive point in the shot will also make a big difference on the impact and value it adds to your image. Like I said earlier, it can really be down to luck whether or not this added element moves into just the right place to make a difference.
In episodes 17 and 18, I did two episodes giving tips for shooting in harsh winter conditions. I’d visited Shirakawagou, a small village with traditional houses with steep side roofs called Gasshouzukuri, which literally mean built in the shape of praying hands. The Shirakawagou village is a UNESCO World Cultural Heritage site, and such a picturesque place to visit any time of the year, but in winter, it is simply amazing, even if quite treacherous to get to.
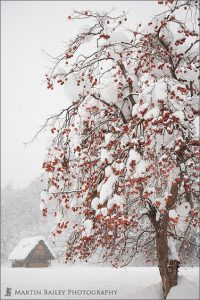
Image number 782 was probably my best shot from the brief trip, with the orange persimmon fruit left on the branches of the tree in stark contrast to the bleak snowy surroundings. I gave many other tips on shooting in harsh cold, such as putting your camera equipment in an air-tight bag when taking it into a warm building from the cold, to stop condensation from building on the internal elements of lenses and your camera etc.
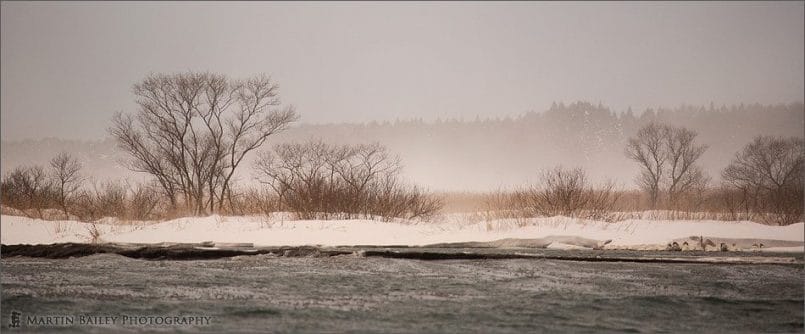
I shoot in very cold conditions quite often, so many episodes contain tips on this shooting in the cold, but if you are heading off to a cold place yourself, listening to these two episodes would be a good place to start. The second of these two episodes by the way included examples from a shoot at the Inawashiro Lake in Fukushima Prefecture. My favourite is image number 809 that I entitled “Swans Awake”. This was my prize for getting up at the crack of dawn and walking along the wind-blasted icy shore of the lake, capturing the swans as they stretch their wings on a far off bank with my 100-400mm lens.
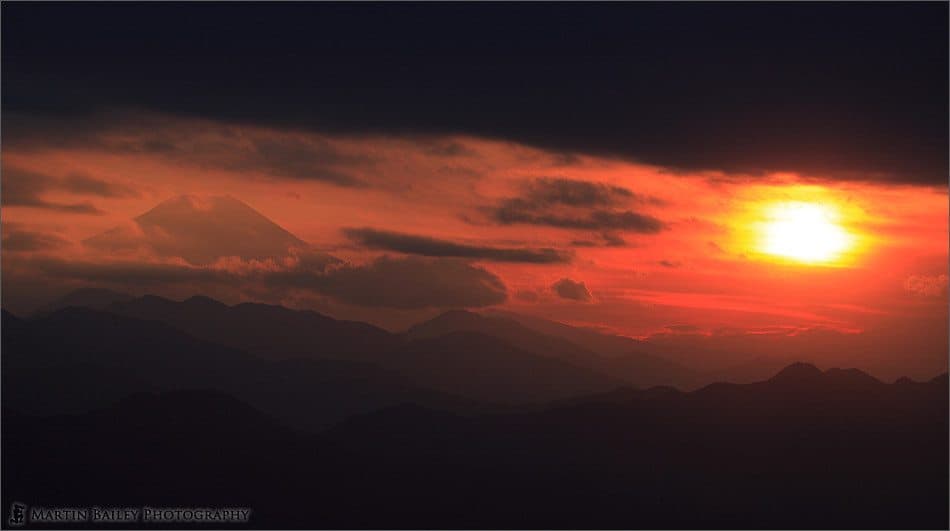
In episode 19 we looked at an amazing sunset that we can see in image number 827, with Mount Fuji that I was lucky (there’s that word again) enough to witness during literally just a few minutes break in the clouds of an incredibly dramatic sky. In this episode I also discussed visualization. I’d visited this location once, around four years before the day I shot this sunset, and on my way down a very long flight of stairs after a pretty gruelling hike, I realised that there was a car park, really quite close to the top of this mountain. Although the climb up the steep steps would probably be a real lung buster, I committed this to memory for future reference. Having bought a car at the end of 2005, I decided to go back to this spot in the hope that I’d be able to shoot a nice sunset. You can see the results, and I hope you agree it’s more than just a nice sunset, with that additional element of Mount Fuji and those amazing clouds, but one of the main points was that it is important to build a mental stock of locations like this to pull out of your hat at different times of the year to re-visit. Many locations might not be perfect when we first find them. We might be there in the morning, when the light would be better in the evening, or visa versa. The greenery might be drab, and would look better with the fresh green foliage of spring or with the colourful autumn leaves. If necessary, keep a note book of such locations and the times of day or season in which you would like to revisit them. I find that looking back through your stock of images regularly can also remind you of various locations and jog your memory for possible revisits too. Finally on this, visualizing the possibilities when you get there will also help you to decide what gear you need to take, which I need to get better at to stop myself from carrying just about every piece of equipment I own up the side of the mountains.
In episode 20 and 21 I discussed monitor calibration and printing with profiles. I don’t really understand all the technical details behind monitor calibration, so I basically just walked you through the steps that I go through to calibrate my monitor with the Spyder2 Pro from Colorvision. Calibration is important because we need to know that any post processing we do will give consistent results. I.e. if you work on a monitor that is too bright, too low contrast and say too green, your results will probably end up too dark, with high contrast and with weak greens because you’d probably be toning them down. Once you have a calibrated monitor you can be sure that what you are looking at on your screen is a standard, so not only will your post processing be more consistent, when you publish your images, they will look the same on other peoples’ monitors as long as they are also calibrated.
One update is that I said that I could not create a separate profile for my second monitor, but this was because I had my video card software set to use the two screens as a single large screen. When I added a second video card to enable me to show my PC screen on my TV as a third screen, I was given the option to create a profile for all three screens, so the problem no longer exists.
With regards to printing, I suggested using Adobe RGB as the colour space when shooting, and setting PhotoShop to use Adobe RGB by default, as well as setting your camera to shoot in Adobe RGB, so that your base contains colours that are not available in the smaller gamut of sRGB, that most camera’s use as default. The main part you loose is light greens, like the fresh green leaves I was shooting in Oirase recently, which I would hate to loose. There’s a little more work involved in using Adobe RGB than sRGB, but if you want to use your images for anything other than viewing on the Web, where sRGB is still the standard, Adobe should be your choice. It does mean that you have to convert to sRGB before publishing to the Web, but this is just one line in an automation script, and really not a big overhead. Then I explained about soft proofing in PhotoShop to see the results that various paper and printer profiles will give you on screen, before actually printing it out. This helps you to select the right combinations and adjust the image if necessary before printing and will save on time and money it costs when you make mistakes. The same settings that we use in the proofing tool are what we use to make the final print.
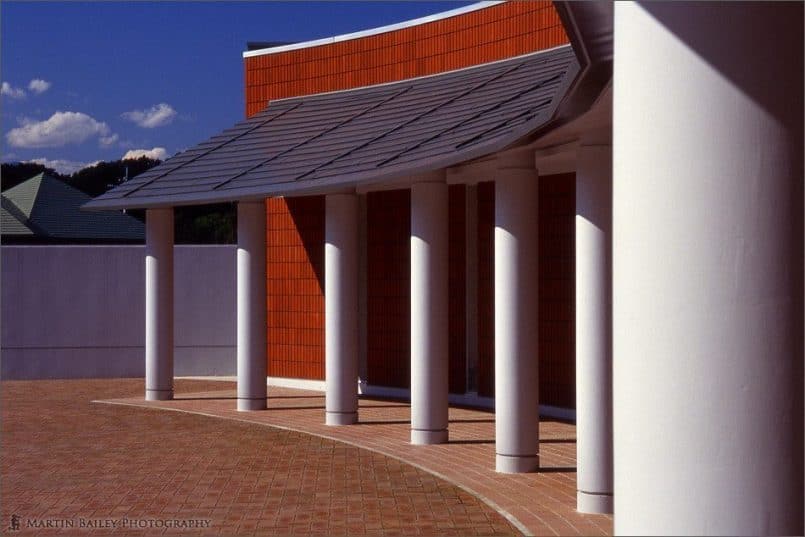
In episode 22 I discussed the composition style of using repeating patterns, and the first image we looked at was one of mine from way back in 1992 of a row striking white pillars in front of a red building with a nice blue sky. It is image number 16 on my Web site. Repeating patterns are all around us in both man made and natural forms, and although this is a relatively simple composition tip, it can produce some very pleasing results. What I tend to do is to put one of the repeating elements very close to the camera as with the first white pillar here that is taking up around 25% of the entire frame, and then let the other similar objects flow into the distance leading our eye into the shot.
Next week we’ll continue to summarize starting with Episode 23, in which I discussed using telephoto lenses successfully. This Podcast seems to me to be really not that far in the past as the one’s I’ve discussed today and last week, so hopefully we’ll be able to pick up the pace even more by then.
Remember that we are still voting for the Depicting Culture assignment, so if you haven’t voted yet, please go to the mbpgalleries.com Web site and make your selection. You can change your selection if you change your mind, but it will remove the vote from your previous selection, so that each member only gets the one vote.
Have a great week whatever you do. Thanks very much for listening. Bye bye.
The Martin Bailey Photography Podcast is a member of the Photocast Network. Find other great Photography related Podcasts at photocastnetwork.com.
Subscribe in iTunes for Enhanced Podcasts delivered automatically to your computer.
Download this Podcast in MP3 format (Audio Only).



0 Comments