Today I’m going to describe what types of camera supports I use, give you just a few examples of images shot with each, and a few tips on what to look out for when buying a tripod, monopod or other camera support.
Today’s Podcast topic was originally suggested by Dom Leary, username Scrubs, from Surrey, England. Dom has been a member for a while now and contributes a lot to the board, so Thanks Dom, both for the suggestion for today’s topic, and for your continued contributions to the forum.
As of April 2006 I use two tripods and a monopod, selecting from them as necessary based on the intended use. I took all three to Hokkaido with me in February this year and used them all.
So firstly, the tripod that I’ve owned the longest, around 4 years now I think, is comprised of a set of Manfrotto 444 Carbon One legs, and at the end of 2005 I bought Acratech’s The Ultimate Ballhead for this tripod. The Ultimate Ballhead is a great piece of equipment and it fits perfectly onto my Manfrotto 444 legs. Unlike my previous ballhead that was greased, and required a lot of pressure to be applied to fix the camera in any particular position, and even then sometimes the camera would still move, the Ultimate Ballhead is not greased and really needs very list pressure to stop it dead.
When you order from Acratech’s Web site, I’ll put links to all this equipment in the show notes by the way, you can choose from a number of options, such as to optimize the ballhead for left-handed use, and also you can choose rubber knobs, as I did, which makes tightening and un-tightening much easier. I also chose the option to not put a Quick Release shoe on the ballhead, as I wanted to standardize all my camera supports with the same Wimberly QR or Quick Release clamp, C-10. This QR Clamp has a groove down the middle into which screws in the plate that you fit to the camera or your lenses slide, but stop the lens from sliding all the way out if the screw should come loose at all. I now have a plate permanently screwed to both my 5D and 20D, as I sometimes use both together, and I also have a plate on all my lenses that have a tripod mount, namely the 600mm F4, the 100-400mm F4.5-5.6 and my 100mm macro lenses.
I find it important to be able to use both cameras and all my lenses on any of these supports, as the plates that you fit to lens mounts or camera are not quick release. They screw into the tripod mount and in some cases also have other locking nuts, so taking them off and switching to different plates in the field is impractical. So basically this tripod and both my second tripod and monopod are all fitted with QR Clamps from Wimberly, so that I don’t have to waist time changing shoes instead of shooting.
So, why did I go for the Manfrotto 444 legs? Firstly, I wanted carbon-fiber for it’s lightness, as I was going to attach this tripod to the side of my already too heavy camera bag and often trek up mountains or walk for long distances. It can’t be too light though, as we don’t want it blowing over in the slightest breeze with our precious equipment sitting on it. This particular model weighs in at 3.5lbs or 1.6 kilograms and will support up to 11lbs or 5kg of camera equipment happily. It was important to check this as the tripod needs to support a large DSLR with battery grip and flash. Basically the message is don’t go for something too flimsy. Small and light is nice, but only really suitable if your main camera is a compact digital. Even then, I wouldn’t go very light as you’re not going to be too happy if the wind takes it.
The second reason I chose this particular model, the 444, is because it has four leg sections, which means it is compact when the legs are all contracted. The closed length without a head is 19.2 inches or 48cms. When I have a head on this, it is just under the maximum length that you can carry one to an airplane. I don’t like checking any photographic equipment when traveling abroad, so making sure that I can carry it on to a plane was important.
Another consideration was the maximum height. I like a tripod to get the eyepiece of the camera to eye level, without having to extend the center pole. Extending the center pole is OK in emergencies, but you don’t want to put yourself in the position of having to always use it, as it reduces the effectiveness, that is the ability of your tripod to steady your camera greatly. At 48 inches or 1.2 meters, then adding the height of the ball head and the camera itself, this tripod gets the eye piece right to my eye level. You also don’t want to be crouching to shoot, unless you are doing macro work where the subject is low to the ground. For normal landscape work, you want to be able to stand without stooping and look through the finder. This is just a comfort thing really, to stop you from getting back ache unnecessarily.
Now, if you do any amount of macro work or shooting from low angles for any other reason, the minimum height from which you can shoot is also important. I chose this tripod for low angle shooting for two reasons. Firstly, the legs can be widened to three different angles. If you don’t do anything, the legs stop at pretty much the same angle as most tripods, in this case, 25 degrees. Then using the quick action leg angle selector buttons at the top of the legs, you can also allow the legs to open more widely to 45 and then even wider to 65 degrees. This allow you to get lower to the grown with the camera still attached to the top of the tripod. Once you go past a certain angle though, the center pole will hit the floor, so there’s a special low angle adapter, that screws into the bottom of the center pole, which you unscrew, take the center pole out, and then drop the low angle adapter into the hole where the center pole was. This allows you to get the tripod way down low because the pole is no longer sticking out of the bottom to stop you. You then remount your tripod head onto the low angle adapter and drop your camera sits on that as usual.
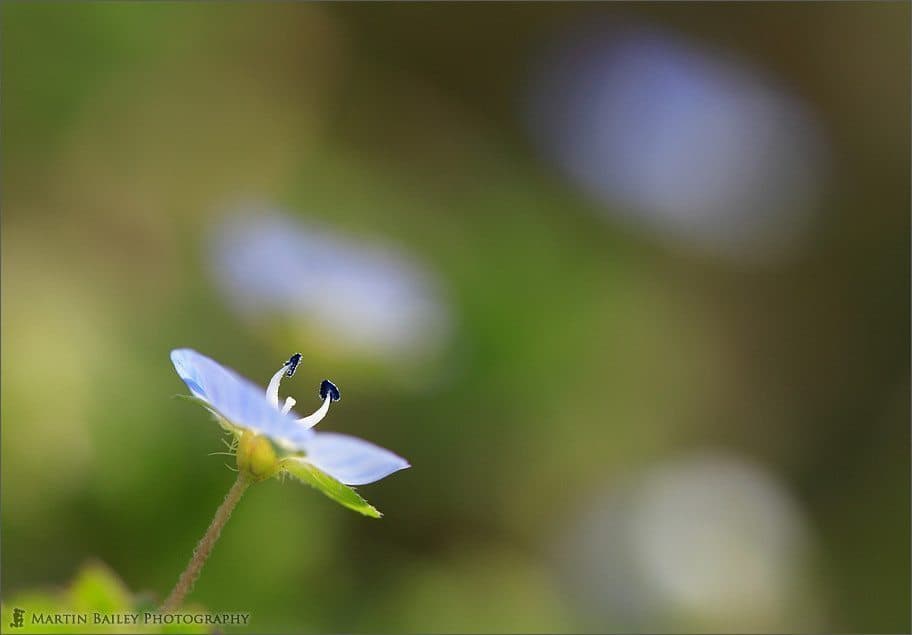
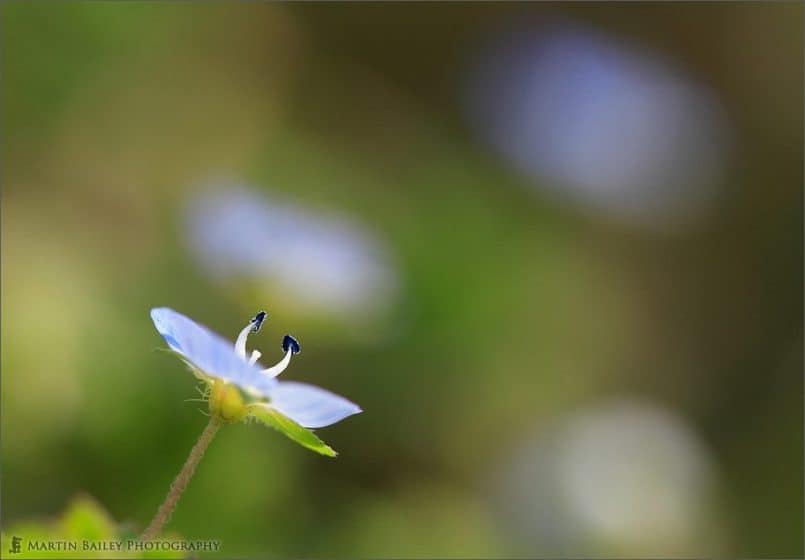
Today, I’m not going to talk about many photos, as this is going to be more equipment based, but one that I do want to look at is shot number 955, of a tiny blue flower called a Common Field Speedwell. If you know this flower, you’ll know that it grows on a bed of leaves and stalk right down at ground level. To make this image, actually looking up at the flower head slightly, I had my camera upside down, with the flash shoe about 2 centimeters from the ground. To keep my camera stable I was using the Manfrotto 444 Carbon One tripod with the legs opened out to 45 degrees, and the center pole inserted upside down into the tripod so that the camera hung upside down. The ability to do this was another consideration when I bought this particular tripod, and if you are into macro or low angle photography, I suggest you keep this in mind too when deciding what to buy.
This shot was made with the 100mm F2.8 macro lens with the 25mm extension tube at F4 for 160th of a second, at ISO 200.
The last thing I kept in mind when buying this particular tripod was the Quick-action leg lever locks that secure the leg extensions firmly in place. This means that I can undo the lever, extended the leg section and lock it again pretty quickly. I’d say that the feeling of how easily the legs extend and contract is going to be pretty much down to personal preference though, so I’d try to get to a camera store and actually handle the tripod before buying.
The second tripod I use, which comprises of a Gitzo 1348 Mk2 and a Wimberly Head, also has four leg sections for shorter minimum length of 24 inches or 0.6 metres, and with this tripod leg sections that are locked by rotating a rubber grip on the leg sections. This takes a maybe a fraction longer than the quick action leg lever of my Manfrotto to undo, but equally easy to use. In fact, this might also just be because I’m not as used to using the Gitzo tripod just yet. The main considerations for this tripod were that I wanted something that would steadily support the weight of my 600mm F4 lens with a camera and battery grip. This tripod weighing in at 4.75lbs or 2.2kg will support up to 26.5lbs or 12kg of equipment. Although the Manfrotto will hold the weight of my 600mm and camera too, I wanted to use this tripod with the Wimberly head, and as changing the head in the field is not practical, because they sometimes lock up, I decided to buy another tripod especially for this combination.
Another reason is that I wanted something that extends higher than my Manfrotto, so that if the legs sink in snow, I would still be OK. This tripod actually extends around good two feet higher than I need it too for this purpose. The other advantage of this is that if I want to use the 600mm to shoot at say a falconry display or something, where there will be a crowd, it is not possible to set up a tripod at the front row or in the crowd. The only option would be to stand at the back of the crowd, so I could take some small steps, set the tripod up to maximum height, which is 65.75 inches or 167cm, and then another twenty cms or so for the head, and then shoot while standing on the steps. This is something to bear in mind if you intend to shoot from a tripod at sports venues or similar locations.
The Gitzo Tripods center pole also can be removed and replaced with a different adapter for low angle shooting, as with my Manfrotto tripod.
I found an interesting fact on Gitzo’s Web site today while preparing for today’s Podcast. It seems that in 1992 a UK company called Vitec Group PLC bought Gitzo, and this same company also owns Manfrotto. They are committed to both as separate brands apparently. I just thought it was funny that I chose two different tripods for different needs, and the money for both ended up going into the same company’s pocket.
Anyway, one other consideration, as making sure the tripod is level when using the Wimberly Head is important, is that this particular model incorporates a spirit level. This helps to get the tripod perfectly level so that when I pan I don’t find myself with a crooked horizon at any point.
The reason I chose the Wimberly Head was partly through seeing it in action in a copy of Michael Reichmann’s The Lumious Landscape Video Journal. For long or super-telephoto lenses the Wimberly Head really comes into its own. As you can achieve perfect balance of your lens and camera, you can literally undo all the locking nuts on the lens and swing it around with almost the same amount of freedom that you get when hand-holding. Once again, I’ll put a link to the Wimberly Web site and Michael Reichmann’s Video Journal in the show notes.
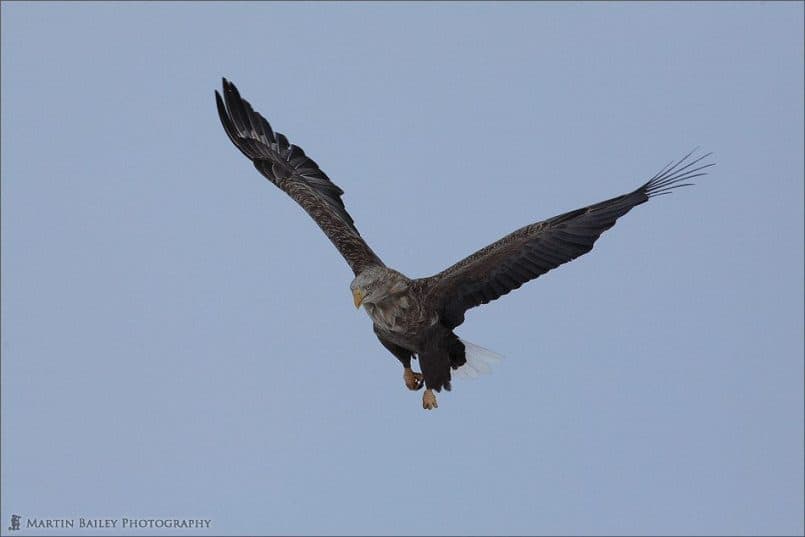
So, by way of introducing just one image I made using the Wimberly Head on the Gitzo 1348 Mk2 legs during a trip to Hokkaido in February 2006, let’s take a quick look at shot number 872. I first spoke about this shot and the Wimberly Head in episode 26 of the Martin Bailey Photography Podcast, but I really like the sharpness of this shot, and one of the reasons for that sharpness is the excellent design of the Wimberly Head and the ability it gives you to track subjects like eagles as they move across the sky. This was shot with the 600mm F4 lens at 1/800th of a second, ISO 400 at F11.
Finally, although not very often, I use a Manfrotto 3245 monopod. As I mentioned earlier, this is also fitted with a Wimberly QR Clamp to allow me to fit my lenses to this monopod too, without changing the plates on my equipment. I don’t have a ball head or anything on this monopod, as I can loosen the screw on the tripod mounts on my lenses, and turn the camera in the mount to the vertical or portrait position. This does make it difficult to shoot things very high up in the sky, but I don’t find myself needing to do this very often.
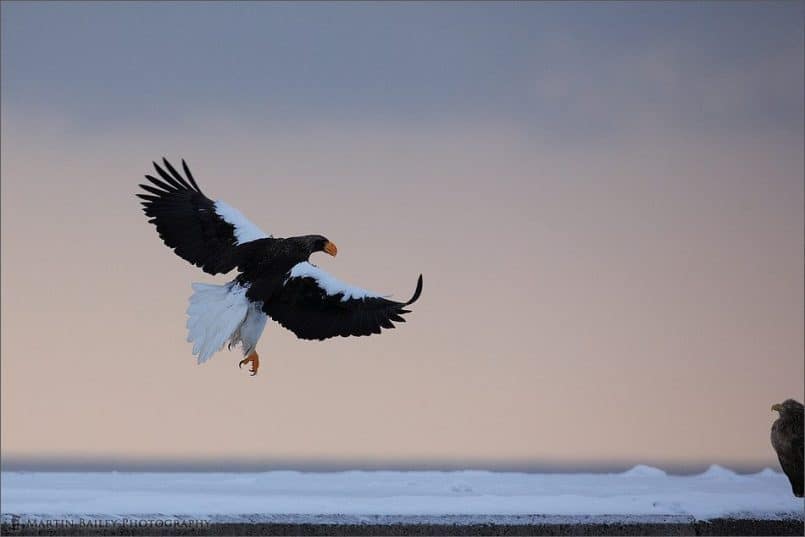
Monopods are great for sports photography and actually provide more stability than you might think. I used mine to good effect also during the Hokkaido trip in February, from the deck of a fishing boat when shooting eagles. Take a look at image number 909 to see the results. This was one of the first images I’d made after switching to the 600mm F4 on the Manfrotto monopod from hand holding the 100-400mm lens with my 5D. It was shot at F5.6 for 1/640th of a second at ISO 400. I hope you can appreciate how sharp this image is. Using a tripod on a rocking boat is obviously not an option, so I hope this image will also help you to appreciate that using a monopod is a viable option when circumstance dictate.
For studio work, where carrying the tripod around is not an issue, there are also some much larger, heavier tripods around, and as they are usually made from steel or other heavy metals, as opposed to carbon-fiber, they are not as expensive.
I haven’t provided a review of all the options available here, and as I don’t have any experience with other products, I don’t think it would be fair to compare them with what I do use and know. Anything like that would be just speculation. There are lots of makers of excellent quality tripods in addition to Manfrotto and Gitzo, so please do take a look at all of your options. Hopefully sharing what I considered during the search for my camera supports will help to figure out what you want if you are currently in a similar situation.
Options other than tripods and monopods that I can think of include bean-bags that can be dropped onto a wall just about any steady surface and then you rest your camera lens or body on the bean-bag for stability. You can use your camera bag in a similar way, but a bean bag I’d imagine will mould itself to the shape or your camera and lens. There are also clamps that house a standard tripod head, that clamp onto shelves or some that also can be clamped onto your car window. I’m not sure I’d like to support a 600mm lens clamped to my car window, but I’m sure this is a viable option for shooting with shorter lenses. Another similar option is something that clamps onto your car door with the window down. This will obviously support much more weight. There are very small compact tripods. I personally would not use one of these for my photography, but I can imagine if you found one that will support the weight of your camera and your longest lens, they may have some limited applications. As I say, check out what’s available and make up your own mind. At least now you’ll have my own considerations and opinions and will hopefully think of a few things that were not initially important to you.
So that’s it for today’s main topic. I have a quick update on the photography assignment we kicked off last week. Firstly, I decided to change the voting system. I was going to turn on the rating system in the gallery at the end of April when we stop taking entries to the Assignment gallery, but this system allows members to vote multiple times and would also allow zero voting to lower the average score of others images and so would not be fair. I’ve now implemented a system where a vote button will appear above the images when viewed in the Assignment gallery. On clicking the button, your vote will be counted and you will not be able to vote for a second image for that assignment. I have also made it possible to change your mind, so if as you view the gallery you decide you really like a particular image, then as you further view the gallery you find something you like even better, you will be able to change your vote to that image, but it will be removed from your previous vote. To do this, just click the vote button again on a different image and the system will give you the option to update your vote.
Also, a good point about the rules of the assignment was raised by Dom, the member that suggested today’s topic. I’d not mentioned what the limits for reworking images in Photoshop or any other editing tool was. I’ve added a bunch of guidelines to the rules section on the top page of the mbpgalleries.com site. If you are thinking of entering, please take a look.
There currently just under three more weeks to shoot your entry to the assignment. Remember the theme is contrasting colours, and for full details listen to Episode 31 if you haven’t already. I look forward to seeing what you make of this assignment.
Even if you are not thinking of entering, have a great week. Bye bye.
Show Notes
Music from Music Alley: http://www.musicalley.com/
Subscribe in iTunes for Enhanced Podcasts delivered automatically to your computer.
Download this Podcast in MP3 format (Audio Only).
Download this Podcast in Enhanced Podcast M4A format. This requires Apple iTunes or Quicktime to view/listen.


0 Comments