Last week I took delivery of a shiny new 27″ iMac, and having just about got it set up how I want it, I wanted to relay my thinking behind the purchase, and a few important things that I’ve learned from a Photographer’s perspective, especially with regards to the quality of the screen, which has in short blown me away.
This episode is brought to you by Squarespace, the all-in-one platform that makes it fast and easy to create your own professional website, portfolio or online store. For a free trial and 10% off, go to squarespace.com and use offer code MBP11
First a little background; I was a Windows user since 1994, but I’ve also been using Macs since college here in Japan from 1995, and bought a Mac mini back in 2006 to enable me to create this Podcast in the Enhanced Podcast format. I actually replaced that Mac mini as the old one became slow, and then in January 2011, almost three years ago now, having become somewhat annoyed with Windows for a number of reasons, such as no native 16bit printing, and the lack of ability to put USB hard drives to sleep among other things, so I decided to jump ship completely to the Mac platform.
I bought a MacBook Pro, and told myself I’d give it a year, and if I was still happy with the decision, I would buy a Mac Pro to live permanently in my office/studio. At the time I was thinking of the Mac Pro that was a tower style Mac that looked similar to a lot of Windows based tower style desktop computers. It didn’t take me a year to decide whether or not Mac was for me. I knew before very long at all that I was never going back to Windows.
It’s not that I’ve got anything against Windows really, I am just happier with the Mac hardware and Mac OS than I ever really felt I was with Windows. The only thing I missed was the Accounting module that tells me exactly how much each print I make with my iPF6350 large format printer costs, and I also cannot access my business account Internet banking with anything other than Internet Explorer. To overcome both of these problems I use Parallels, and I start it solely for these two reasons, and nothing else.
So, why didn’t I buy a Mac Pro after the first year? Well, basically, for much of what I do, the MacBook Pro and now the MacBook Pro Retina do pretty much everything I want. I have a tendency to max-out new computers I buy, especially now that the MacBook Pros can’t be upgraded, so my powerful Retina laptop has been great, and even encodes video pretty fast, but there was one problem with my setup that has needed a solution since I switched to Mac.
I had been using my MacBook Pros with my external Eizo display when in my office, but the laptop screen was always so far away that I had to move my windows to the Eizo to do pretty much everything, and after switching from the 17″ MacBook Pro to the smaller 15″ Retina screen, this started to become a real problem. By this point I was using my first MacBook Pro as a server in my office, backing up to Backblaze etc. but continued to plug my Eizo into my main Retina computer to do work in the office, and there are times when I need to leave it all connected to do jobs like copying my entire image library from one drive to another or rebuilding all of my Lightroom Previews, so this, coupled with the not ideal display situation, meant that I needed to make some changes.
As with camera equipment, I don’t buy anything new unless the upgrade or new addition to my kit enables me to solve a problem. I now had two main problems to overcome with my office computer situation. I needed a second large screen, and I needed second powerful machine for the jobs that caused me to have to leave my MacBook Pro in the studio overnight, or for multiple days sometimes.
With my office/studio being on the 3rd floor of our apartment, I generally start work answering email etc. while still at the dining table after breakfast, and I come up to the office at around 9am. Then after dinner at 7pm, unless I need to come back upstairs for a meeting or to finish something off, I stay downstairs, and work from the sofa. That keeps me close to my wife but I can still get stuff done, which means having to leave my computer in the office was a problem.
My Options and Thinking
So, I have been weighing up my options slowly over the last few years, then more seriously this year since I got the MacBook Pro Retina with the smaller screen, and here is what I was comparing. First, I had to decide which Mac desktop I would buy. The Mac Pro hadn’t been given a major upgrade for years, so it was obviously ready. I waited for this for a while, but nothing surfaced until a few months ago when Apple announced the upgraded Mac Pro that we’ll see start to hit the stores in a few weeks time. This is a monster of a machine, a black cylinder basically that can be packed with a huge amount of computing power as well as 4k monitor support.
As I said, I tend to try to max specs out when I buy a new computer, but maxing out a new Mac Pro would probably make too big a dent in my bank balance, and frankly, I’m already close to being happy with the amount of computing power I have, so I could not warrant the expense of a mid to high end spec Mac Pro when they become available.
The other option of course, was buying a second external display, and plugging that into my MacBook Pro along with my current Eizo monitor. That of course only solves half of my problem, in that I’d still not have a reasonably powerful computer in the office, plus, a 27″ Eizo CX model would cost me around $1,200 or $1,800 if I went for the CG model with the hardware calibration, but I probably wouldn’t do that, as I don’t think it’s worth the additional cost.
Now, I seriously considered this option. I love Eizo displays, and have been very happy with my current 24″ display for more than 5 years now. But, that’s a lot of money to spend when you consider that it only solves half of my problem. So, I kept thinking that the iMac would be a great compromise.
It has a beautiful screen, and a pretty powerful computer built right in! The problem for me, for the longest time, was the glossy screen. My first MacBook Pro had the matte screen, and I liked it a lot. The Retina screen on my current MacBook Pro is glossy, and although it’s a beautiful screen, you have to be careful where you sit, or the reflection can be very distracting.
In my office I sit to the right of the window, so there are no light sources behind me but I do have a plastic covered first-surface mirror leaning against the wall behind me that is very reflective, especially when the sun comes out, so the glossy iMac screen would have been a problem, until now. When the new iMac was announced, I was really happy to see Apple singing the praises of a new 75% reduced reflection screen. I didn’t have time to go into town to actually take a look, but from what I read online, this looked to be the real-deal.
After a little more serious consideration, I decided to go for the new 27″ iMac. I almost maxed out the specs, so it has a 3.5GHz Quad-core Intel i7 CPU, that boosts up to 3.9GHz, and 32GB of RAM. I didn’t go for the SSD drive, because $1,000 for a 1GB drive just didn’t seem worth it, especially when you consider the other option of a 3TB Fusion Drive for an extra $350. I didn’t know the size of the SSD component in the Fusion Drive when I ordered this, but a closer look through the system information app shows me that it contains a 128GB SSD drive and a 3TB hard drive. Data that you use a lot is automatically stored on the SSD drive to speed up the entire system, and the hard drive used for slower storage.
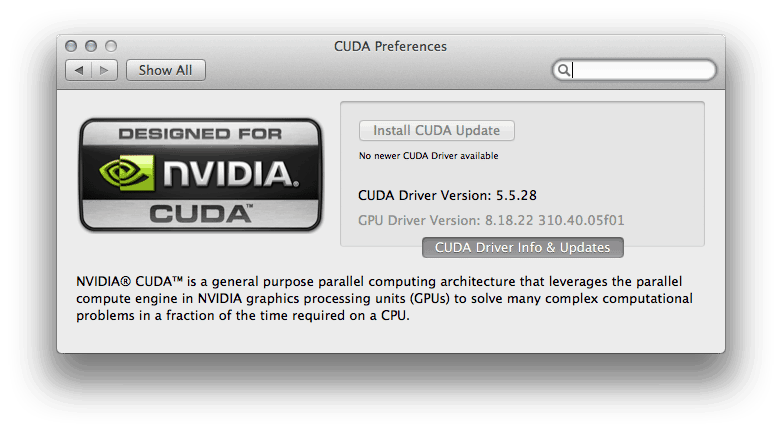 I also maxed out the video card, going for the NVIDIA GeForce GTX 780M with 4GB of GDDR5 memory which cost an extra $150.00. Remember that some graphics related applications like Photoshop and Premiere Pro now make good use of the Graphics Processor to accelerate processing, so having a lot of video RAM is no longer just to make games run faster and smoother. Note too while we’re at it, that I install the NVIDIA CUDA Driver to give Premiere Pro access to the full power of the Graphics Processor.
Set up from Scratch
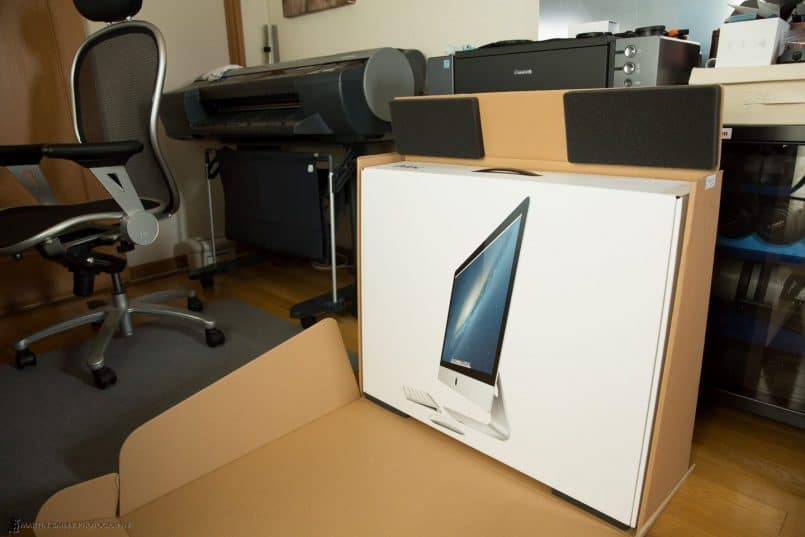
When you buy an Apple computer here in Japan, if you customize it, it seems they are assembled in Shanghai, and shipped across. I ordered my new iMac on October 31, a Thursday and it arrived exactly a week later, on November 7. I decided not to migrate my data from my MacBook Pro because there are a few things broken that I didn’t want to chance being copied to my new iMac.
Mini Freezes
There was only one negative experience as I set up my new iMac and that was that for the first few days I experienced a lot of mini-freezes. The mouse would lock up, and sometimes I actually had to do a force reboot to get the system working again. After a bit of trial and error, I’ve come to the conclusion that this was probably due to my old Drobo initially being connected via Firewire, going into the iMac via my Belkin Thunderbolt hub, which has a Firewire port.
I switched the Drobo over to USB, and I haven’t had any more problems over the last few days, so I think that was the cause. My Drobo 5D of course is still connected via Thunderbolt, going directly into the back of the iMac, and I have my external Eizo monitor connected via the extra Thunderbolt port on the Belkin hub.
Eizo vs iMac Screen
OK, so let’s also touch on the quality of the Eizo display compared to the new iMac screen. I have been a huge Eizo fan since my first 17″ Eizo screen that I bought some 12 years ago. I tell you, I almost cried when I first saw my photos on an Eizo screen, the quality was that good. Eizo have continued to improve their screens of course, and my current 24″ wide screen Eizo display, although now some five years old, or maybe even a little more, is still very nice, but it is getting a bit long in the tooth.
I say this, kind of out of loyalty to Eizo though, because the 27″ screen on the new iMac actually beats the Eizo. I honestly didn’t expect this, and I’d love to compare the iMac to a new Eizo, and I’d also like to compare the last generation of iMac screens with my old Eizo, but with what I currently have available to me, the iMac screen wins.
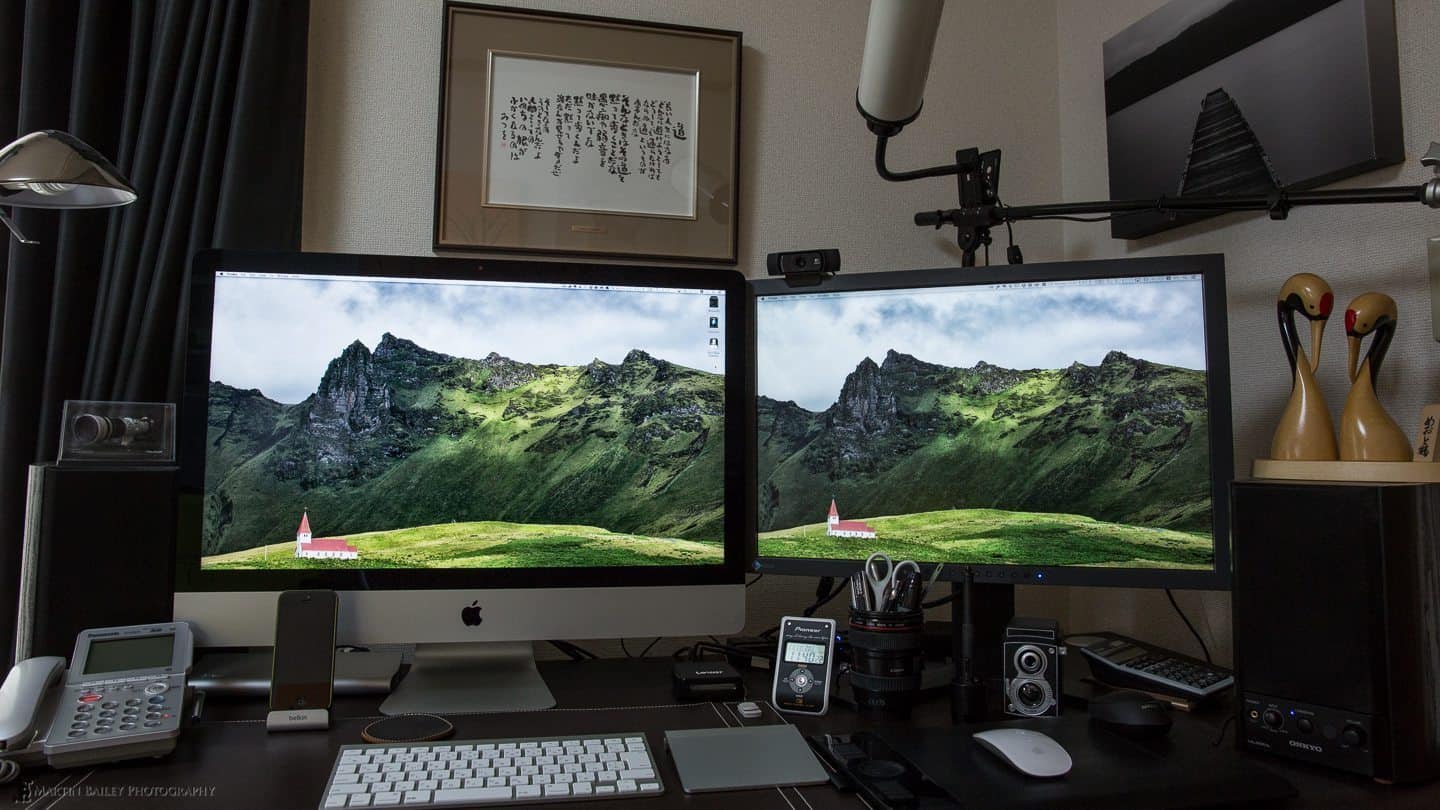
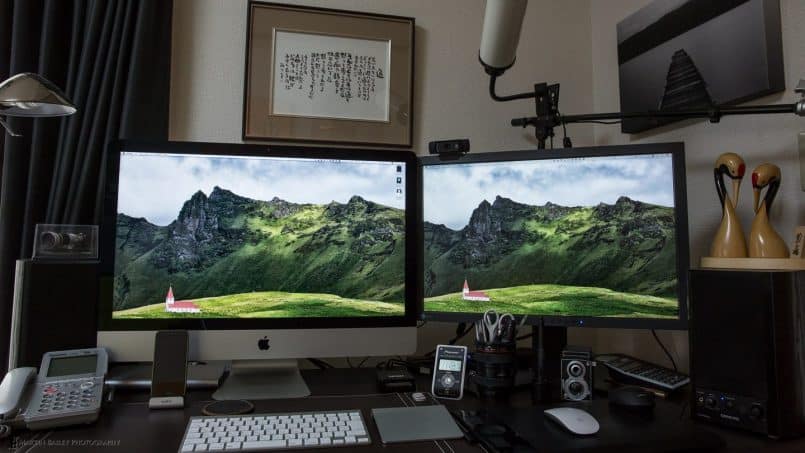
It’s going to be difficult to appreciate the subtle differences in this image, but here you can see the iMac screen on the left and the Eizo screen on the right. They have both been calibrated with the X-Rite i1Pro 2, and you can perhaps make out with this photo on the desktops, that the iMac has slightly more vivid colors, and is more punchy.
Now, punchy isn’t always a good thing, especially if that punchiness is not there in your original images. Straight out of the box, the iMac was actually a little over the top for my liking, and calibration brought that down and under control. The colors are now very similar to the Eizo, but the main thing that impressed me, was the iMac screen’s ability to display rich texture and detail.
Think of the punchiness out of the box as the difference between a consumer print and a fine art print. Most printers and printing services aimed at the consumer do all sorts of nasty automated enhancements to images as they print them, so that your average happy snapper gets images back that make them go “wow!”. Us photographers on the other hand either add the “wow” when we shoot, or in post processing, so we don’t need any arbitrary enhancements during the print process. It’s the same thing with most computer displays out of the box, and this is one of the main reasons we need to calibrate them.
Back to the Eizo comparison though–my first MacBook Pro screen always seemed nice, but it definitely paled next to the Eizo. I could see much more detail and texture in photos on my Eizo screen, so I’d kind of come to think of the Apple displays as being inferior. The Retina screen on my current MacBook Pro changed that of course. The Retina screen is incredible, and shows much more texture and better gradations, and although I wasn’t expecting the iMac display this much detail and beat the Eizo, it does.
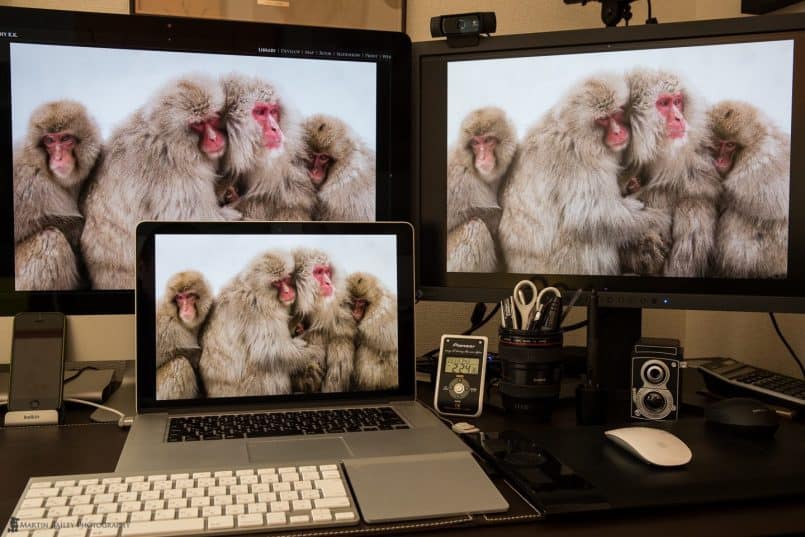
In this next photo, I brought up a Snow Monkey shot from 2012, because my old MacBook Pro never really showed the fine gradations in the snow in the background of this shot, but as you can see here, the Retina and iMac displays both show the shot very similarly.
If you open up your browser window and click on the image to view it as large as possible, you will probably also notice that the Eizo display has lighter shadow areas. This is great for seeing detail in areas that might otherwise be a little on the dark side, but they don’t print. When I print, the shadows will plug up a little, and actually look more like what we see here on the Retina and iMac displays, so I think the days of me using my Eizo display as my final soft-proofing screen before I print may be coming to an end.
Don’t worry about the difference in color temperature between these example images by the way. I’ve shot these images at various times while setting up the iMac, some with the sun shining into my studio, and other while it was overcast, so the wall behind my displays varies quite a lot, but they are correctly white balanced.
This photo also of course gives you an idea of the difference in screen real-estate that I now have. Basically, the Retina display and my Eizo was my old configuration, with the Retina a little bit further back on my desk. I would do most of my work on the Eizo, so I was always sitting at an angle, which I didn’t like, but now, I can sit straight on, and the iMac display is so large that I can have multiple application windows open at one time and not even have to switch between them. I’m currently writing my third Craft & Vision ebook, and I can’t wait to start writing again as soon as I have released this week’s Podcast episode.
Lightroom is Lightening Fast!
So, as photographers, one of the major jobs we need to do on our computers is processing large batches of images. As software gets more advanced and more resource intensive, we start to notice it slowing down, and this is one of the main reasons we end up having to upgrade our computers every three or four years, but most of us at some point, have had to run our workhorse applications like Lightroom on slow machines, and this can be incredibly frustrating.
Earlier, I said that I didn’t really need the power of the Mac Pro, especially when I considered that I was already happy with my MacBook Pro for most of the stuff I do. Still though, I didn’t want to buy something new, that I will have to keep for probably four years, only to find that it was a little bit sluggish. I didn’t expect it to be, but I was blown away by the speed at which I can work through large batches of images in Lightroom.
When I moved my Lightroom catalog to the iMac, I deliberately didn’t copy my Previews folder over, as I wanted to create this again on the iMac, but I also wanted to do some speed tests, and not having any previews makes that easier. This isn’t a scientific test, but here are my findings.
When I had already had Lightroom create standard previews for the images in a folder, I can navigate through images full screen in the Library module without the “Loading” message displaying at the bottom of the screen for the majority of the images. For a few, the Loading message displays for about half a second. The image is either there in full resolution from the start, or the quality snaps in after that half a second.
If I’m in the Develop module, which always creates a new Preview unless you’ve just created one, the Loading message displays for a fraction of a second longer, but still under a second. That in itself is very impressive, but what’s even more impressive, is when I view images in a folder that I have not yet created any previews for, literally, with gray thumbnails instead of images, it only takes a fraction of a second longer. In the Library module, we’re probably talking one second, and in the Develop module, we’re talking maybe a fraction over a second, and even for 120MB TIFF files, it doesn’t go over 1.5 seconds.
We’re talking basically stress-free image editing here, and if you are wondering, yes, I already have all the other software that I need installed, so my machine is no longer a fresh install. My MacBook Pro Retina is fast, and that is running on an SSD, but it still takes about three seconds for the images to res-in in the Library module. It’s actually faster in the Develop module on my MacBook Pro for some reason, usually taking just over a second, so still no complaints, but the iMac just doesn’t make you feel as though there is any wait at all.
Widescreen Lightroom Rocks!
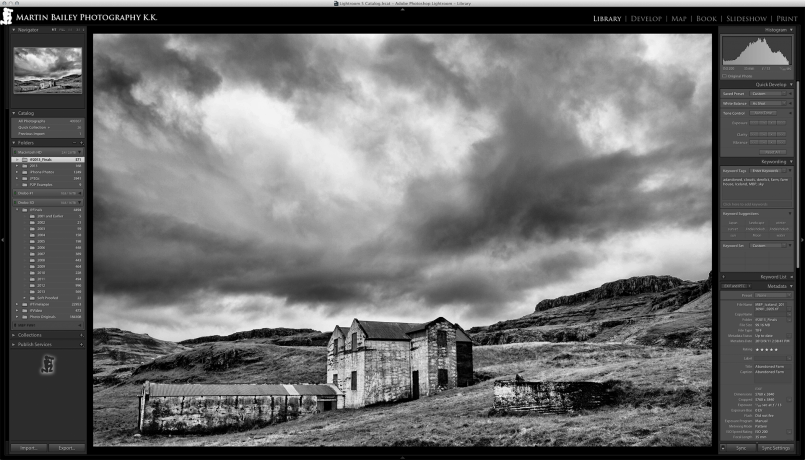
Another thing that I really like but wasn’t quite expecting, is how incredibly comfortable Lightroom feels on the not only large, but wide aspect screen. With a 27″ display sitting on a desk, the chances are you are sitting pretty close to it, so although images look spectacular full-screen, you don’t feel as though you are missing much by having some of the Lightroom menus showing. I’m always quick to hit SHIFT+TAB to get rid of all of my menus on a smaller screen, but on the iMac screen, as you can see in this screenshot, it’s really not a pain at all to have some menus showing.
Also, because the screen is a 16:9 widescreen aspect ratio, with the two side menus and the top menu the image fits perfectly in the space left over. In fact, with the 27″ monitor being this high quality, and images in this view being roughly the same physical size as an image displayed full screen on my Eizo 24″ display, I’m quickly finding that when going through images in Lightroom I don’t really need the second screen, so it’s becoming more useful when doing other tasks like having multiple Web browsers open as well as Excel and email etc.
Syncing Email with ChronoSync
On the subject of email, there was always one problem that I wanted to avoid and was partly a reason for me sticking with one main computer for a while, and that is the syncing of data between the two computers, especially email, as I’m using that on both computers, switching at least twice each day. This is not a problem is you use IMAP for all of your email, but I have a lot of locally archived email, so I need to copy this between computers to stay in sync.
You might recall that I use an application called ChronoSync to synchronize my images with my external hard disks, so I was happy to see an article from the people at Econ Technologies, the makers of ChronoSync, when I searched for ways to synchronize email between two Macs. I won’t go into detail here, although I will link to the article, but basically, you have to create a few synchronization jobs, then a container to run all of these jobs with one click, and then launch that container to sync your email every time you switch computers.
This may seem like a bit of a pain, but I’ve been doing this for a few days now, and I’m pretty happy with this method, at least until I find a totally automated method. Basically all I have to do is run the synchronization job after breakfast, before I come upstairs, and then run it again when I go back downstairs in the evening. It takes about a minute and a half to run, and that’s to sync the difference between a bunch of mailboxes total 17GB. I know, I should clear out my mailboxes.
Lightening Fast Wake-up Speed
Another thing that I really like about the new iMac is that it wakes up from Sleep mode in just a few seconds. It goes to sleep when the monitor goes off, and I have my system setup to turn off the display when I move the mouse to the bottom right hand corner of the screen or after 10 minutes of inactivity using the Hot Corners feature. Then when I come back to the computer, I tap the space bar on my keyboard, and it wakes up and displays the login screen in just a few seconds. It also wakes up over the network just as quickly, so I can do those email syncs without having to come up to the studio to physically wake up the iMac.
My two connected Drobos and Time Machine backup hard drive go to sleep with the computer too, but then also wake up very quickly, so as long as I don’t power the computer down totally, I can access my images on the Drobo over the nextwork from anywhere in the house. Note too that while I am doing a Backblaze backup of all of my images from a trip, that can take a few days, I just select not to put the computer to sleep with the display in the system preferences.
And on that note, I switched my Backblaze backup from my old MacBook Pro to the iMac by selecting to Transfer the Backup State from the Backblaze menu. It took just under two days for Backblaze to run through the 5.2TB of data that I have backed up and confirmed that they were the same files from my old system, and then backup the new stuff from the new iMac as well. Now that I’m fully backed up, I’m allowing the iMac to sleep when I’m not using it.
The last thing that I wanted to note is that despite the iMac containing a very powerful computer, it has generally been very quite so far. The fan has so far only kicked in once, when the mouse had frozen and something was obviously putting a lot of load on the CPU. When it did kick in, it was quite loud, so I’m hoping this doesn’t happen a lot, but so far, even when flicking through image after image in Lightroom, the fans stay off and you can’t hear any noise from the iMac at all. In fact, it’s really hard to believe that there’s even a computer inside there at all.
Expandability
In fact, before we finish, I should also touch on expandability. I mentioned earlier that I have a bunch of stuff connected via the USB 3.0 ports and Thunderbolt. Although it’s difficult to actually change out parts yourself with an iMac, this is really the reason I max these computers out when I buy them. That way, I can get the maximum life out of them. Pretty much everything else that I need is already connected via USB and Thunderbolt, and these offer virtually limitless expandability.
I know that the new Mac Pro will have Thunderbolt2 instead of plain old Thunderbolt, but I’m happy enough with what I have here. It’s going to take a few years for companies to really maximize the benefits that Thunderbolt 2 brings, and I don’t mind hankering after the next best thing for a few more years after that, while I get my four years out of this iMac. If I can get four years out of a desktop style computer, I’m happy, and so is my tax accountant.
Thumbs Up!
All in all, I can say without a doubt that it’s a big thumbs-up all round for the Apple 27″ iMac. I knew I was going to love this computer, but I didn’t know I was going to love it this much. The new low reflectivity screen has certainly been worth waiting for, and all the power under the hood, or more to the point, hidden conspicuously behind this incredible display, makes it the perfect computer for someone that needs power, but not necessary a Ferrari.
 This Podcast is Sponsored by Squarespace
The Martin Bailey Photography Podcast is proud to have Squarespace on board as our current sponsor.
Visit www.squarespace.com and use the code MBP11 for a free trial and 10% off new accounts.
Show Notes
Here a link to the synching article on the ChronoSync web site.
Music by UniqueTracks
Subscribe in iTunes for Enhanced Podcasts delivered automatically to your computer.
Download this Podcast in MP3 format (Audio Only).
Download this Podcast in Enhanced Podcast M4A format. This requires Apple iTunes or Quicktime to view/listen.


Comprehensive post Martin, thanks. For the second screen, would you use it for thumbnails? I have 2x 24″, one perched on top of the other, and the lesser screen is my grid view in Lightroom leaving the main screen always with a full size loupe or develop image.
Hi Alistair,
Thanks for listening.
I used to use my MacBook Pro for the thumbnails and show the full sized image on the 24″ display, but so far I’ve found it better to just switch between thumbs and full sized on the iMac screen. I will continue to try different ways of working though, and may end up doing the thumbnails on the 24″ and full screen on the iMac. I’ll see how it goes, but it’s nice to have options now. 🙂
Cheers,
Martin.
Hello Martin,
Great podcast, as usual! I have been listening to your podcast since a while now and went back to hear all the old ones, inspirational. Really good job, thanks for the work you did it’s always a great time listening to the podcasts.
Since you mentionned Eizo monitors and as I have been lurking for a new monitor as well, would you be able to suggest one of their models at a reasonnable price? (I’m a studen :D)
Thanks for listening Löwenchen, to this and the other episodes!
That’s a tough question, because Eizo are really industry standard, and don’t make cheap displays. If I was to buy one, I’d go for the CX270 (27″) or CX240 (24″). The CS range is their budget offering, but I wouldn’t go lower than the CX range. The CG range is the top of the line, but that’s overkill in my opinion.
I hope this helps!
Cheers,
Martin.
It does! Thanks for the quick reply 🙂
Thanks for this excellent post Martin. About 2 days after listening to your podcast, my 27″ iMac’s (about 3 yrs old) harddrive failed. I have just purchased the same config as above based on your recommendation – now I have to wait an agonising 2-3 weeks for delivery. Cheers, Brett.
I’m pleased this helped Brett, but sorry about your old iMac. I know what you mean about the wait. It always seems like an eternity! 🙂
Hi Martin,
I have been listening to your podcast from October 2013 and already learned plenty of useful techniques, the most valuable the theory of exposing to the right. Thanks for the invaluable work you are providing.
Would you please explain your experience with the calibration of the 27″ iMac display. I am using NEC PA monitors http://www.bhphotovideo.com/c/product/996585-REG/nec_pa242w_bk_24_pro_wide_gamut.html particularly, with an older Intel i7 core and Windows 7 based system and considering to switch to Apple for my photography work. I do use the X-Rite i1Photo Pro 2 for calibration.
Please advise.
Thanks,
Regards,
Attila
Hi Attila,
Thanks for listening. I’m pleased this is useful.
I already said above that I am really happy with the new antiglare 27″ iMac display, and talked about the colors compared to industry leading Eizo monitors. I was pleasantly surprised. I can’t comment on a comparison to your display, as I don’t have one, but if there is anything in addition to my comments above that you’d like to know, please be specific.
Cheers,
Martin.
Hi Martin,
Sorry not to be clear enough. I asked about your experience with the calibration process using your X-Rite Pro2 tool. I do have the Photo version of the bundle.
Regards,
Attila
Aah, I see Attila.
I had no problems calibrating the iMac display and my external Eizo display with the i1 Pro 2. The profiles are created and managed correctly.
Cheers,
Martin.
Hey Martin,
I just ordered a new 27″ iMac today and, soon after, found your post.
As always a very well constructed and thought through article which I very much enjoyed reading.
I should have my new love this time next week and, like you, will have it sitting side by side with my EIZO 27″ monitor. From there we should be in total control. I’II take Manhattan, you can take Berlin.
All the best,
Glenn Guy
http://www.travelphotographyguru.com
Hee hee. Let’s do that Glenn!
I’m sure you’ll love the new iMac. I’m still very much in love with mine. 🙂
Hi Martin and thanks for all this information about the iMac! What are your thoughts on the difference in the ability of showing adobe rgb (between the iMac and Eizo CX)?
This is right now my main concern! I’m looking in to getting Retina Macbook Pro + an Eizo CX270, or i 27″ iMac. I sometimes do photo work that will be printed.
I would really like to hear what you think about all this aRgb/sRgb.
Hi Niklas,
My old Eizo isn’t 100% Adobe RGB. I think it is about 98%, so I can’t say for sure, but the Retina Screen is a good match, and the iMac screen is actually a little better. These devices remap the colors to use what they are capable of displaying really well, so I personally don’t think it’s an issue. It’s not like photos in Adobe RGB color space are not displayed properly or anything. When you think about it, Lightroom used Pro Photo RGB which is even wider anyway, and the images look great. I don’t think there’s anything to worry about.
Cheers,
Martin.
Hi Martin,
Glad I found your post. I was debating whether to update my old iMac or just leave iMacs behind altogether. But you’ve convinced me to stay and upgrade. Just a quick question about the i1pro2. I’ve read they’re a little more complicated than the Spyder to set up. Is that true? (not having a ‘PhD in colour management’ this stuff does my head in sometimes) And are they really the better choice for the iMac?
Hi Ness,
I’m pleased this helped. As for calibration, unless you also want to profile a large format printer, the i1 Pro 2 is probably overkill. If you only want to profile your display, I recommend the i1 Display Pro. If you want to also profile a printer, the ColorMunki Photo is a good choice. You can see links to all of these devices here:
https://martinbaileyphotography.com/x-rite-calibration-product-links/
Personally, I prefer X-Rite tools over the Spyder. I owned a Spyder some years ago, and had a lot of trouble with it.
Cheers,
Martin.
Thanks Martin. The new 27″ iMac is up and running and I’m very happy with the choice. Yes calibration is just for the display so I’ll look at the i1 Display pro. Thanks for your help. Some excellent resources on your site. Thanks for sharing!
Cheers,
Ness
Glad to hear it Ness. You’re welcome!
Hi Martin,
Do you have any hiccups when sending your photos for printing? I heard from some users who shared about concerns of lack of colour accuracy due to the high contrast on the iMac screen, when compared to the high-end matt screen monitor, in this case, NEC or Eizo.
Some say that iMac screen only look good for entertainment and presentation, but is a disaster in print work?
Appreciate your comment on this. Thanks for your input in advance.
K
Hi Kai,
No, that really isn’t a problem. Yes, you can see more detail and texture on an Eizo display. I have one as my second monitor, but if people are having problems with prints, it’s because of something else, such as their display being too bright, or not calibrated at all. Having said that, my iMac is one of the first to have the 75% reduced reflection screen, so I can’t comment on earlier models.
I hope this helps!
Regards,
Martin.