Today I’m going to walk you through loading a roll of 120 format film into the LAB-BOX for processing. The LAB-BOX is an ingenious little box that is used to process film in daylight, without the need for the laborious black-bag that many people, including myself, have been using as a full-blown dark-room replacement.
There are plenty of videos out there for this, but I thought I’d illustrate the process in photos, as this might be easier to follow along with for some people at least. We will then follow up with another post showing the development process. Today is just to show you how to load the film, and I think you’ll agree, this little box really is a stroke of genius.
Four years ago I created a couple of videos to share my first attempt at feeding a roll of film into the reel using the Paterson system, but as much of a revelation it is to be able to process film without a dark-room, I have to admit, I have only processed a few rolls since then, simply because it’s such a nerve-racking experience.
Then, a few weeks ago, I was communicating with my friend Brian Wood-Koiwa, a street photographer doing wonderful work here in Tokyo, and he mentioned the LAB-BOX, and I ordered one before getting to the end of his email. When I told Brian that I had ordered one, he told me that I probably needed the optional crank as well, so I had to wait for that to arrive before I could get into this, but it’s all here now, and I’m really looking forward to sharing this new process with you.
LAB-BOX
I won’t do an unboxing as such, but here is what arrived in its original box, and the optional crank which came a week or so later. There are stockists around the world, but for me based in Japan, Camera Film Photo in Hong Kong was my closest option and they were very fast, shipping each of my orders within a few hours of placing them, so I was pleased with their service.
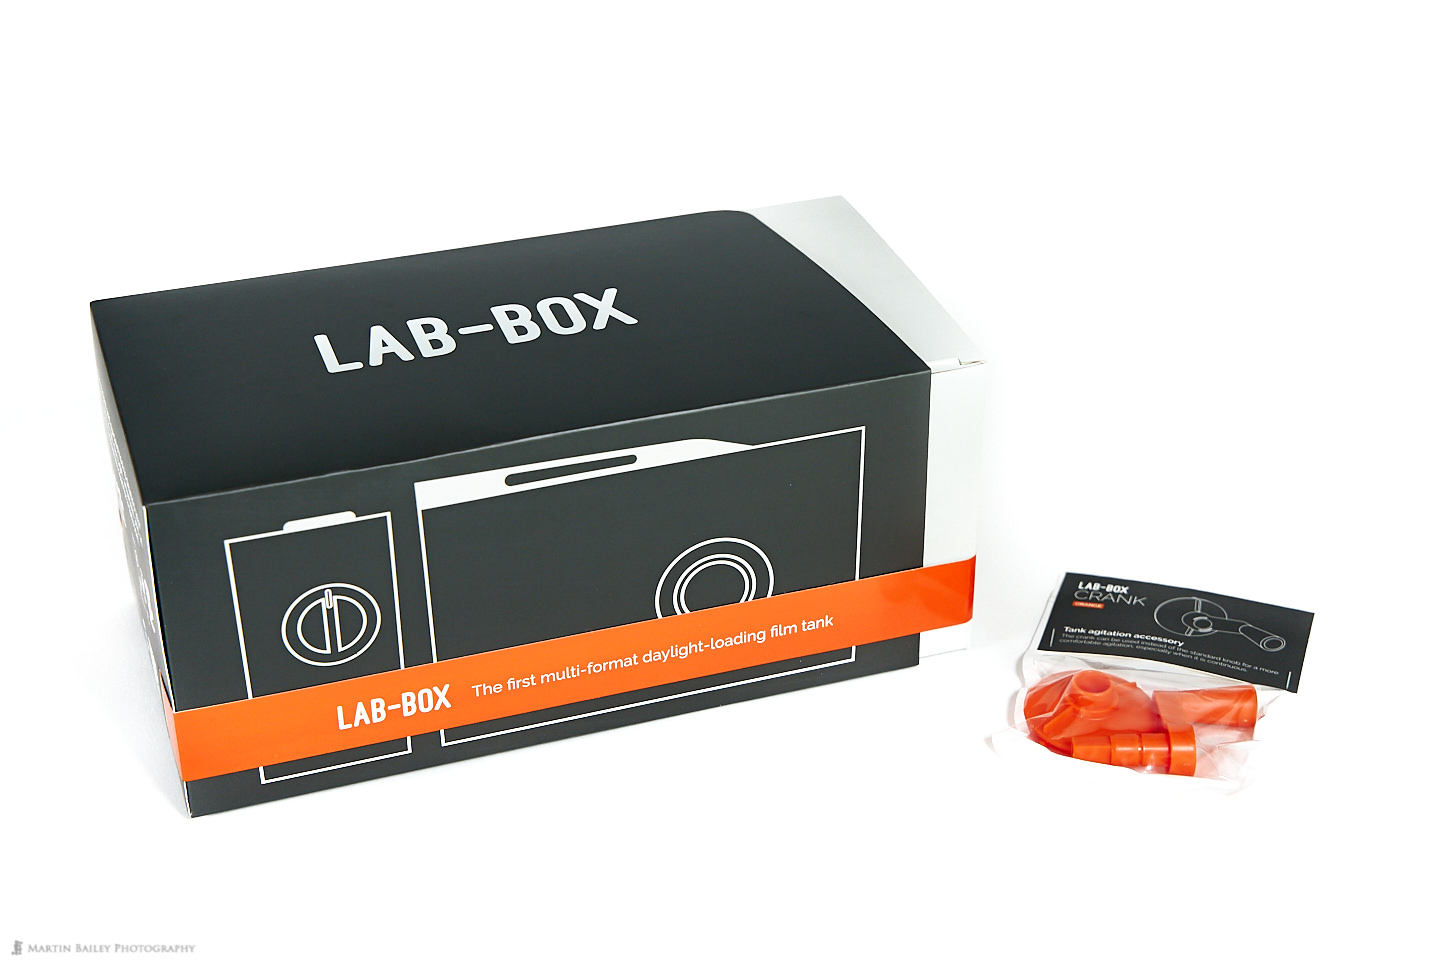
I bought the 135+120 Module Lab-Box, which comes, as you might imagine, with a module for developing 35mm film and a second module for 120 format film. I actually shoot more 120 format film, but I also have a few 35mm film cameras and a few rolls of film in my fridge too, so I figured that at $199, for the package with both modules, it wasn’t going to break the bank.
Unpacked and including the optional Crank, this next image shows what you will get in the 135+120 Module Lab Box package. Mine came with the 135 Module fitted, and the 120 Module in a separate box. There is apparently also a choice of three colors, with Green and Black available in addition to this Orange, but in my excitement, I didn’t even notice the options. I’d have probably gone with this striking orange anyway.
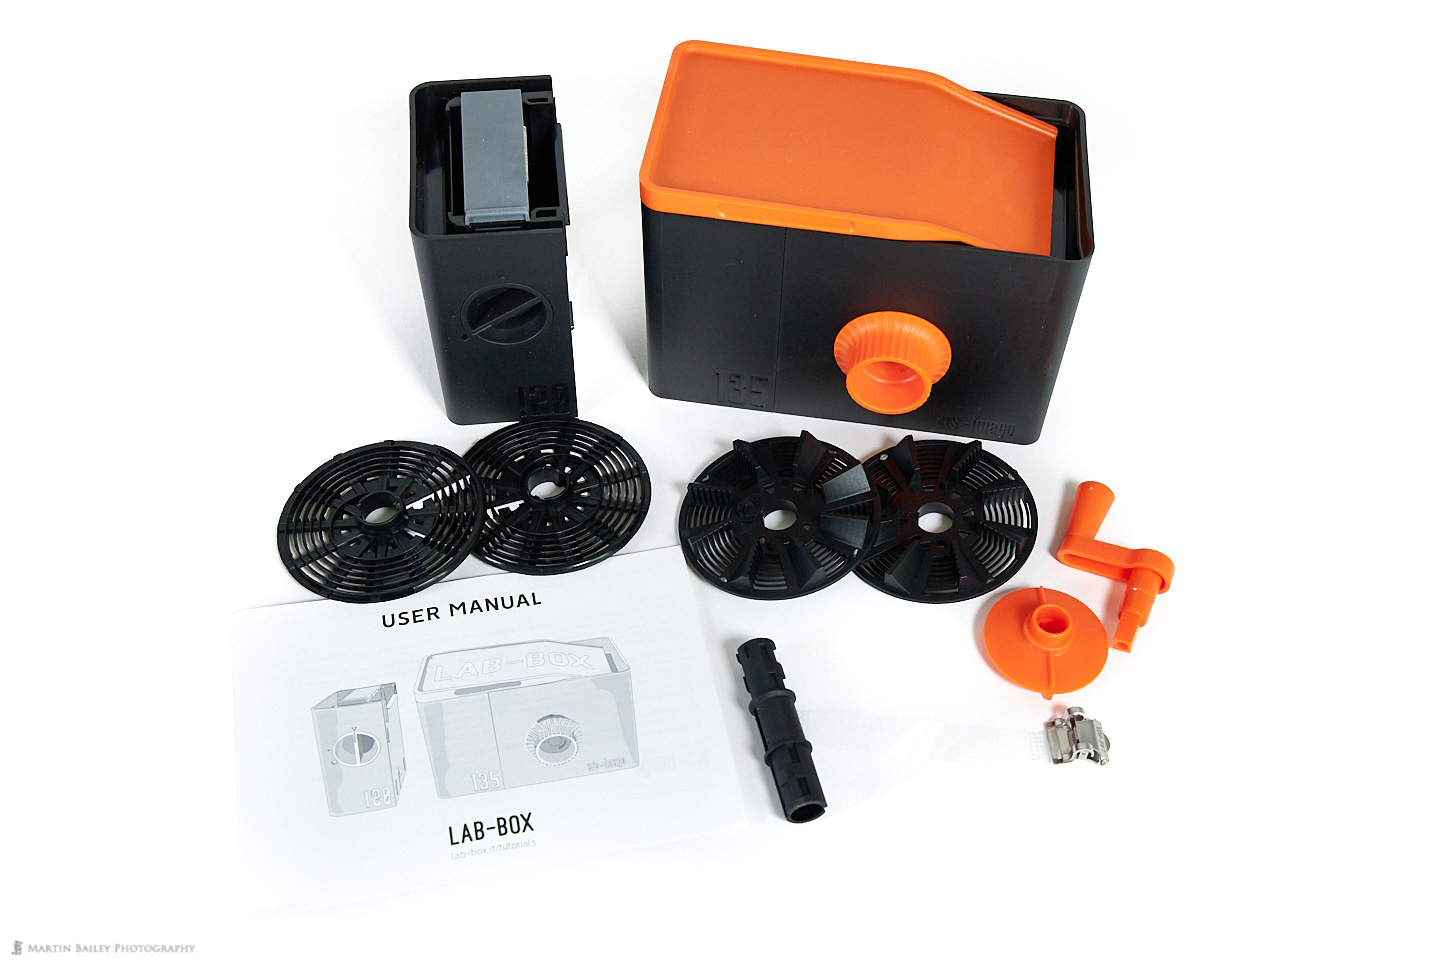
What each piece is for will become clear as we proceed, so let’s press-on. Following the very thorough manual, I first built the film guide that we see in the next photo and put it together in the 120 film format position. For 35mm film, you press the two sides together.

In the next image, you can see the hub and 120 format reel. The 135 format reel has fins on it, I imagine to both fill out its width and also to help agitate the developing chemicals. You can also see here the ingenious little clear plastic belt with the not so clearly visible film clip that you clip onto the film to spool it onto the reel later.

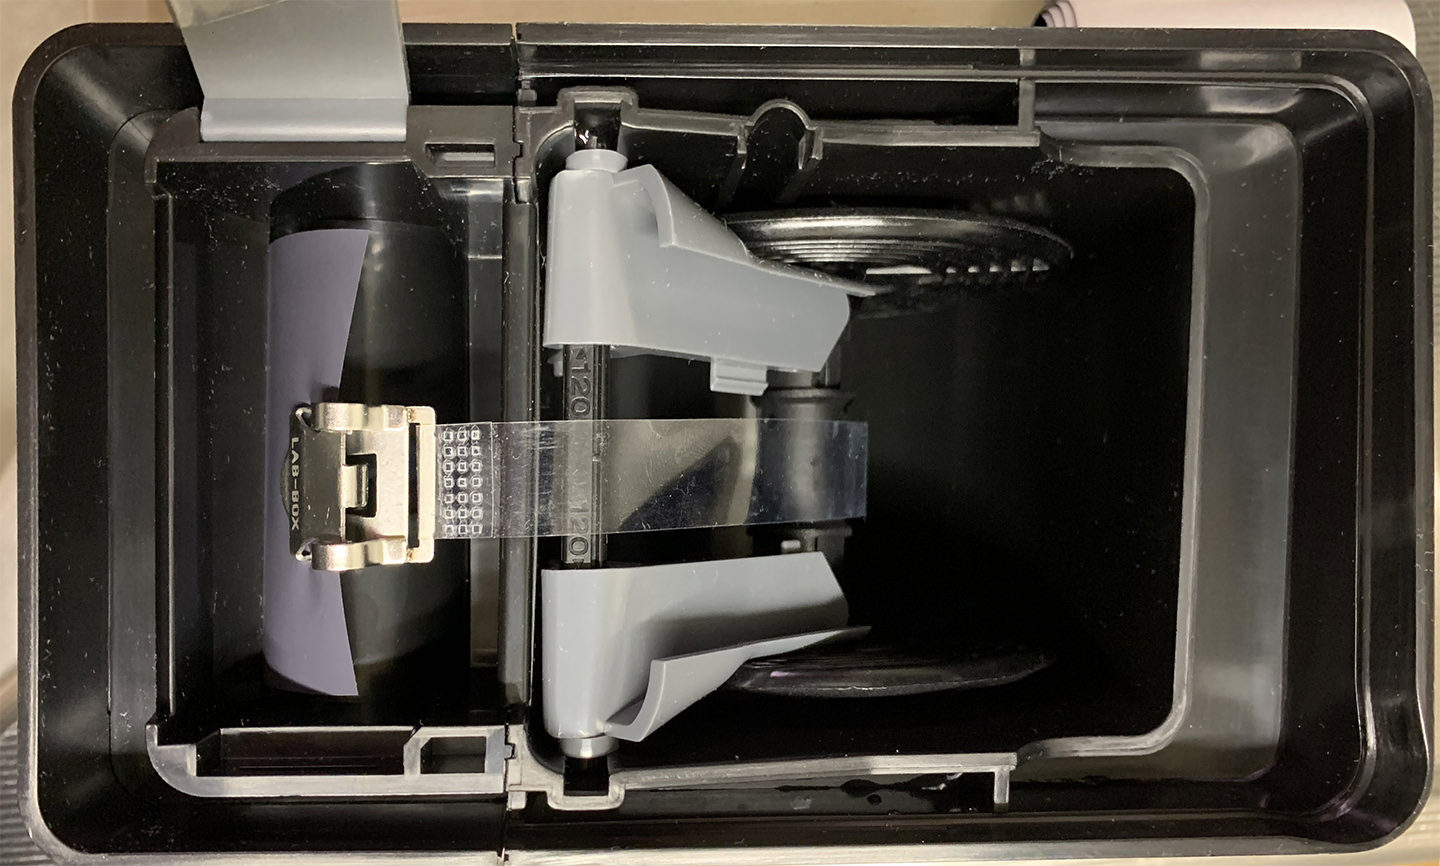
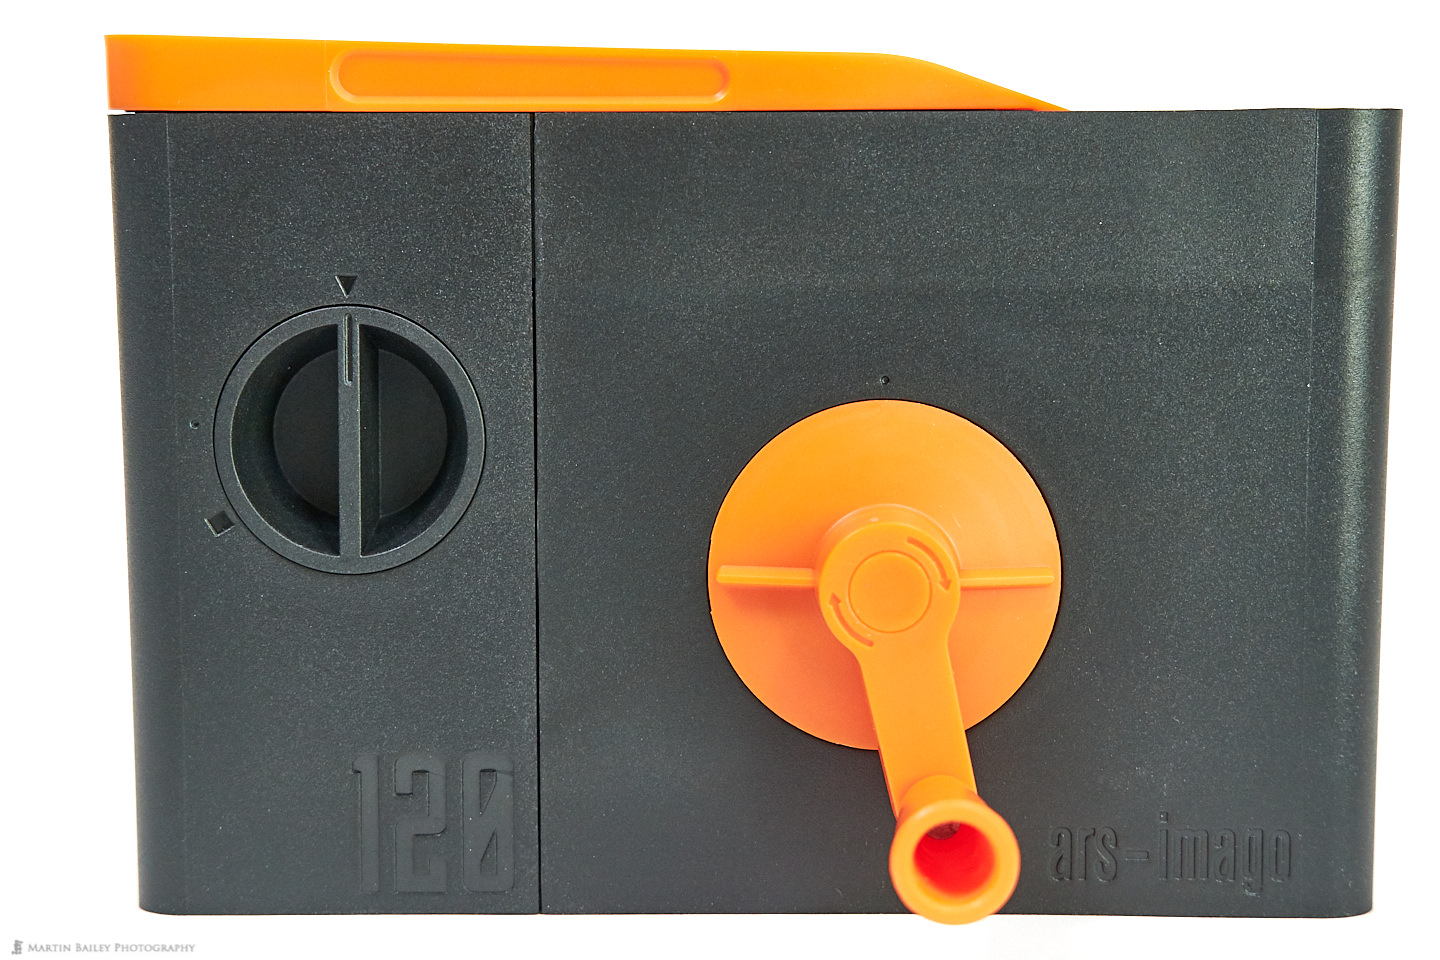
I then replaced the orange knob on the side of the Lab-Box with the optional Crank that I bought and found that the end of the crank feeds into the spool inside the tank, as you might imagine so that we can turn it later. Here I have also opened the grey lock on top of the film module on the left, ready to load my film. You can also see the reel with the film clip and film guide now in place inside the tank.
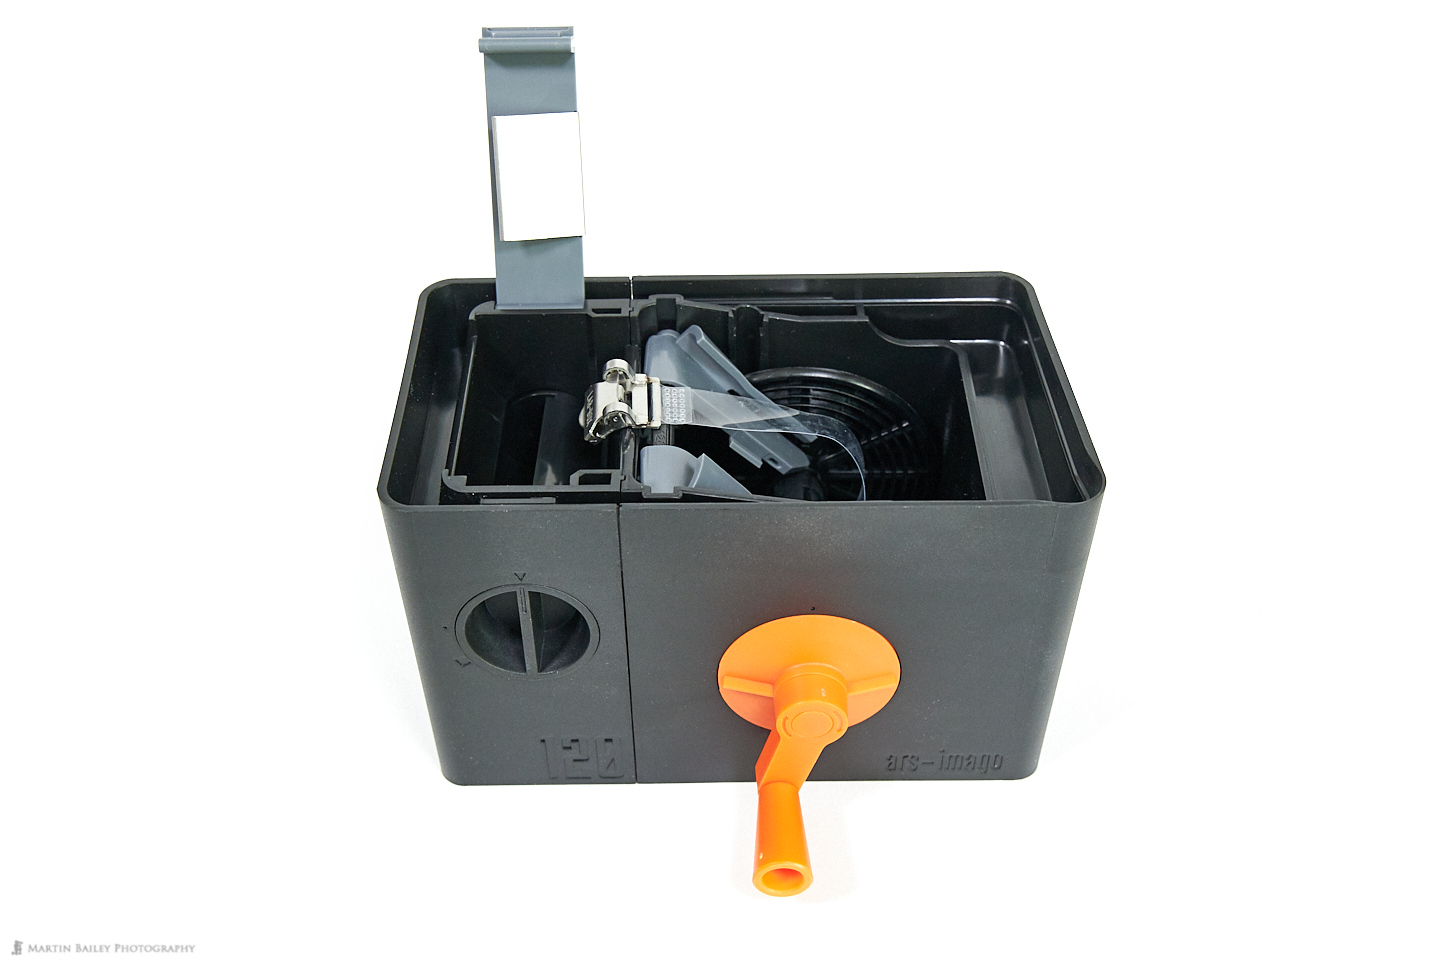
Also, notice that I have turned the dial on the 120 Module to the vertical position so that it’s pointing to the triangle at the top. This is the position to open the film canister inside the 120 Module. You then feed the end of the black backing paper that is on 120 format film through the little slit on the side of the 120 Module and close the grey lock, before placing the Lab-Box lid firmly on to the Lab-Box.
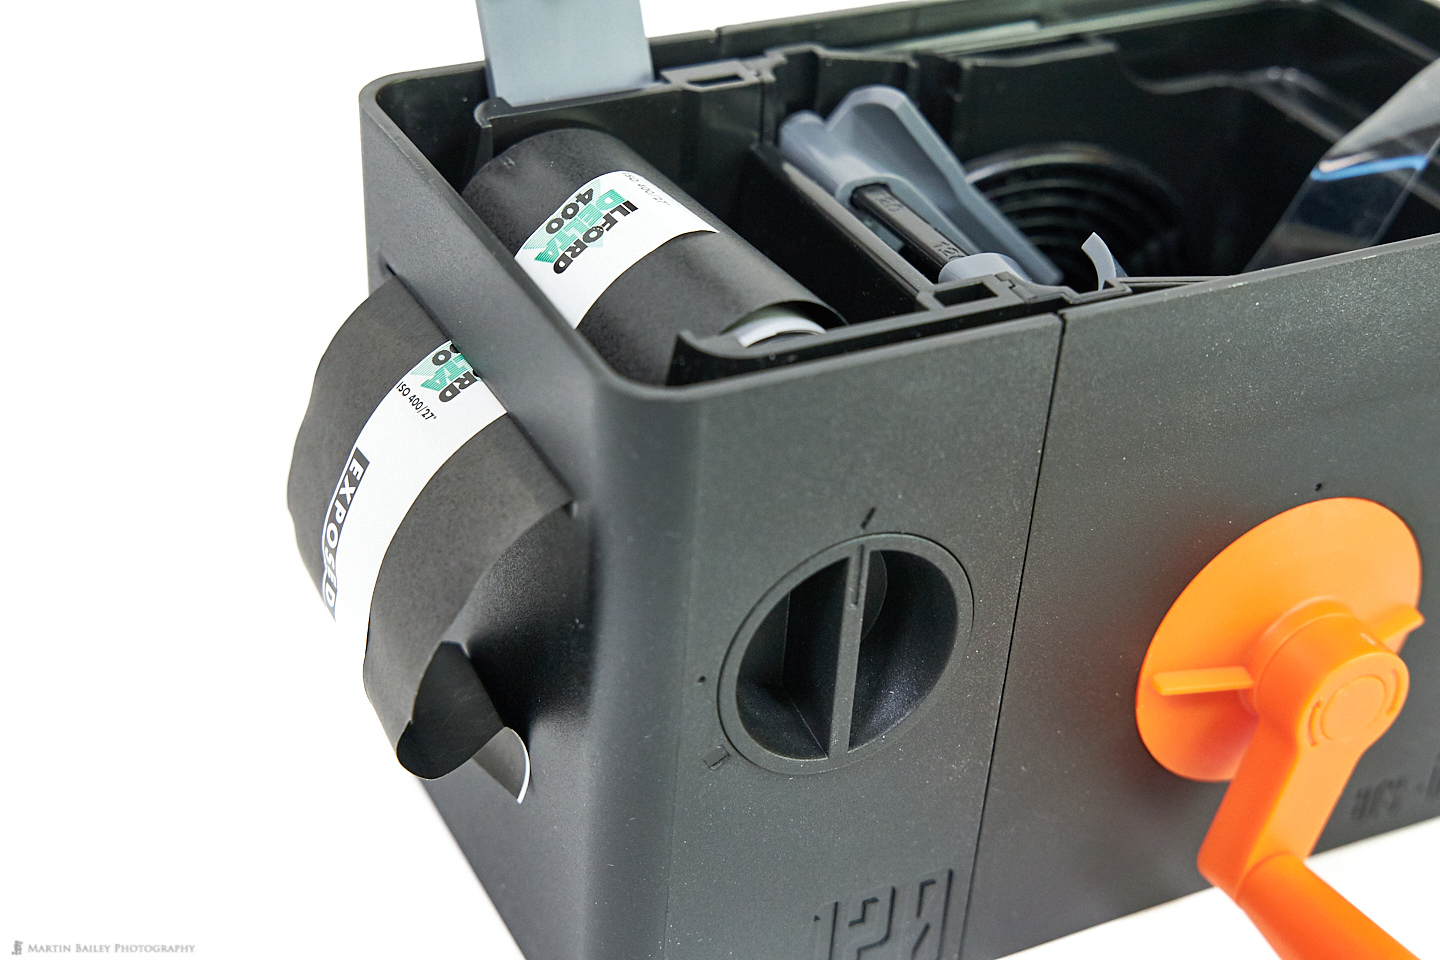
Pull the backing paper out through the slit and this, in turn, feeds the film into the canister. You keep pulling the backing paper out until it stops. You’ll see the number one on the paper showing that you’ve reached the start of the roll. You then close the film canister by rotating the dial to the square.

While we’re on this view of the Lab-Box, note the little notch at 9 O’clock on that dial, which is where you rotate the dial to in order to remove the spindle that the film was wound onto once we’ve finished the development process. You then tear away the backing paper and having double-checked that the film canister is closed, open the Lab-Box again.
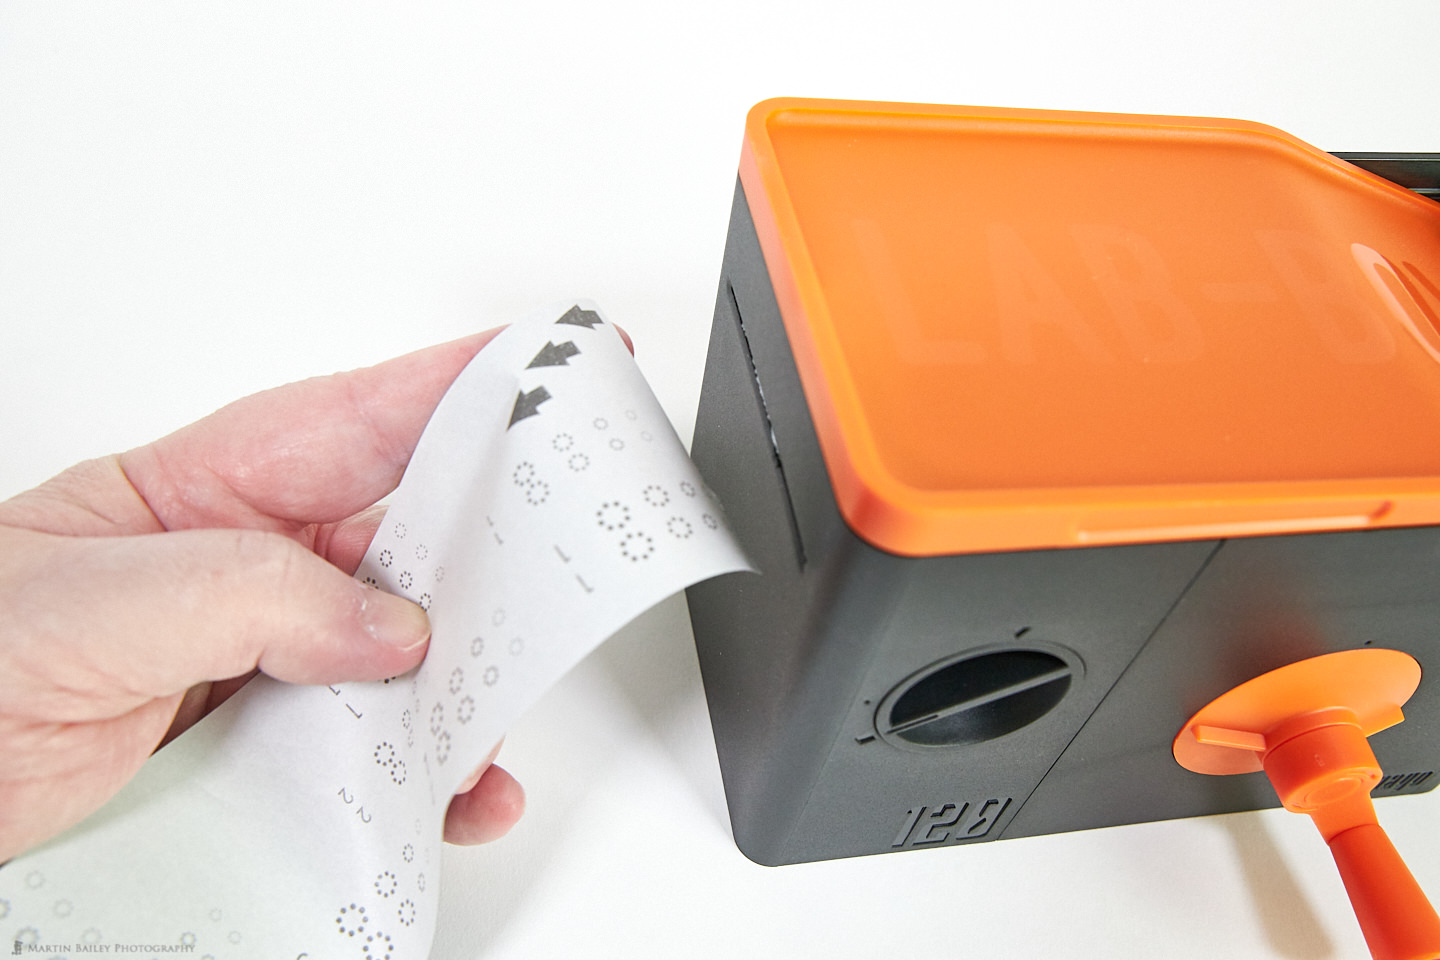
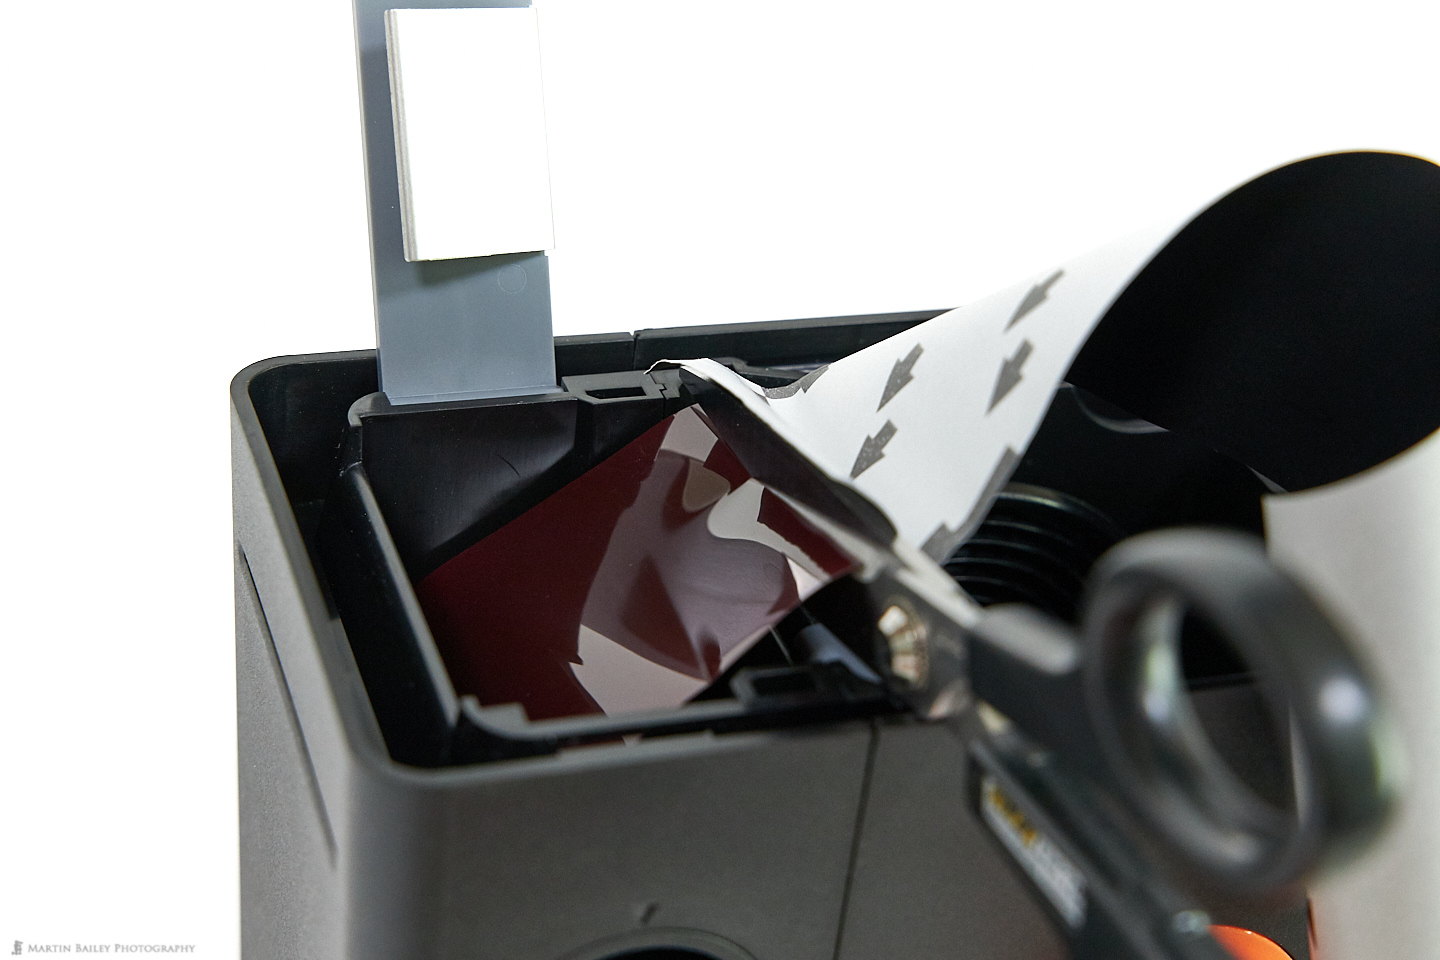
Then either tear or cut-away the remnant of backing paper from the end of the film, and ensure that you also remove any tape that might still be stuck to the end of the film. It’s important not to pull the film back out of the canister while doing this, as your first frame isn’t far into that canister at this point, so we don’t want to expose that to the light.
Dec 2019 Update – How to Avoid Losing the First Frame
OK, so in the weeks after releasing this post, I found that you cannot pull the film out of the light-tight chamber this far to attach the lead clip to pull the film into the spool. I am now literally peeling off the tape and backing paper without extracting any film, and now I’m able to keep the first frame on my rolls. If you pull the film out as far as I showed in the above and below photos, you will lose your first frame.
The above is an iPhone shot from a later development session and this worked perfectly!
Attach the Film Clip to the center of the film, and as you see as you wind the crank to take up the slack, the film is now poised to be pulled down the Film Guide onto the reel in the development tank.
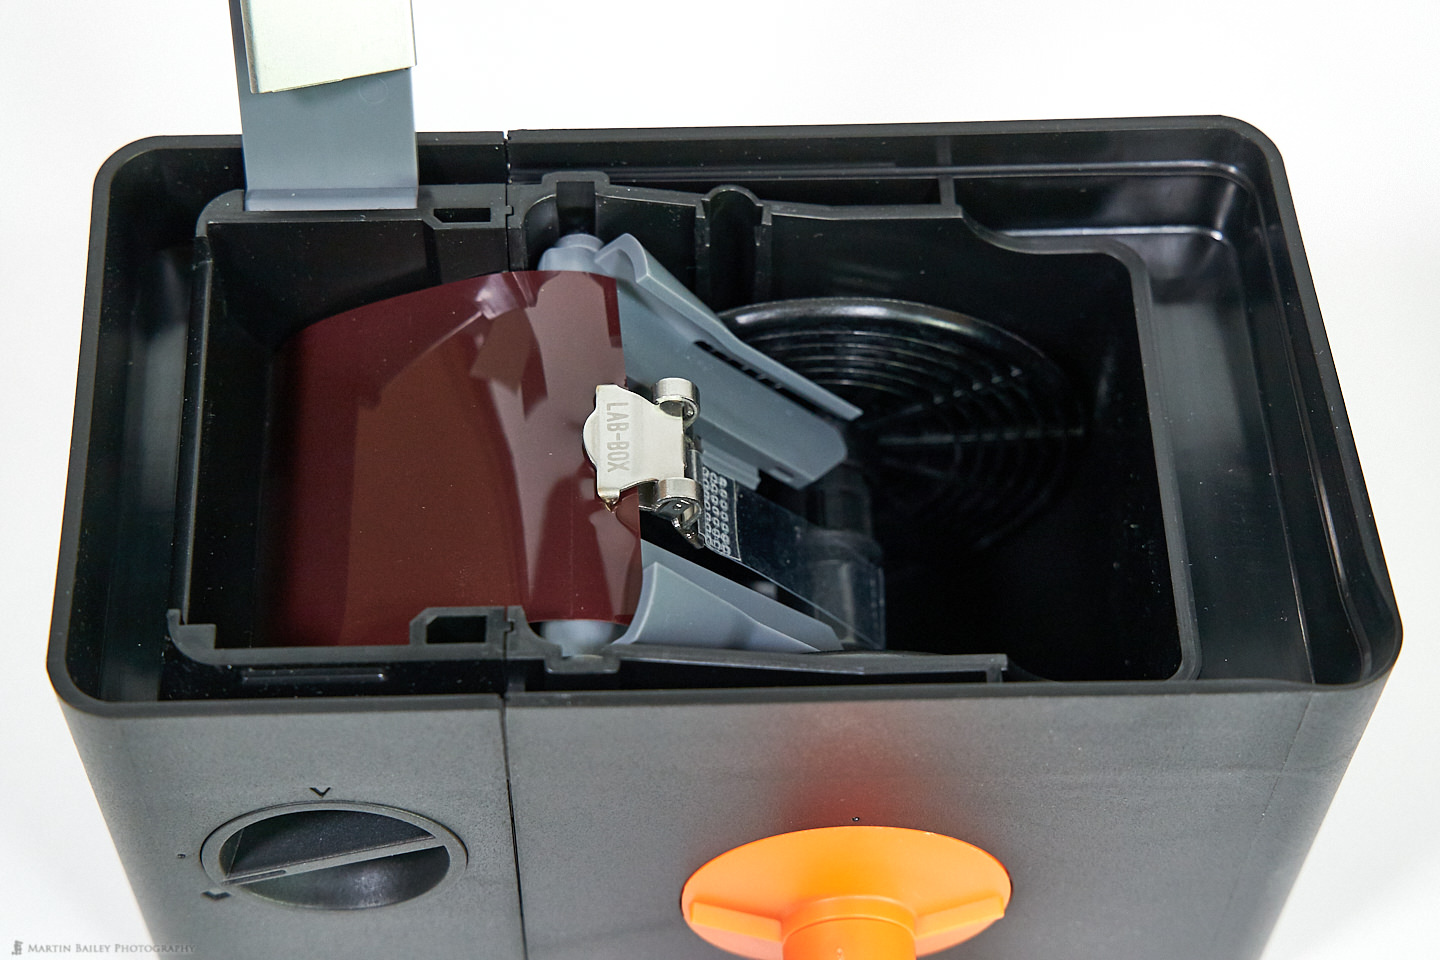
Before we do that, we need to return the 120 Module dial back to the top Triangle position to open the film canister and allow the film to be wound out. In this position though, with the Lab-Box lid firmly on, you can now wind the crank clockwise until you feel the film loosen as it completely leaves the chamber and is fully wound onto the reel.
You are now ready to start and develop your film, but just to illustrate this final step, I’m going to show you something that you would normally never do. The film that I used for this first practice session was actually an old roll that I had exposed to the light and used for practice purposes with the Paterson system, so it’s already ruined, which means I can open the lid once again to take a look at the spooled film.
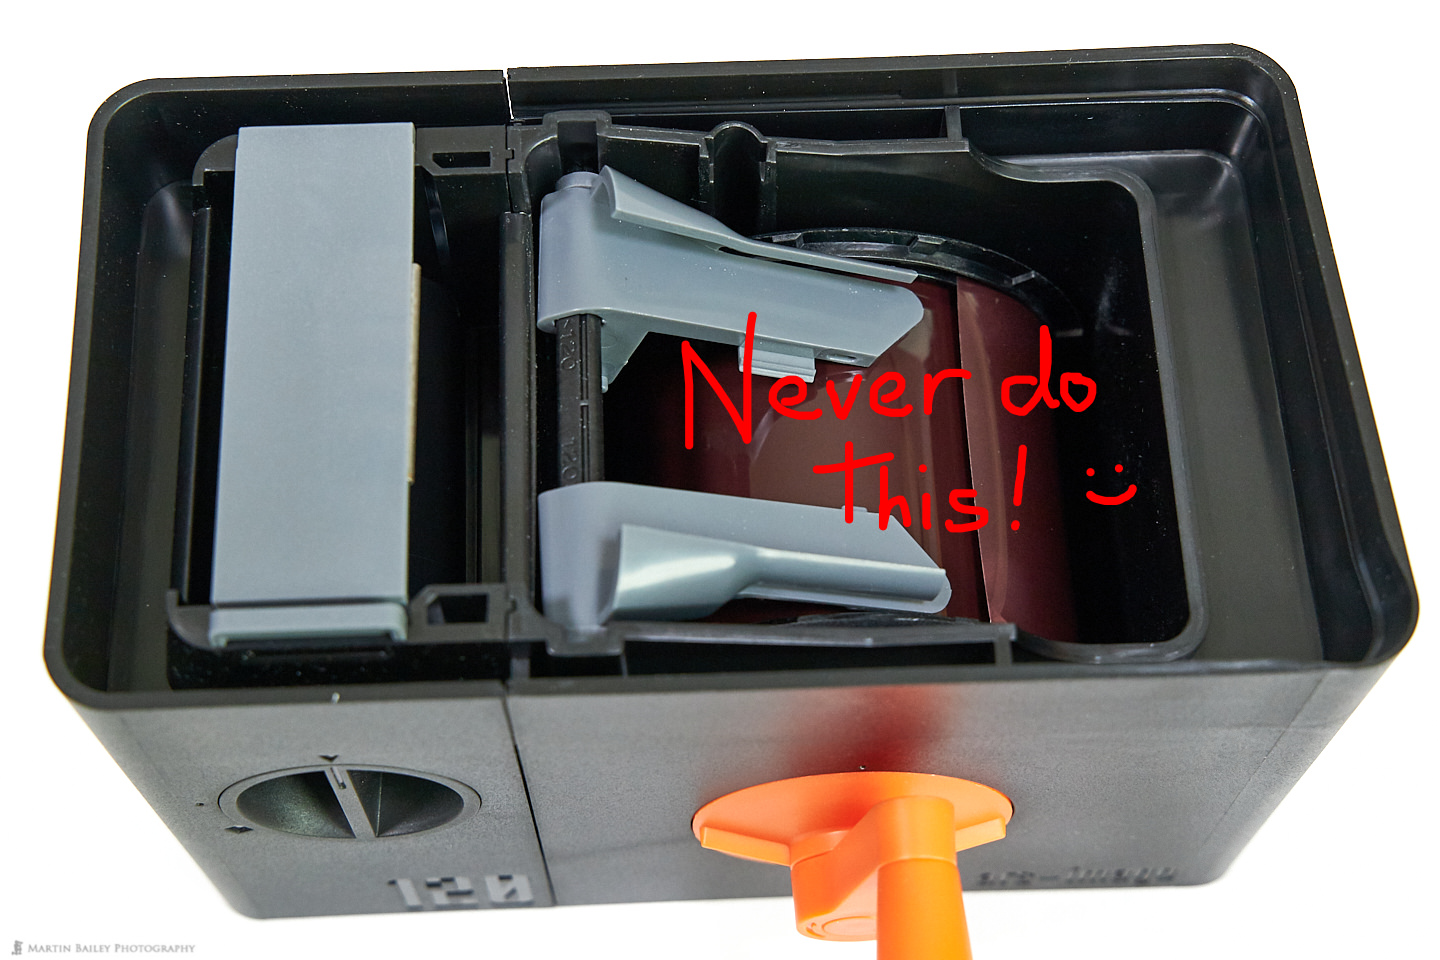
You can see how nicely the film has been fed through into the grooves in the reel and is now sitting there patiently waiting for its chemicals. To start the development process you simply pour your chemicals into the top right side of the Lab-Box, and they flow down into the development chamber without letting any light in, just like magic.
I have actually not developed my first roll of film with the Lab-Box yet, but I’m going to do that over the next few days and put a follow-up post together to walk you through that process as well. I’m going to continue to use my ILFORD chemicals that we looked at back in Episode 477, so if you want to check that out, it’s at https://mbp.ac/477.
Next week I have an interview coming up, so it will be a few weeks from now before we conclude this two-part series. I hope you found this useful to this point.
Links
You can order the Lab-Box on B&H Photo Video here: https://mbp.ac/lab-box
The optional crank on B&H is here: https://mbp.ac/lbcrank
Note that if you buy with these links you help us out with a small affiliate payment at no extra cost to you.
Film Related Posts
[ess_grid alias=”film-posts-grid”]
Show Notes
Check out my other film-related posts here: https://martinbaileyphotography.com/category/film/
Audio
Subscribe in iTunes to get Podcasts delivered automatically to your computer.
Download this Podcast as an MP3 with Chapters.
Visit this page for help on how to view the images in MP3 files.

0 Comments