Today’s episode is the last of three in which we’re taking a look at three lenses that I have picked up in the last few months, and not talked about yet. In the first two weeks we looked at the Canon 135mm F2 L prime lens and the TS-E 90mm F2.8 Tilt-Shift Lenses. Today we’ll take a look at some shots from the new version of the 14mm F2.8 L lens. So let’s jump right in and take a look at some shots from this Ultra-wide angle lens.
So, as with the last two episodes, I have a shot of the lens in my online gallery, so let’s bring up image number 2016. As a quick reminder, for those that are new to the podcast, I will be calling out a number for each image I discuss. This is the unique number for the images in my online gallery. If you are listening to the enhanced version of the Podcast, the images will automatically change on your computer or your iPod, so you might not need this number. If you follow the audio by looking at the images on my Web site though, you can input this number into the field at the bottom of the Podcast menu in the top menu at my site, martinbaileyphotography.com, then hit enter or click the button to jump to the image. You can also just locate this Podcast in the table on my Podcasts page at the same site, and click the thumbnails.

Canon EF 14mm F2.8 L II USM with Lens Cap
So, getting back to the lens, in the photo the first thing that you will notice is that the front element of the lens is big and round and sticks out of the front of the lens barrel quite a long way. Of course this means that there is no way to put a protector filter, or any kind of filter on this lens, so it’s a bit scary when you use it. You can see the special lens cap in the photo too, and I tell you, as soon as I’m not actually shooting photos with this lens, I put the cap back on to protect that front element. The other thing that you will be able to see is that the lens hood is built in. You can’t take it off, and this is also the reason for the shape of the lens hood. It kind of drop around the lens hood and clips into place. You’ll also will see that red ring around the front of the lens, showing us that this is an L lens, which is Canon’s high end professional lens range. Not all, but most L lenses are dust and moisture proof, and this is no exception. I’m not looking forward to the time when I have to use this lens in wet conditions though, as that may mean that I have to wipe that front element, which I don’t usually like to do. A small amount of moisture can often be blown off with a lens blower, but if it got really wet, I’d have to wipe it while shooting, which is going to be a bit scary.
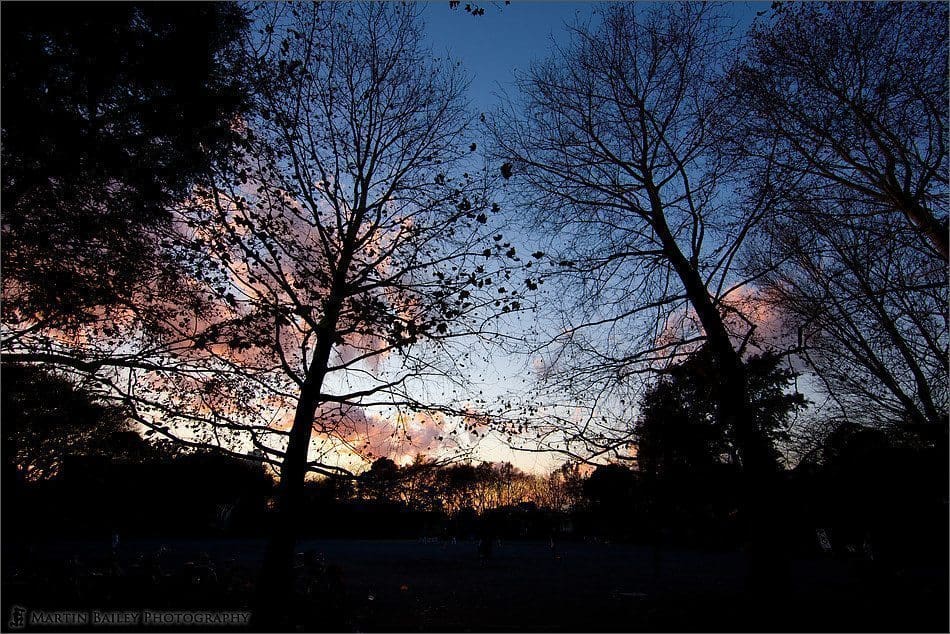
The first photo that I wanted to look at today is number 1996. This and the next photo was actually shot with David Lee’s lens, and not my own, which I bought the following weekend. I’d met up with David, one of the active participants in our Photography Forum, in a park here in Tokyo, and we spent the afternoon of November 30th shooting together. David had asked if there was any glass that I’d still like to own, and when I said the 14mm, it turned out he’d got this lens in his bag. After we’d been shooting the autumn color for a while, we walked along and I noticed the sun shining through these trees creating nice shadows. I went for my 16-35mm F2.8 II lens, intending to point it downwards to make the shadows seem to radiate out. David at that point though handed me the 14mm which I used instead. The effect of the radiating shadows was emphasized even more of course than it would have been with the 16-35mm.
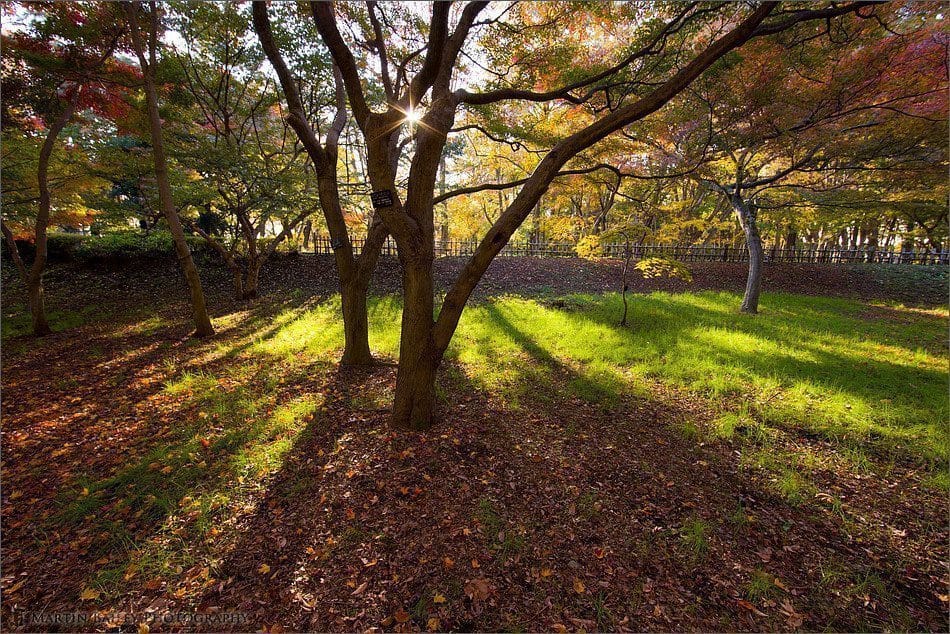
Radiant Shadows
The diagonal angle of this lens is 114°. The horizontal angle is 104° and the vertical angle is 81°. One of the worst problems with ultra-wide angle lenses is that the image corners tend to look as though they are flowing out of the frame. The 16-35mm II version has corrected this really well, and I was looking forward to getting home to see how the 14mm II had handled this. On close inspection on the computer I was kind of surprised to see that the top corners had a little of this, yet the bottom corners showed hardly any distortion. I haven’t had time to look into why this would happen, but it seems that various conditions create different distortion.
It was about this time that David, looked behind us, and noticed the beautifully coloured tree canopy, which we can see in image number 1997. The tree trunks that we see here, seemingly converging inwards from the bottom corners are actually only about 45cm apart. There is not even room to get your shoulders between these trees, yet the extreme wide angle of this lens makes them look much further apart. For this shot, I pre-focused to about one meter, which is just a tad less than infinity on this lens, and extended my tripod legs fully, then pushed the camera mounted on the tripod up a meter or so, between the trees, and released the shutter with my cable release. I did this to get me a little closer to the canopy, which in reality is not that far away, though it seems to be here, and also to get me between the trees, which was not possible by physically sliding in between them. Pretty soon I’m hoping to put together my list of top five or top ten images for 2008, and when I do, this will definitely be included. I love this shot.
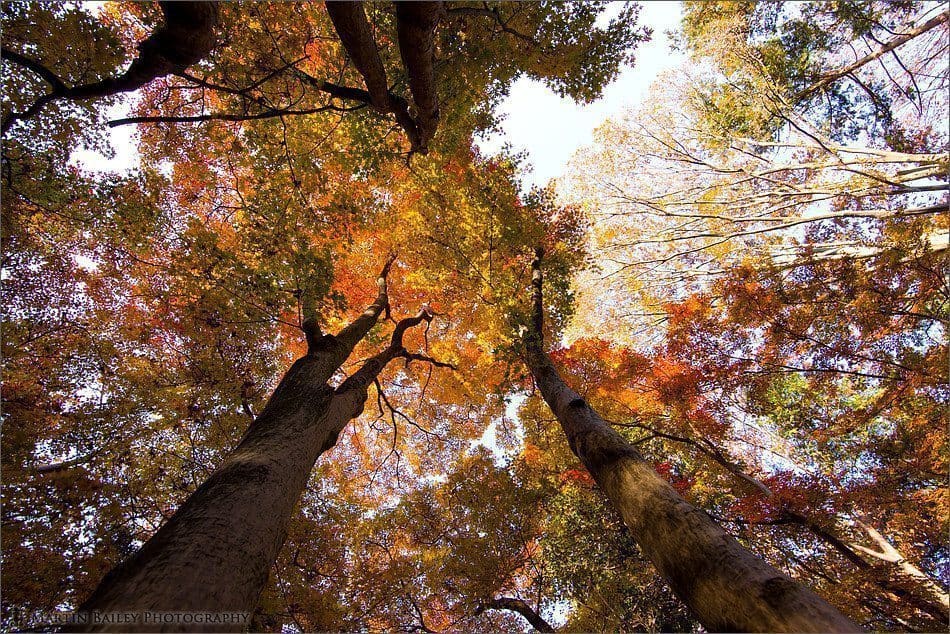
Rainbow Canopy
I also inspected this shot pretty closely for distortion, and here found very little, again puzzling me somewhat, because it seems to be contextual. Still, there is no problem right to the corners in this image, with regards to distortion. There is mind a little chromatic aberration in the corners of this image. For this wide a lens it isn’t enough to put me off using it, but it’s there. I was sold though. I’d been wanting to pull the trigger on this lens for a while, and having actually tried it out and taking a look at the images on the PC, I was having a hard time resisting picking up my own one. I lasted exactly one week, and went to pick mine up the following weekend.
I took the lens out straight away for a test run, and shot the rest of the images that we’ll look at today on that following weekend. The first of which is image number 2011. This was shot in a local park, again looking up into the autumn tree canopy. Here though I’ve taken advantage of the depth-of-field that the super wide angle affords us, and focused on a patch of leaves just above my head on the left side of the frame here, but then with an aperture of F9 have rendered the trees that reach up into the sky totally in focus too. Again, these trees are really not that big, but the angle of the lens makes them look much bigger. Again we have that convergence as we look up, which I’m really enjoying. I’ve shot this sort of image quite often over the years. This is one of the ways in which I like to use the 16-35mm, but the 14mm just takes it to another level. I’m really surprised at the difference that just 2mm makes.
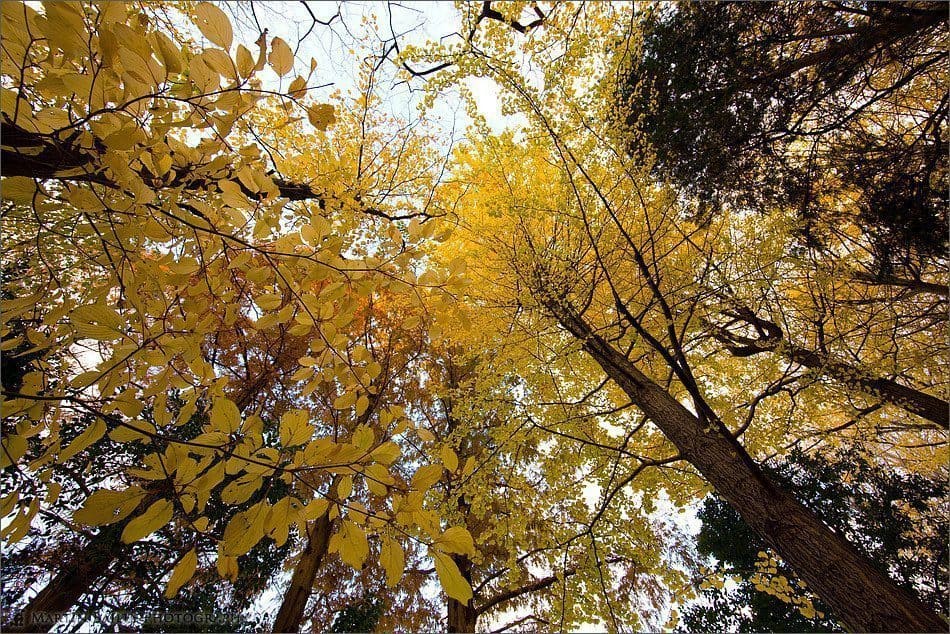
Yellow Near and Far
The warped world effect is of course not just visible when looking up, but also when pointing the camera down, as in the first shot that we looked at. Let’s take a look at another example though, in image number 2013. Here we see a yellow carpet of gingko and other fallen leaves. Again, this is really just a simple image from a stroll in the park, but has become quite an effective image. It’s having the ability to do something different, even in relatively boring locations that was one of the most tempting things about this lens. You can by the way see a little of that distortion in the bottom corners, as though the image is flowing out of the frame. Again, not a big deal, but most certainly visible here. And, this time the top corners are fine, just adding to my confusion as to the circumstances in which this distortion shows itself. I’m sure there’s a good reason, and I’ll probably spend a little time to research this on the Web soon. If anyone knows about this though, maybe you could let us know in the forum.
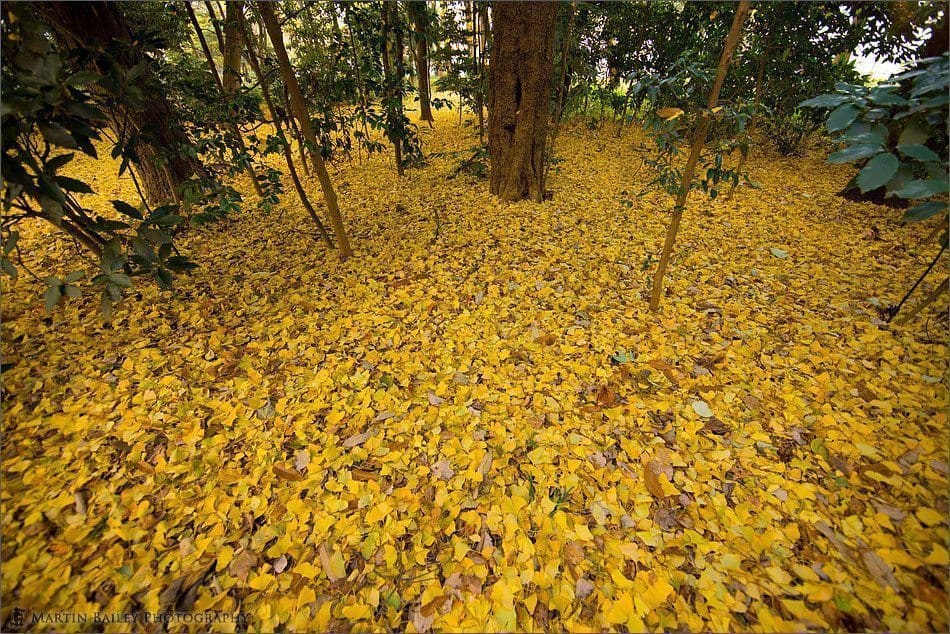
Yellow Carpe
As I got to the far end of the park, the sun had dropped well below the horizon, but was casting a lovely warm light onto the clouds, as we can see in image number 2014. Again I used the ultra-wide angle to make relatively small trees that were literally right in front of me look much taller. I also exposed for the sky here, to keep the colour in the clouds, and allowed the trees to pretty much dropped into silhouette. You can probably see a little orange spot near the center of the bottom of the frame too. I left that in as a hint, that there are actually loads of people playing games, and finishing up a game a baseball in the area between these near trees and the ones in the distance. This is a community play area, so literally teaming with people. They can actually be made out on the full sized image, and although I’m yet to print this, I’m thinking that they’ll make a nice little easter egg in a print of this image.
Yellow Carpe

Cloud Leaves
Shortly after this, as I was finishing up a can of hot coffee from the vending machine, I noticed the clouds moving to a position that there were pretty much lined up with the a tree, and so I shot image number 2015. This tree again is actually almost vertical, but the lens has bent it over, making it look like it’s leaning into the shot. The clouds behind the tree kind of look like leaves on the tree, with a bit of a stretch of the imagination. It was getting pretty dark by this point though, so I upped the ISO to 400, and shot with an aperture of F8 for 1/25th of a second. I could have gotten everything in focus at F5.6 or probably wider, but I’m still getting the hang of the depth-of-field with this lens.
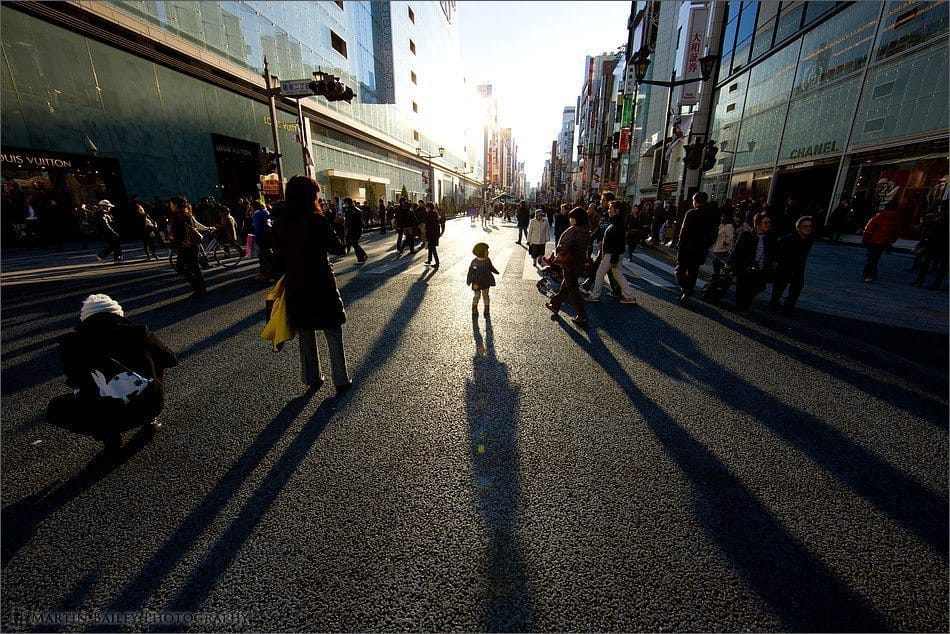
I haven’t had a whole lot of time for my photography since, but wanted to take a look at one last shot from the following day, which is image number 2020. Not quite a silhouette, but with some nice long shadows, this is a scene from a shopping afternoon in Ginza, here in Tokyo. I arrived at this street that they close off to cars during the day at the weekends, just as the sun was reflecting off a building on the left of the street as we look at it. The sun is actually over on the right of the scene, hidden to us by the buildings on the right. I’d been shooting for a minute or so here, waiting for people to walk into the shot at a nice even spacing, to again make those long radiating shadows. As I waited, this little girl ran into the scene, getting ready for her much who we can see to the left, to take her photo. For just a moment, there was a gap behind the girl with very few people, which enabled me to shoot quite an effective image. Not one for street photography as such, when an opportunity like this presents itself to me, it’s as exciting as any other kinds of photography that I do, and made a little more exciting by the incredible angle of view that the 14mm gives us.
So, a fun lens, that I’m really looking forward to getting out with much more. It seems that whatever you point the camera at with this lens, you can make an image worth looking at, it’s just so different. This is quite a removal from much of my photography, which is often shot with much longer lenses, and with a very shallow depth-of-field, but again, that is part of the fun. The lens is built well, as we’d expect from an L lens, and is not that big, so it will be easy to drop into my bag as a way to make something different out of a normal location or subject
So, a few pieces of housekeeping before we finish. Firstly, the deadline for signing up for the Hokkaido workshop has come, but we still aren’t full, so I’m leaving the links up to continue to sign up at mbpworkshops.com. If you are interested, and still sitting on the fence, note that I will charge slightly less if you wire the funds, instead of using the Paypal links on the site, so contact me if you’d prefer to wire the funds and I’ll send you my bank details. Please don’t wait too long though, as the flight is filling up quickly, now that booking is open. I booked all the flights for our current participants last week and the plane was pretty full already, so don’t hold off much longer if you are thinking of joining us for the Winter Wonderland Workshop 2009.
On that same subject, you probably noticed that I was a little unenthusiastic about the Blurb book that I made of photos from the 2008 trip when I mentioned it last week. When I looked at the book in daylight, I was actually a little more disappointed with the quality than I let on last week. It seems that the printer heads either needed cleaning, or simply were not putting out enough ink, on all of the pages on the left side. The right side is perfect, so it proves that the quality can be there. Anyway, I have mailed Blurb about this, and send them some photos of the problem, and I’m now waiting to see what they say. Although pretty good, I would really like the book to be as good as it can be, and so want to see what they say before ordering a larger batch.
Finally, I’ve had a bit of a hellish last week, working on a script to build RSS feeds for Cooliris, the Web technology that I have recently build into my Web site. I wanted to be able to push one button and the script go away and build multiple feeds, for each album and category on my Web site, which is based on Coppermine, the free PHP gallery software. Well, finally, after midnight on Sunday the 21st, I got it completed. It’s working really well, and now there are some additional links below the bop menu in my Web site at martinbaileyphotography.com when you are browsing thumbnails or images in the gallery. You will see a Cooliris logo with an arrow pointing to the links when they are available, and if you have the Cooliris plug-in loaded, when you click the links, you will be launched into Cooliris, and see a full screen virtual wall with all of the images from that album or category displayed. You can click on them to view in the intermediate size, and even double click to make that image full screen and turn on the automatic slideshow etc. It’s really cool technology, and I do recommend you grab the plug-in from cooliris.com and take a look for yourself.
That’s it for this week though, and as we are now just a few days from Christmas 2008, I’ll finish by wishing you all a very Merry Christmas, and I hope that you and yours have a great time over the festive season. And even if you don’t celebrate Christmas, you just have a great week, whatever you’re doing. Bye-bye.
Show Notes
The music in this episode is from the PodShow Podsafe Music Network at http://music.podshow.com/
Subscribe in iTunes for Enhanced Podcasts delivered automatically to your computer.
Download this Podcast in MP3 format (Audio Only).
Download this Podcast in Enhanced Podcast M4A format. This requires Apple iTunes or Quicktime to view/listen.

0 Comments