About three weeks ago, I did a portrait shoot for a client, with a difference. I was to shoot the client’s pets, namely two small dogs, and two ferrets. Today we’re going to look at some images from the shoot, as well as discuss some tricks we used to keep the pets in the frame, and I will also go into some detail about the portable studio I used for the job. This will include a bit of information about the lighting setup, and I have created a simple diagram to show my lighting, which I’ll add to a forum post to accompany the Podcast. There’s a link to the post in the show-notes if you want to take a look.
Pet Shoot #1
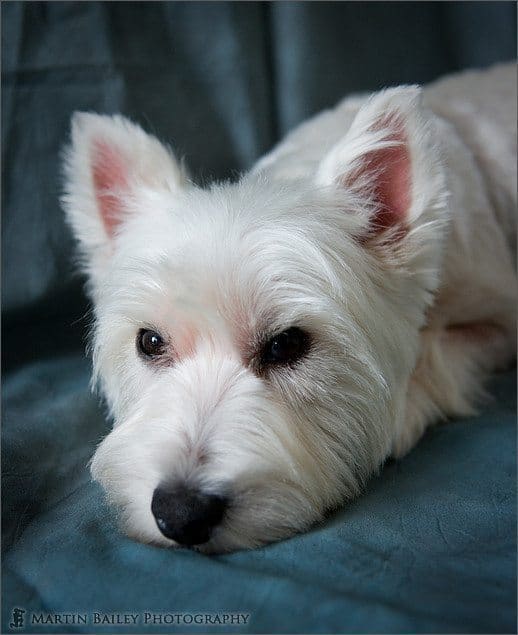
So, this was an interesting shoot for me, as it was my first time shooting pets. I’ve done some client work shooting portraits, but never pets. It’s also the first time I’ve spoken about this sort of stuff here on the Podcast, so I’ll try to go into some details about my gear and lighting. To set the stage, let’s bring up the first photo for today, which is image number 1858. This is one of the dogs, obviously, as it looks nothing like a ferret, and this was actually taken just as we got the background in place, but before I’d set up the lights. I had taken my wife with me as an assistant, and literally just set the background up, and the white dog of the two, just came right on in and made herself at home on the muslin sheet.
I wanted to show this first for a few reasons. Firstly, this is the only shot from the shoot made with natural light. The client’s living room was small, pretty standard for a Japanese apartment, but had a large window to my left while shooting this. We can see that in the catch-light in the dog’s eyes. The point I want to make here though is that this was shot with an exposure of 1/30th of a second at F4, with an ISO of 800. You can understand from this that a 30th of a second was not going to be fast enough to hand-hold successfully for many shots, and ISO 800 is too high for this kind of work, so it was obvious that I was going to need some extra lighting. I also just wanted you to see the colour of the background that I had chosen for the shoot. I own two backgrounds, both from Lastolite. They are machine washable muslin backgrounds, 10 feet wide, by 24 feet long. Of course, in this small living room, I was not going to use anywhere need that size, but my background support system by Impact can be adjusted from 6 feet wide, to 12 feet wide, in three stages, and here I was using just two of the four poles between the stands, so we’re talking the minimum width for the stand, which is six feet. This was all I could set up, and although I would have preferred a little wider, it would be enough for the shoot, as long as I was careful not to include the sides of the background.
This colour is called Wyoming and my other background is like a light beige colour, which is called Dakota. I took both with me, but with the colour of the dogs and ferrets, I figured I’d use this blue/grey background to set off the colours of the pets, as opposed to being very similar, with just the black and grey dog that we’ll see later standing out. To expand on the equipment explanation, I also have two Photoflex weight bags that you can fill with sand or water, I use water, so basically I can take them along very light, and if they are necessary, I can fill them with water at the clients place, and then empty them before leaving, keeping the kit as light as possible.
Pet Shoot #3
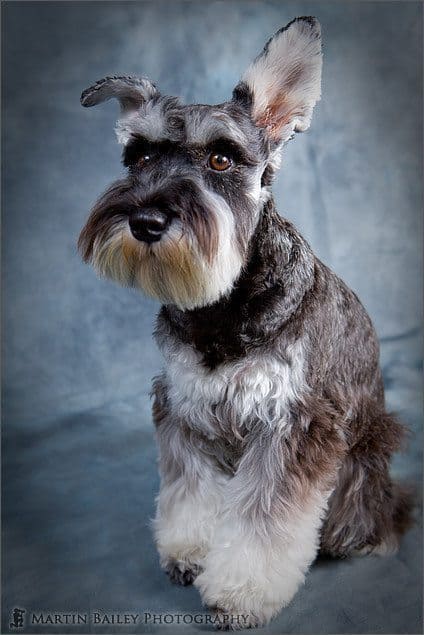
In the next image, number 1860, we can see the other dog, and if you look closely, you’ll see we now have two light sources in the catch-lights in her eyes. From the EXIF data of the image, if you are viewing in my online gallery at martinbaileyphotography.com, you’ll also be able to see that I am now shooting at ISO 200, for 1/125th of a second, with an aperture of F5.6. This is because I’d now set up my lighting, so let’s talk a little bit about that. I use my old Canon Speedlite 550EX and the new 580EX II mounted on tripods, with Photoflex convertible umbrellas. Convertible means that they have a black cover on the outside of the dome of the umbrella, which can be removed, to reveal just the white underside. With the black cover on, the umbrella will behave as a reflector, so you have to bounce your flash into the umbrella, and the soft light will be reflected back out onto your subject. The umbrella that I use like this is 60” across, to give me a large soft defused light source.
My second umbrella is 30” across, and with this I take off the black cover, and face the dome towards the subject. With the cover off, the light from the flash goes through the umbrella, which now acts more like a diffuser or soft box. You may ask why I don’t just use a soft box then. Well, I find umbrellas easy to carry and set up, and they’re versatile, especially these convertible ones. And to be totally honest, I would have bought a soft box, but if this kind of work increases, I’ll probably find myself wanting better light sources than my Speedlites, and so wanted something that I can still use later. The soft box would have been basically for my Speedlite, and so I found the investment a little restrictive.
So, as I say, the light source is my Canon Speedlites, and to attach these to the tripods, I use two Shoe Mount Multiclamps, again from Photoflex if I recall correctly. The fit onto the thread of the tripod that I would usually attach my ball head with, and the pole of the umbrella fits through a hole made for this purpose, and is clamped into place with a screw threaded clamp. I probably should say before I go on, that I am by no means an expert in what I’m about to tell you, but having played around with the setup a bit, this is what works for me. As usual, take away what you find helpful, but if you have any better ideas, by all means come along to the forum at my Web site and share them with the community. So, what I do is I take control of the angle of light coming out of my strobes by setting the zoom setting manually. I set the angle to 24mm, so I get a nice wide spread of light, and I set the 60” umbrella so that it is clamped close to the end of the umbrellas pole, this gives me a nice large diffused reflected light to fill in shadows on my subject. For the 30” umbrella that I am using as a more concentrated light, I set the zoom to 50mm and clamp the pole to the stand at about a third of the way from the bottom. This seems to give me a more concentrated light source.
I attach Compact Battery Packs CP-E4 to each Speedlite to keep them firing faster and longer. I want to avoid the flash not recharging quickly enough for me, which would result in missed shots. I attach these to the tripod legs with the straps on the cover that comes with the battery packs. By the way, I use tripods simply because I have them. I have not yet found it necessary to by light stands, but they would obviously be fine if you are out buying this sort of kit.
To fire the Speedlites I use a Canon Speedlite Transmitter, ST-E2. To make sure I have a line of site to the camera I actually mount the flashes sideways, and then turn the heads 90 degrees to point into the umbrellas. I find though that I can get way forward, with the Speedlites actually behind me, with no real line of sight, and the strobes still fire, so it’s a reasonable solution. I’d probably use some sort of a radio transmitter like Pocket Wizards as opposed to infra-red if I was buying this kit from scratch. I control the output of my Speedlites using the Ratio control on the ST-E2. This allows me to set one strobe to fire brighter than the other. I changed this slightly through the shoot, as the ambient light from the window dropped, but basically, to enable me to use the small umbrella as the main light, and the large umbrella to fill in the shadows a little, but not too much, I set the 30” umbrella to fire 4 times brighter than the 60” umbrella. To see how this lit the subjects, I’ll also include a close-up, at about 70% of full size, of the white dogs eyes, which luckily include visible indications of the brightness of the light sources. There’s a link in the show notes, but you can just go to the MBP Podcast forum at martinbaileyphotography.com and look for a post on Episode 151, and you’ll see not only a diagram of the setup, but also this close up of the eyes. In the eye to the right of the shot, you can see the smaller umbrella without the cover, being used a diffuser, and the main light source, and you can see a dimmer umbrella in the eye to the left of the shot, which is the 60” umbrella at 1/4th the strength of the other, to fill in shadows and prevent the main light source from getting too harsh. You can also of course see the overall effect of the lighting, with the rights side of the dogs face as we look at the shot being much brighter than the left, which is sufficiently lit, but in more shadow than the other side.
The Lighting setup diagram was created using a Photoshop file from Kevin Kertz, created and distributed for this very purpose, so thank you to Kevin Kertz for making this available. You have made my job much easier in preparing for this Podcast. I should say having just looked at the diagram as well, that I was shooting handheld for the entire shoot. This was possible because I was shooting with relatively fast shutter speeds, thanks to the lighting set up.
Let’s move on now to take a look at some more images. There’ll be a link to all 16 shots in the show notes. I actually made 138 shots available to the Client using a Lightroom Flash Album. This enabled the Client to select which shots she wanted prints of relatively easily. These 16 are selected as a very small selection to give you an idea of what I shot.
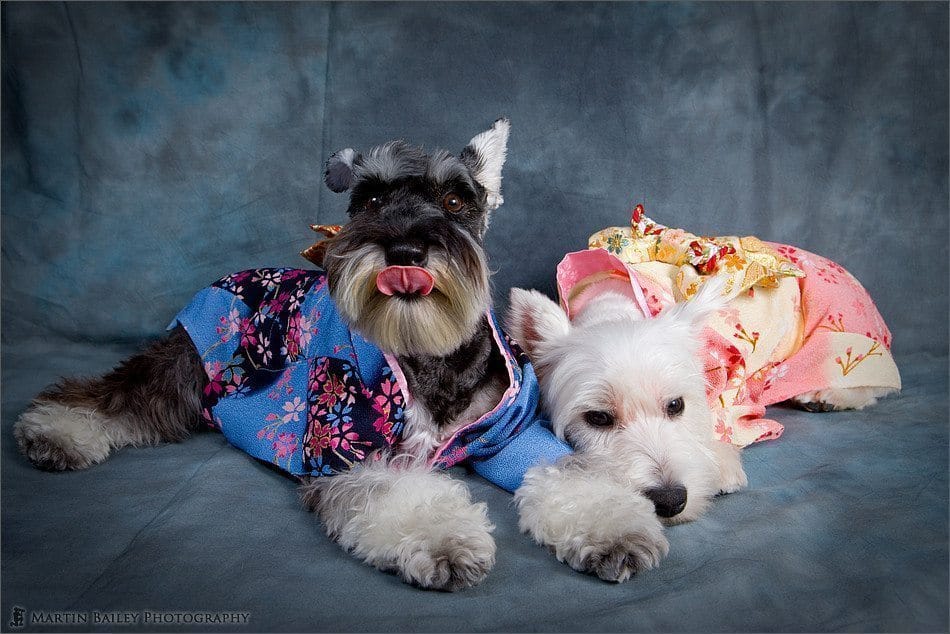
I created a work list for the shoot, and listed all of the shots that I wanted to try and shoot, based on the Client’s requests, and also things that I thought would be good to try. In shot number 1861, we can see one of the types of shots that the Client suggested, which was to dress the dogs in Japanese Kimono dresses. I provided the client with a number of options for this shot, and they went with the one with the tongue out, which is pretty much as I thought. This was shot with an aperture of F8, to ensure both dogs eyes are sharp, and also to capture the detail in the dresses. Note that once you have the lighting set up, and your camera set to Manual, you’re strobes will pump out as much light as necessary too light the shot. I should also note that I made sure the Speedlites were in ETTL mode for this. Also, you’ll see that the corners of these shots are slightly darker than the main area. This is not a lighting issue. Actually the lighting was relatively even across the frame, but I felt that these essentially portrait shots warranted a vignette, so I used Lightroom to add a vignette to all of the images that I put forward to the client.
Pet Shoot #4
Pet Shoot #6
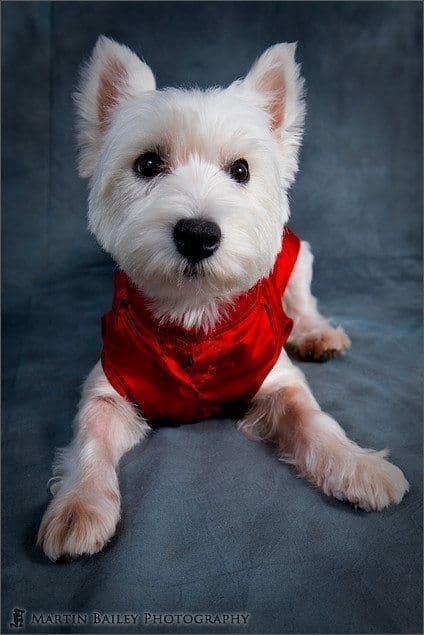
In image number 1863, we see the white dog with a nice red China dress on. This is another prop that the client prepared for the shoot. I like the nice catch-lights in the dogs eyes here from the umbrellas, and again we can see here how natural the lighting looks, with a nice shadow on the left of the dogs face as we look at the shot. This white dog was actually pretty sleepy most of the time, so we had to keep on waking her up throughout the shoot. I haven’t included any shots in the Podcast from this, but another trick I used to get the dogs to look up, was I had my assistant (read wife) blow air on to the dogs with my rubber blower. Not only does the air bother them, but the sound of the blower got their attention too. The only problem with this ploy is that after a while it gets tough on the forearm to keep squeezing those big blowers, but it worked for what we wanted to do.
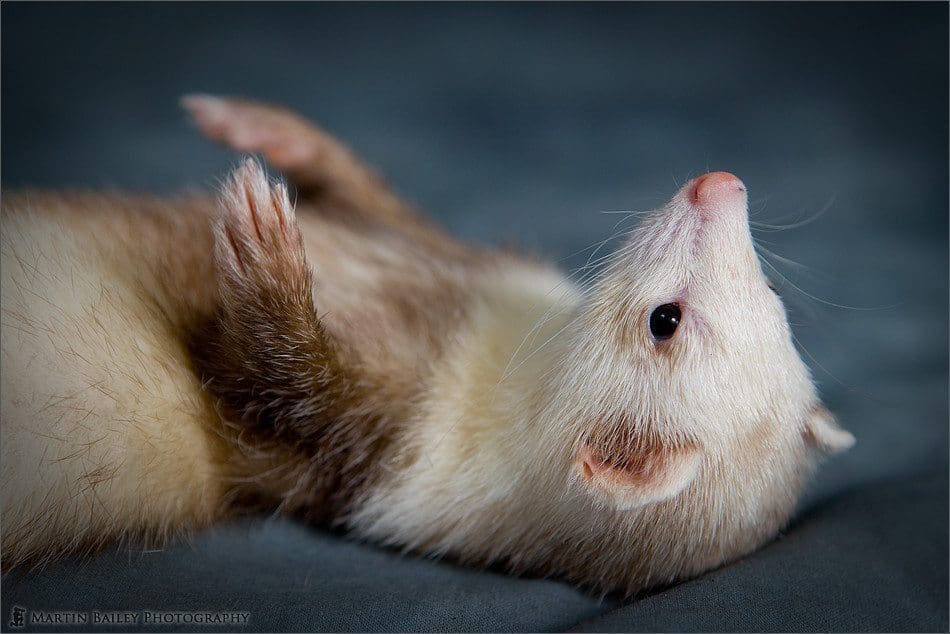
Of course, for pets, it’s important to get the animals in poses that look cute or what the client can relate to. In image number 1866, we can see a close-up of one of the ferrets, rolled on her back and looking up. I can’t quite remember, but this might have been reacting to the blower too. By the way, I used my new 24-70mm F2.8 L lens for most of these shots. As I knew I was going to be shooting the pets close to the ground, I had the Angle Finder C attached to the camera for most of the shots too. This allowed me to get a very low perspective, without having to lie on the ground. To follow these guys around I had to be pretty quick, and so I didn’t want to commit myself to one spot, which is what lying down would have started to do. I found that I could sit on the floor, then shuffle around quite easily to get my shots with the angle finder. Again in the eye here you can see one bright and one not so bright light source, and a bit of shadow under the chin because the light source to my right was more focused and physically four times brighter than the one to my left.
Pet Shoot #9
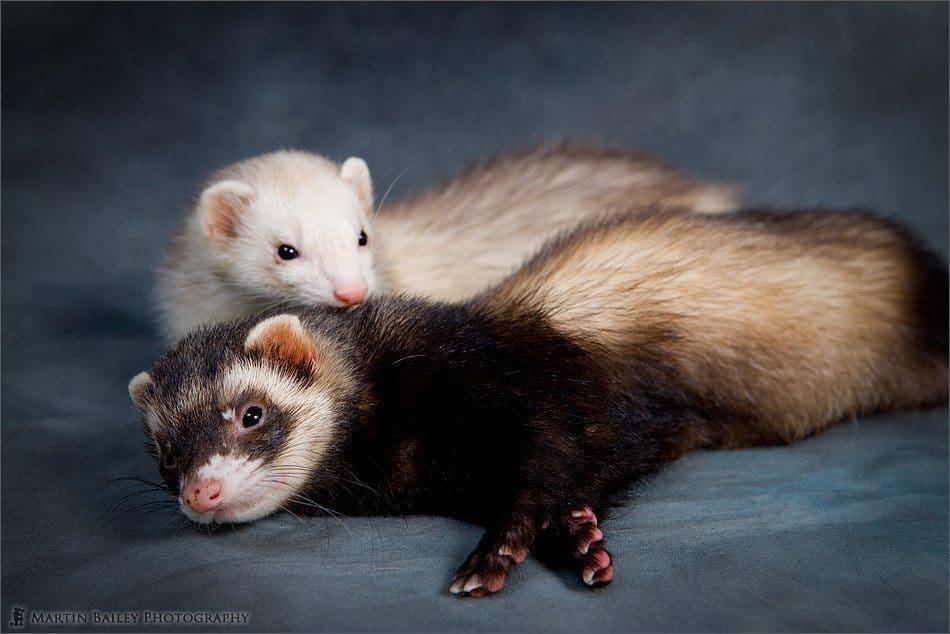
In shot number 1867, we have a nice cute shot of the two ferrets lying next to each other. The focus is on the front ferret and the back one is slightly out of the depth-of-field, but I still think it makes a nice shot. I have another where the front ferret is yawning, showing his fangs, and looking quite menacing, but this one is cuter and cuddlier.
Pet Shoot #10
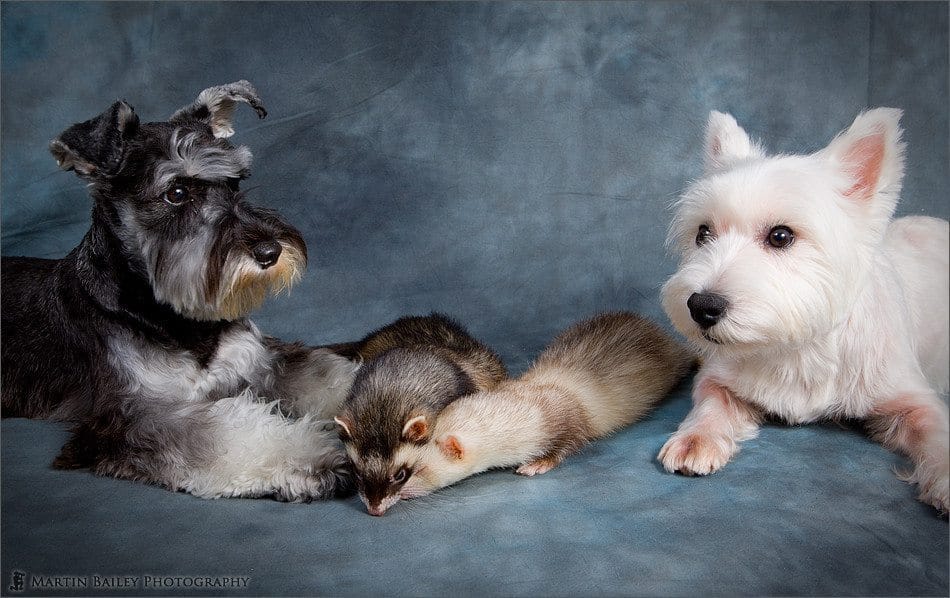
One of the other requirements was to get all four pets in the frame at once. In image number 1869, we can see that I achieved this, as well as a few other shots. It was actually really difficult, as the ferrets have a very short attention span. As with here, if you feed them, they will stay for a short while, but it was hard to get them to look up or at the camera. There are a few other shots that I uploaded that capture this better, and some that I provided the Client with that do it even better, but as photographs I prefer this one, so I thought I’d share this with you today instead.
Pet Shoot #12
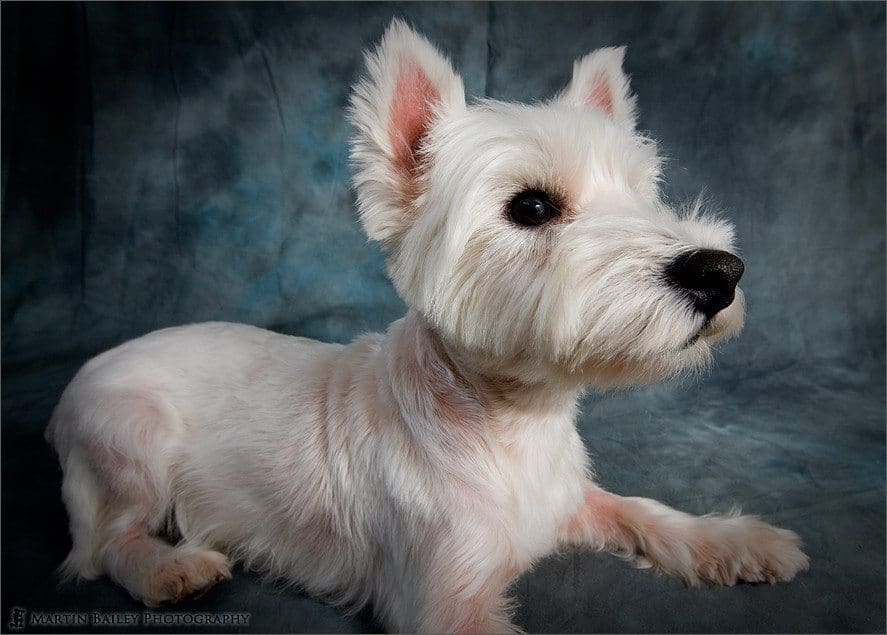
One of the other lenses I used was my 16-35mm F2.8 II L lens. I used this because it enables you to get up close to the subject and with dogs, this will emphasize their noses, making them look bigger and cuter, as we see in image number 1870. You have to be careful not to get too close though. This dog was already very nervous when I was this close to shoot this photo. On my list I’d actually got a few other shots that were not possible. One was to bring the client’s sofa into the set and have the animals all sit on the sofa, but the sofa was gold and scratched by the pets, to the extent that it would really not have made a nice prop. The other thing I wanted to try was to get the dogs looking out of the window, but again, the room was not going to lend itself to this, so I gave up on it.
Pet Shoot #13
Having nailed all of the required shots though, I threw on the 100mm F2.8 macro lens, and had a bit of a play around. One of the resulting images is shot number 1871. I got in pretty close, and so even at F8 with this lens, the dog is slightly out of the depth-of-field, but I was looking for something more artistic here, so I was not going to try to extend the DOF any more than this. The ferrets head popping into the frame from the bottom works OK here, and this is another shot that the client requested prints of.
Pet Shoot #14
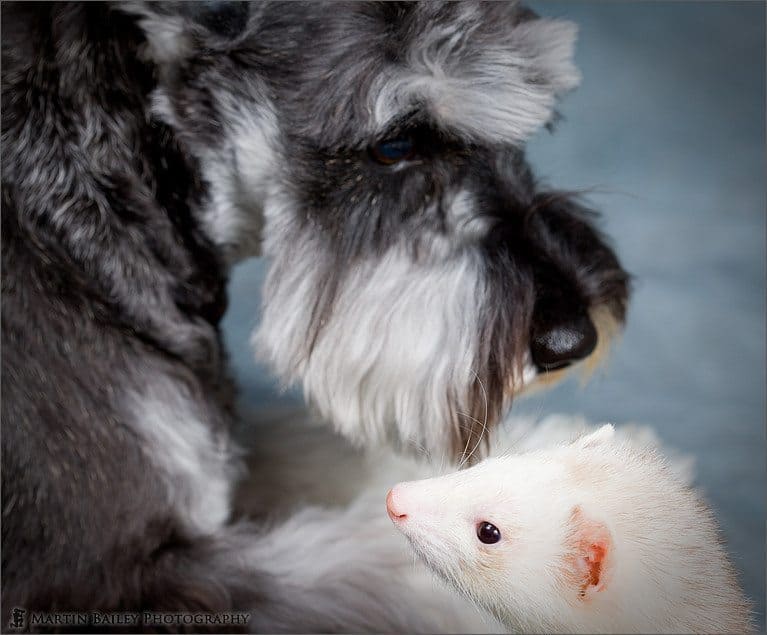
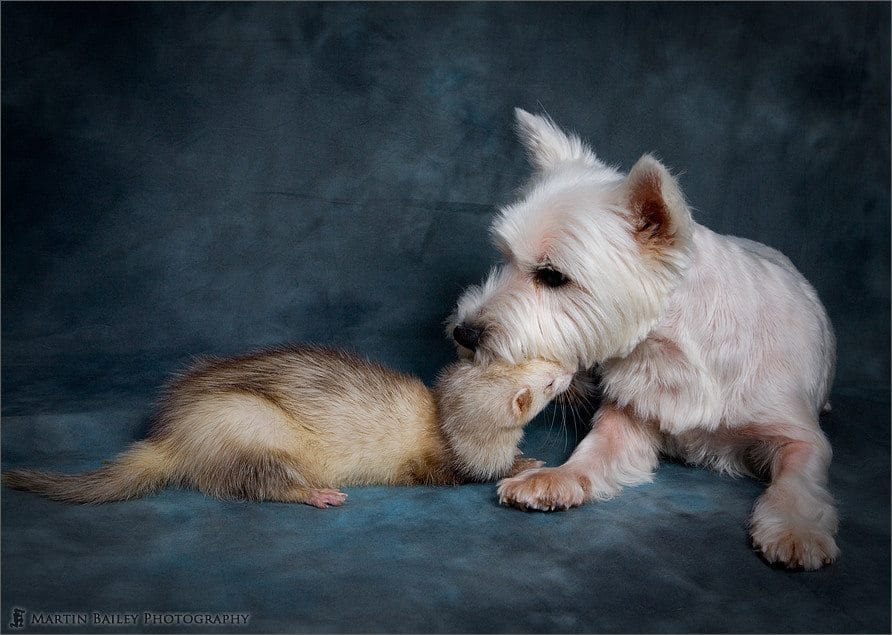
I was also trying to capture sweet moments, like the one we can see in image number 1873, where the white dog was muzzled up to the lighter ferret. This was towards the end of the shoot and the light from the window was now very dim, so I’d upped the ISO to 320, so as not to push my Speedlites too hard.
Pet Shoot #16
I had priced the shoot for a 3 hour session, and I shot some 1600 photos. I provided just over 130 shots for the client to choose from. In the package, I’d promised to provide the full sized digital data for the client to have a bag made with two of the images. This is a service I’ve found here in Japan which seemed to go down well. The bag was very high quality apparently, though it cost the client around $220. I did the order for her, but had it delivered direct to the client, and they paid on delivery, so it was very easy for me. I also of course gave the client the option to buy prints, which I priced the same as the prints on my Web site, but with a 20% discount for more than one print of the same size. The same size thing doesn’t really make a huge difference to my workflow, but it’s a way to allow the client to choose something and get a discount, and that will probably get them selecting more than one large print, which is where most of the money is. I offered to frame the prints with good quality prefab frames or mounting boards. I was going to charge a service charge for this, but they actually selected so many prints that I waived this charge. I was going to be bordering on overcharging, which of course won’t help me to get more custom by word of mouth from people that this client might know. As it is, the client was very happy with the resulting images and the service, which of course makes me feel like I’ve done a good job at a fair price.
In addition, it was really just a lot of fun. The pets were as sweet as can be, and the dogs very well trained, which made it a lot easier than it could have been. They were literally like little dolls when the client was dressing them. The ferrets too were amazing. You could pick them up and mess them around and they just didn’t seem to care. They had very good temperaments and not a hint of them thinking about biting you.
As I say, the settings for the lighting work for me. There may well be better ways to do this, although I have spend some time checking the Strobist Web site, I can’t see any indication that I’m doing things wrong either, and after all, the results are what matter’s and I like the lighting I was able to create. So, I thought I’d talk about it all here today, to see if there’s anything that might help you out as well. Remember the key points to flash photography are basically taking control over the exposure by putting your camera in Manual mode, which I pretty much use all the time already, and bang your strobes into ETTL mode, and allow them to pump out as much light as you need to make the shot look right. You can also use your strobes in manual mode, but only do that when shooting birds with my BetterBeamer, something that I’ll get into at some point as well. Either way, as usual, you’ll want to keep an eye on the histogram, and make sure you are not blowing out your highlights, unless that’s what you want to do. If you do start to get any unwanted hot-spots, just use the Flash Exposure Compensation. You can do this on the individual strobes, or via your camera, which will turn the strength up or down for all of your strobes by the amount dialed in. You can turn them down by a third or two, or maybe even a full stop if necessary if you are blowing out some highlights. And of course, you can use the ratio feature on your remote transmitter to make one light source brighter than the other. I had mine set up with the left strobe as group A and the right strobe as group B, so I could simply make the ratio 1:4 in favour of B, which of course makes it four times brighter than A. This gave me just the right amount of shadow on the left of the subjects, but filled in enough to still look nice and natural. Oh yes, and remember that I also manual set the zoom on my strobes to 24mm for the big umbrella and 50mm for the smaller umbrella used more like a soft box.
So, I hope you enjoyed that and that it was useful to some of you. If you are real strobist yourself you’ll now doubt have some ideas that you want to share with the community, so please do come along to the forum at martinbaileyphotography.com and enter your comments into the thread that I will start with the lighting setup diagram and the shot of the crop of the eyes that I mentioned earlier.
Remember too that the current assignment with the theme of Shadows will run until the end of Sunday the 7th of September, 2008. So please do get out there and see what you can make of this assignment. Or of course, you could use a few Speedlites to creatively make your own shadows in the comfort of your own home. Whichever way you do it, I can’t wait to see what you come up with again. In the meantime, you have a great week, whatever you’re doing. Bye-bye.
Show Notes
The Lighting Diagram was made with the Lighting Setup File, courtesy of Kevin Kertz, which you can find here: http://www.kevinkertz.com/
Music in this Podcast created and produced by UniqueTracks.
Subscribe in iTunes for Enhanced Podcasts delivered automatically to your computer.
Download this Podcast in MP3 format (Audio Only).
Download this Podcast in Enhanced Podcast M4A format. This requires Apple iTunes or Quicktime to view/listen.

This was a great pet photoshoot, Martin! Even though it’s over 10 years old 🙂
I’m so happy you’re still updating your site. Most stop when they’ve uploaded photos in 2008 & 2009!
Have a good one.
/Nabil