Back in Episode 102 I answered one of two questions I’d received from a listener named Julian Seidenberg. Today I’m going to answer the second question, which was really a request for information about the papers and various options available for my prints, which you can buy directly from my online gallery at martinbaileyphotography.com. If you’ve ever thought of buying a print but couldn’t make up your mind on the options, this should be worth listening too. Also, although members of the MBP Web site automatically receive a 10% discount when buying prints, I’m also going to give you voucher at the end of this episode that can be entered to get a further 5% off, making a total of 15% discount if you are also a member. Before we go on, some of you will recall that I said I was going to do a review of DxO Optics Pro from DxO Labs this week, but unfortunately this is going to have to wait until next week due to a few things that came up over last weekend. Sorry if you were looking forward to this, but I am going to try my best to get this out next weekend.
Well, I need to thank Julian for the question, not only as this lets me know that others are probably also a little bewildered by all the options, but also because this prompted me to remove a few of the options that were really remnants of my old printing workflow. First though, let me read out what Julian wrote:
“For ordering prints off your gallery you list options for various types of paper. I’m, quite frankly, bewildered by the options. When do you add a white (or black) border around an image and when do you create prints that go right up the edge of the paper? Do certain styles of photographs look better (to your eye) if they are printed on a certain type of paper? Is more expensive paper always better? What benefit do you get by using paper of higher and higher quality? Does there ever come a time of diminishing returns? Do certain papers work better in certain printers? I.e. can you happily use Fuji’s highest quality paper in a Canon printer? And on that note: what kind of printer do you use and why?”
Firstly I want to say that I have printed on Fuji paper with my Epson printer, with good results, but I don’t make this an option for my prints, and I have no experience with Canon printers, so although I’d like to go into this for you, I’m not really able to. I suggest you raise this in the MBP forum and hopefully someone will be able to provide the answers your after from personal experience.
I’m going to attack the other questions out of sequence too. I’d first like to go into what printer I use, and why. I’m not sure if this is the same model number worldwide, but I currently am still using an Epson PM-4000PX printer. I use this printer for a number of reasons. Firstly, I have used Epson printers for more than 14 years and find them to be very reliable, and although I know that other printer manufacturers also have very good offerings, I’ve found until now that Epson is always at the cutting edge in the printer market. Canon though are also breaking some new ground at the moment and when I’m ready to buy a new printer I will definitely review Canon’s offerings as well. The PM-4000PX gives me the ability to print up to A3+ size paper, which is 13×19”, and that is a nice size print, even to hang on a wall and view from a distance. I am considering a larger printer, but I have to move apartments before I can fit it in, so that’s on hold at the moment. Most importantly though is the quality. I find that the PM-4000PX produces beautiful quality prints, on all of the papers that I have made available in the options we’ll discuss shortly, and as I use Epson inks, they will last longer than most traditional prints under the same conditions. Kind of as a test of how resistant these photographs are to fading, I created two 13×19” prints when I first bought the printer back in 2002, five years ago as of the time of recording, and I hung them in frames under glass in my living room, where they get a good bathing of sunlight, albeit through lace curtains, during the first few hours of everyday, and then are indirectly illuminated for the rest of the day, and they still look as vivid and clear as they did 5 years ago.
If you are really serious about collecting a print for future value, and not to display, the best thing to do is to keep it in some kind of archival box away from light, but that also goes for traditional prints from film too. Quite frankly, if you are worried about the longevity or quality of prints from this printer, you don’t need to be.
Quality does of course depend on a few factors. How large my original is, and how large a print you buy. To safeguard you from buying a print at a size that I cannot print at, I have built in the ability to limit the largest size that will be displayed in the size pull-down, so that old photos from my early cameras or photos that I have severely cropped, will only be available up to the largest size at which I can print it at an adequate quality.
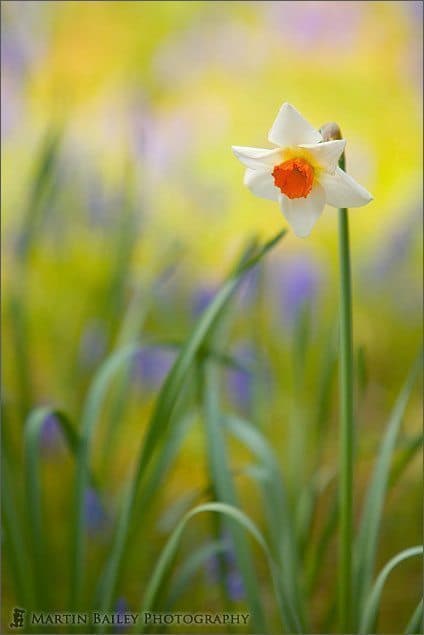
Watercolour Daffodil – Hitachi Park #18
With that note, I guess it’s time we actually talk about the options, and how to view them. If you are at a computer it would be great if we could do this together, but it’s not critical that we do. You should still get a good idea of what’s available from my explanation. So that I can be sure that we are all looking at the same options, let’s jump to image number 1392. If you have not previously clicked on the cart button, the options will be hidden by default, but to show them, just click the little shopping cart button above any image when you display it at the large size in the gallery. To hide the options again simply click the cart button once more.
So one of the changes that I’ve made is that now when you click the cart button the print buying options are displayed directly below the image, and not directly above it. I’ve done this as it will make it easier for people to browse the gallery when they want to make multiple selections. Until now, the options got in the way while browsing, unless you toggle them off again before moving to the next image. That should no longer be the case though, so if you want, you can leave the options displayed and it won’t really get in the way while browsing. I used to find that many people bought just one print, so this was not such an issue, but more often these days I’m noticing people buying multiple prints in one order, so I figured this would work better.
I should note too that most of what we’ll touch on today is for buying prints for your own use or for gifts etc. If you want prints to sell on or rent out commercially, or were thinking it might be OK to scan the print and use it commercially this is not the way to buy the print. If you are interested in any of my images for any kind of commercial or editorial use, please follow the steps we’ve mentioned so far to display the buying options for the image you are interested in, and then click the text link at the top of the options section that says “CLICK HERE to request an estimate for any kind of commercial use”. This will then add your selected photo to a form that you will need to fill out to give me the details I need to create an estimate and get back to you with the details. You can add as many images as necessary and use the same form as long as the type of use is the same. If you want multiple images with multiple types of use, please send multiple requests.
Assuming that you are buying the print for your own use or as a gift, the first thing you need to do before starting to build an order is to select your currency. You can currently choose from US dollar, Japanese Yen, UK Pound, Canadian dollar and the Australian Dollar. Just select your chosen currency from the list and click the Change Currency button next to the pull-down. Note that you need to do this before you start to put anything in your shopping cart because to prevent multiple currency shopping carts, I empty the cart when you change the currency. Note too that even if I don’t have your countries currency, the payment is by credit card or a PayPal account, so you will automatically be charged in your local currency after the credit card company converts it for you at that day’s exchange rate.
After setting the currency, all other options can be mixed and matched, so let’s start to go through these as well. In order, the first option is the type of paper you want the print to be printed on. This may well change over time, but right now, my favourite paper is the Epson UltraSmooth Fine Art Paper. This is a very classy paper. It is not glossy, and so at first can seem quite subdued but actually has a very wide dynamic range and beautiful tones and colours. This paper is perfect if you are going to frame the print under glass, as glass adds the gloss that the paper does not have. Also you often find that viewing glossy paper under glass adds double the gloss, and therefore you can get some nasty reflections from the face of the print that can be annoying at best, and stop you from being able to see parts of the image in the worst cases. The Epson Fine Art paper is quite expensive so I charge 5% more for this than other papers, but I personally think it’s worth it. Now, I’m not going to go into detail about every option in the pull-down here, but this does lead me back to Julian’s questions – “Do certain styles of photographs look better (to your eye) if they are printed on a certain type of paper? Is more expensive paper always better?” It is not always going to be the case that the most expensive paper is the best, but it really depends on what you want to do with the image. If you do want to frame it under glass, without doubt, the Epson UltraSmooth Fine Art Paper is going to be the best selection. Without spending too much time on this though, I finally wanted to say that there are little question marks next to every option that take you to a written explanation, including one next to the paper selection pull-down which has an explanation of the attributes of all the papers available, which should be useful.
Next is the paper size. As I mentioned earlier, in my printer I can output up to 13×19” prints, and so this is currently the largest size available. I don’t send any of my images to a lab for printing, as I prefer the control I get over my images by doing them myself. You will also find an explanation of this on the help page, but I don’t frame any of my prints before shipping. They are shipped rolled in a sturdy tube, for matting and framing by a craftsman of your choice. I would love actually to learn how to matte and matte my own prints, but to be honest, almost all of my sales go outside of Japan, and so matting them before shipping would just make the cost of shipping prohibitively expensive, so I don’t make this an option. This means that you need to think of your matting and framing options before selecting a paper size, unless you are just going to take it to be done at any size. Also, there are many excellent frames available now with a matte insert that actually look very nice once the print is inserted, so again, if you have a frame that you like, check the size of the opening in the matte board and select a paper to match.
Next is the Trimming and Border options. Both this and the next batch of radio buttons are set to my default choice. I like to put around a 10% white border around my images. In Julian’s question he mentioned a black border, but this has never been an option. There was either a white border or no border at all. You can though choose the width of your border. The default is 10%, and this is how I’d prefer to output my work, but say you have a nice 13×19” frame with an opening in the matte just that size and you want to show the image as large as possible in the opening, a 3mm border may be better for you. Just take a look at the size of the paper in millimetres under the Paper Size pull-down, and see if your matte’s opening is created to just fit, or if it is a tad smaller than the paper dimensions. I can also simply fill the paper with the print, leaving no borders at all. This will mean that I will probably have to cut off part of the original image, either along the top and bottom or the sides of the print, because they are rarely the exact same aspect as the paper. Again, there are examples of this on the help page. The last option here is to fit to the longest side of the paper. This is good if you are going to get a custom matte applied, and want the image to be as large as possible for the paper, without cropping the top and bottom or the sides. If you want anything else, please just mail me and I’ll do what I can, or make notes in the options comment field above the orange buttons, either with instructions on what you want or asking me to contact you to work on the print dimensions.
Next are the autographing options. Again my preferred way to autograph photos is preselected. I sign the prints with a black archival autograph pen, but also a small 15 x 15mm Japanese stamp with my name written in Kanji which are the originally Chinese characters used in Japanese writing. This is a traditional way for Japanese artists to sign their work and I think adds a nice touch to the prints. I have two stamps. One as I say 15x15mm and a smaller one at 10x10mm for prints as small as 5×7”. I have never gotten around to limiting the selection of these radio buttons, but please remember that if you select this option, you also need to select the 10% Border option, as there is nowhere to apply the stamp without the border. The characters on the stamp by the way actually read from top to bottom, right to left. In the top right is a character that can be read HEI, then RI in the bottom right, MA in the top left and then TEN in the bottom left. In certain circumstances HEI can also be read BEI, although usually when it comes after another character, unlike in this case. With a little imagination though, the whole name can be read BEIRI MATEN, or Bailey Martin, with the surname first. I could go into the reasons why I chose these characters but won’t today for the sake of time. If you are interested, maybe ask in the forum and I’ll explain in writing.
The other options here are to autograph without the stamp but still in the border, and I can also autograph over the image itself, say if you didn’t choose a border, or if you want to matte right up to the edge of the image using the border as an anchor. I usually do this with the same black archival autograph pen, but if the colours of the image don’t allow for this, I have a number of coloured permanent pens that I can use and will usually select something that sets off the image, and doesn’t clash with the colours in that area or in the image as a whole. The last option here is to not autograph the print at all.
Next is the number of prints you want to buy and then the field I mentioned earlier to add comments if you want me to do something with the print that is not listed in the options. Then there are four buttons. The bottom two buttons are to reset the form, removing your selected options, and another to empty the cart. The more important ones are at the top, and they are Add to Cart and View Cart. When you have made all your selections, you just need to click the Add to Cart button, or if you are browsing around and looking for other images and want to review what you already have in the cart, just hit the View Cart button. Either button though displays the cart, so let’s take a look at that now. I suggest that if you haven’t already done so, make a few selections and then hit the Add to Cart button, or just go ahead and click it with the defaults selected. You won’t of course have to buy anything unless you go through with the payment. This is just to take a look.
The cart will be opened in a separate window. Ignore the graphic with a rather old selection of images at the top of the cart, and take a look first at the details of the image you just added. There is a button to the left to delete the image, say if you had selected a few images but decided against some of them. Then there is the quantity you added and the code of the image. This is just the unique identifier that I use across my site, so you’ll see 1392 in there if you went to the image I mentioned earlier. The next column is the Description, and this contains a somewhat cut down version of what you added. This is cut down somewhat because the cart is cookie based, and the more information I add here, the fewer images the cart will support. This is a bit of a pain, but a technical issue that is not easily overcome. Then you’ll see the cost of the print and the total, which will be different if you added more than one copies of the same print. To the far right you’ll see a thumbnail of your image so that you can remember which one is which in multiple print orders. Below is the subtotal and then the postage and packing costs, then the total cost for the order.
Note that the 10% members’ discount is removed before the items get added to your cart so they are not listed here, but there are also some discounts for buying more than 5 and 10 items, which will appear here if that is what you do. There are four buttons along the bottom of the table which I’ll briefly explain. There’s the checkout button to jump to Paypal to start paying for the order, a Return button to take you back to my gallery leaving the cart open. A Print button to print out the contents of your order, and a Clear Cart button that does just that, empties the cart.
You have to check the checkbox saying that you agree to the terms and conditions before you can actually make payment and complete your order. Click on the Terms and Conditions link to actually read them and then check the checkbox before proceeding. The Terms and Conditions are actually on the help page, but you just need to take a look at the two paragraphs under the Terms and Conditions section. Below this checkbox is a field to enter the voucher that I’ll give you shortly on the off-chance that you might have been sitting on the fence on buying a print. Let’s actually click the checkout button so that I can explain the process a little. This is still not going to cost you anything unless you are using this podcast as a guide to actually buying a print.
Once you hit the Checkout button, you will be transferred to PayPal to process your payment. I wanted to quickly explain here that from many countries, you do not actually need to create a PayPal account unless you already have one or wanted one anyway. On the left side of the screen should be lots of fields to enter your name, address and credit card details. Remember from this point all of the windows are encrypted so the payment process is totally secure. If you are actually buying a print, this is all you need to do, then press the button to preview your order and continue. If however, you do have a PayPal account, you just need to enter your email address and PayPal password on the right side of the screen, and hit the Log in button.
Whether you have a PayPal account or not, once you have reviewed the order and confirmed payment that will usually be all you have to do. There are certain conditions though that sometimes trigger PayPal ask you to register for their Expanded Use program. If this happens, you have to register a credit card and have PayPal take a small payment, then check the random four digit number on your credit card bill, either online or when it arrives by post, and then enter that number into the PayPal Web site to complete this Expanded use registration. The small payment made will be deducted from your first payment, so you don’t lose any money, but this does cost us some time. PayPal don’t divulge why they sometimes do this, and although it’s a pain if it happens, it is to keep the integrity of the system high, so I guess we have to put up with it. Usually though, your payment should sale through.
Once you have made payment, I receive the order by mail, and unless I’m on an extended shoot will usually start to create the prints within 24 hours and get it send out to you within a further 24 hours. I aim to fulfill all orders and get them shipped within 72 hours of the order being placed and have managed this for every order I’ve received so far. Shipment to your own country of course will vary, depending on how far you are from Japan and the speed of your local postal service. I don’t use a courier like FedEx or UPS or whatever, again to keep the cost down. I do though guarantee that if the print is damaged, and you can prove that it was damaged during postage by sending me a picture of the damage, I will send you out another print, again, within 72 hours. I actually had some problems a few years ago while I was using a different type of tube for packaging, but since changing over a year ago I have not had any issues at all, so you really needn’t worry about damage to your print.
I tape a piece of paper around the rolled print too, to stop it from opening up inside the tube, which I found makes it very difficult to get the print out. Now it just drops out once you open the tube, and just need to rip the paper off from around the center of the print to see unroll it and take a look for the first time. There will be some curling of the print, but if you intend to have it matted and framed the person that does this will take care of that. If you want to you can roll the print the other way yourself, but be careful not to crumple it, and also use the piece of plain paper that I roll with the print to protect the surface of the print from damage.
Actually, I should mention that if you buy prints smaller prints I will probably ship them in a sturdy envelope, as opposed to a tube, but again, have so far not heard of any issues with damage during shipment. One last thing I should mention is that I cannot be held responsible if you are charged tax for the print. Again, I’ve not heard to anyone being charged to date, but if your country does choose to charge tax on it, I’m afraid it would be your own responsibility to settle that charge.
So, as I mentioned in the introduction, now that you’ve listened to the end I’m going to give you a coupon now that you can enter into the field in the shopping cart window that says “Enter your coupon code here”. Please don’t write this coupon down anywhere on the web, as it’s especially for you listeners as a thank you for your time and for your loyalty. The coupon is, MBPListener, with the first four characters, “MBPL” in uppercase or capital letters, and the remaining seven characters, “istner” in lower case, small letters. So that’s a capital MPBL with a small istner, MBPListener. Please make sure that you have logged on from that machine at some point for your initial 10% discount to be applied as well. When this discount has been applied you’ll see the phrase “Additional 10% MBP member discount applied!” in red characters at the bottom left of the buying options section. Note too as I said earlier that the additional 5% discount will only show up as 5% in the cart. You will not see a 15% discount the first ten is already deducted. All the prices you’ll see after being logged on are already 10% less than the list price for my prints.
So that’s it for today. I hope this has been of help to those of you that were interested but a little confused about the options, and thanks again to Julian for the prompt for the Podcast. Again, sorry that I couldn’t bring you the DxO Optics Pro review that I promised you last week. I’m going to try to get that completed ready for next week’s episode. And that’s about it for today. So with that, all that remains to be said is thanks for listening, and you have a great week, whatever you’re doing — Bye-bye.
Show Notes
The main thing to remember is if you aren’t sure about the options, choose the defaults. This will always give the best results, and allows me the creative freedom to crop as necessary leaving a tasteful border. Of course you can always contact me with any queries too, and I’m open to specific requests that you can mail in advance or write into the optional comments field when ordering prints.
 Subscribe in iTunes for Enhanced Podcasts delivered automatically to your computer.
Download this Podcast in MP3 format (Audio Only).
Download this Podcast in Enhanced Podcast M4A format. This requires Apple iTunes or Quicktime to view/listen.


0 Comments