Last week I picked up a Canon EF 300mm F2.8L IS USM Lens, and today I’m going to touch on some of my first impressions. I’ve been out with the lens just twice, but already I’m incredibly pleased I took the plunge on this lens that I have been lusting after for years. Listen on for more details on my experiences with the 300mm F2.8 so far, including having shot with the 1.4X and 2X Extenders attached.
First of all, the thing that most of you will already know is this lens is expensive. I cost me the equivalent of $4,600 at today’s rate, at the end of Nov 2007. This has obviously been the most prohibiting factor to my not adding this lens to my kit so far. The other reason is because as happens so often, I have this focal length covered with a few other lenses, including the 100-400mm. I want to start off by saying that I did do some tests, comparing the 100-400mm at 300mm, and found the 100-400mm to be good, as expected. Better than I’d expected in fact, because I’d been a little disenchanted with the 100-400mm for a while, despite it getting me some great shots over the years. I was going to publish the results today, but I’ve decided against it, because to be honest, for the money, the 100-400mm L lens is still an incredible piece of kit. It is a little soft at the 400mm end, and it is virtually unusable with the 2X Extender, but once you know it’s limitations, it will serve you well, as it has me for years, so no 100-400mm bashing today.
Canon EF 300mm F2.8L IS USM
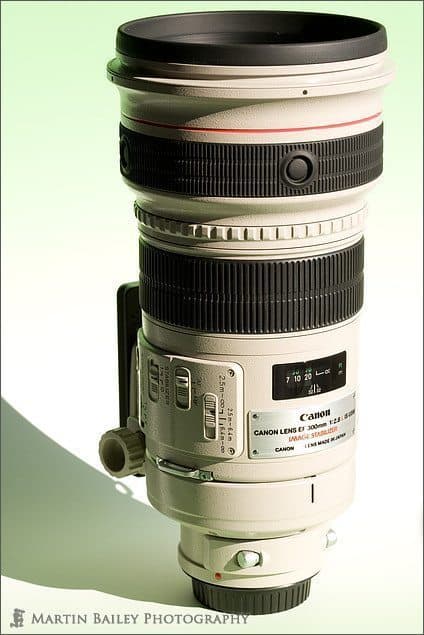
First let’s take a quick look at the 300mm F2.8 lens itself, in image number 1615. Remember if you are listening to the Enhanced version of this Podcast in iTunes or on an iPod, you will be able to see the images as we speak. The images are also embedded in the MP3 file for you to flick through, and you can also view by clicking the thumbnails on my Podcast page linked via the top menu at martinbaileyphotography.com. And you can also add the number that I call out for each image under the Podcast menu and then hit enter or click the button to jump directly to the photo in my gallery. I shot a few images of my latest lenses yesterday for the rotating graphic behind the top menu on the Web site, and while I was at it shot the 300mm and uploaded it to my Gear album so you could take a look. The lens comes with a hard carrying case, with a key that I found is exactly the same as my 600mm F4 lens, so the actual act of locking the case is more of a comfort to the owner than a security measure. I never check my lenses while travelling though, so I will rarely use the case.
The lens also comes with a strap to carry it over your shoulder. Also, The lens is heavy at 5.6 lbs or 2550g, so when carrying it while attached to a camera, you are better to carry with the lens’s shoulder strap than the camera’s, to avoid ripping the camera’s lens mount out. I found too that carrying the lens with a camera body attached, namely the 5D with a battery grip and two batteries inside, gave me a really well balanced setup. The camera and lens hung horizontally, and not vertically, like when there is no camera attached, which makes it really nice to carry. Canon obviously designed the lens this way which was a nice touch I thought. The lens also comes with a large white lens hood that fits on the lens backwards like most hood do for transporting, and it also has a large leather lens cap that covers the entire lens hood. Although there are some third party lens caps available for the 300, 400, 500 and 600mm telephotos from Canon, the front elements of these lenses are so big, Canon don’t actually make a lens cap for them. There is no filter thread to grip a lens cap either.
That brings me on to the filters for this lens. The Canon Super Telephotos all take 52mm drop in filters. There is a little cover in the back of the lens, near the lens mount with a clear glass filter incorporated that has to stay in while no other filter is in use. If you want to use a polarizer though, you have to buy one especially for these lenses, and change it out in this drop in compartment. Once in place, there is a cog wheel on the lens barrel that you use to turn the filter to adjust the amount of polarization required for your shot. They’re a little more expensive than your normal polarisers, but luckily all of the super telephotos take the same 52mm drop in filter, so you don’t need one for each, unless you intend to use them simultaneously. There are a number of other filters listed on the Canon Web site, but I only have the PL, and have only needed that so far.
Anyway, let’s jump in and start looking at some of the images I’ve got from my first two days of shooting, and I’ll interleave some of my other impressions as we progress. As I upload my image chronographically ordered, I’m going to talk about them in that order, and this means that the first image I want to look at, image number 1618, was actually shot with the 2X Extender attached, for an effective focal length of 600mm. One of the main benefits of this lens that I was looking forward to was the ability to actually use a 2X extender and still get tack-sharp images. Although a big lens, at almost 10” or 25cm long, it is much more portable than the 600mm F4, which I only carry when I know I’m going to need it. The 300mm though becomes an F4 420mm with the 1.4X Extender, and an F5.6 600mm with the 2X Extender. It’s this set up that I was testing here.
Momiji
To show you just how sharp this setup is, I’m going to post some example images, not just to my gallery, but to a forum post that I will link to in the show-notes. In this post I’ll put the Web sized image that we are looking at now, but there is a red square showing you an area of the photo that I have cropped out, and will also upload showing you the cropped area at 100%. If you are at a computer now you can take a look, or check it out later, but you can see that even with the 2X Extender this lens is has totally acceptable sharpness. I should say that I was for this using a tripod, though the tree was moving slightly in a breeze.
I won’t go into the shooting data for all of the images today, so if you are interested, take a look at the EXIF data below the image in my online gallery. I’ll put another link in the show-notes actually to display all images taken with the 300mm F2.8, including those shot with Extenders attached. I will say though that this was shot at F5.6, which is wide open for this combination, and still I’m very happy with the results.
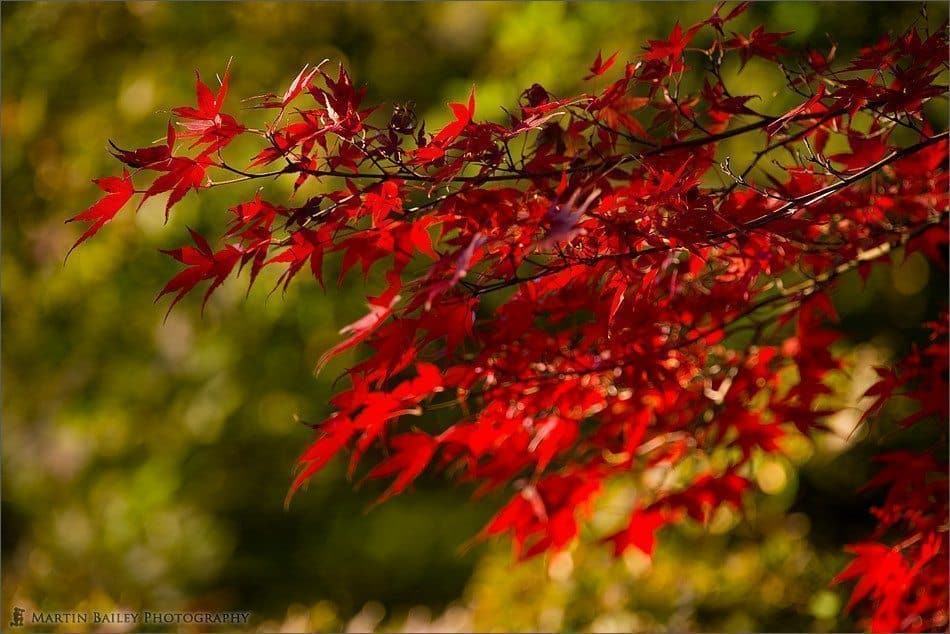
Next, let’s look at image number 1621. This was shot without any Extenders at 300mm with the aperture wide open at F2.8. I was focusing on the left jagged edge of the yellow-orange leaf on the right of the frame. Again, I’ll upload a 100% crop of this area of the image to allow you to see how sharp the lens is. I should also note that I found the bokeh to be very sweet both with and without Extenders, but slightly better without. With a shortest focusing distance of 2.5m or 8.2ft, which is just about how close I was to this scene, you can see how quickly the foreground and background go out of focus. It was this effect that I was after, and this is one of the main reasons for investing in this lens over using my 100-400mm at 300mm. The 100-400 has a widest aperture of F5.6 at 300mm, which really doesn’t cut it when it comes to bokeh, although, as I said earlier, it’s a very nice lens for the price.
Fallen!
Cousins
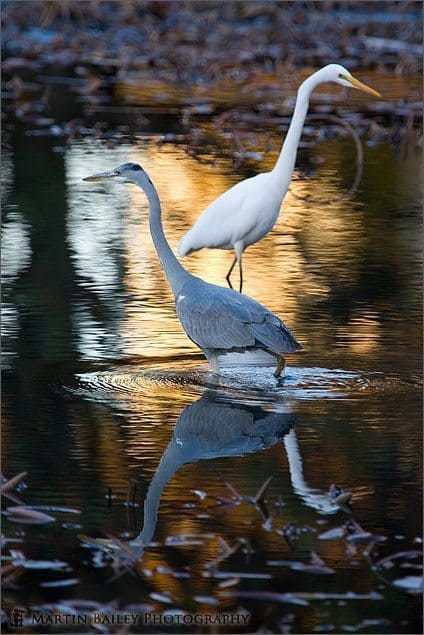
In image number 1623, we see a grey heron and a great egret, strutting past each other in a pond in the park in which I was shooting. This is a prime example of when I would be kicking myself for not having the 600mm with me. Instead though on this day, I just dropped the 2X Extender on, and started to shoot away. At 160th of a second shutter speed, I was able to shoot hand held with relative success.
About a quarter of the images were blurred, but that was more through me moving the lens while panning with the birds movement. When I was stationary, I was able to get very acceptable results. I haven’t included a 100% crop of this shot, as the birds themselves were also moving, making the results a little unfairly soft. In the next image though, number 1624, the grey heron was more stationary, so I will include a 100% crop of the entire bird in the forum post. This is with the 1.4X Extender, again handheld, and is a tad on the soft side, but again very acceptable for a hand-held shot at 420mm with a shutter speed of 1/200th of a second. Note that I had upped the ISO to 400 for these shots, which in this light will introduce minimal but visible grain.
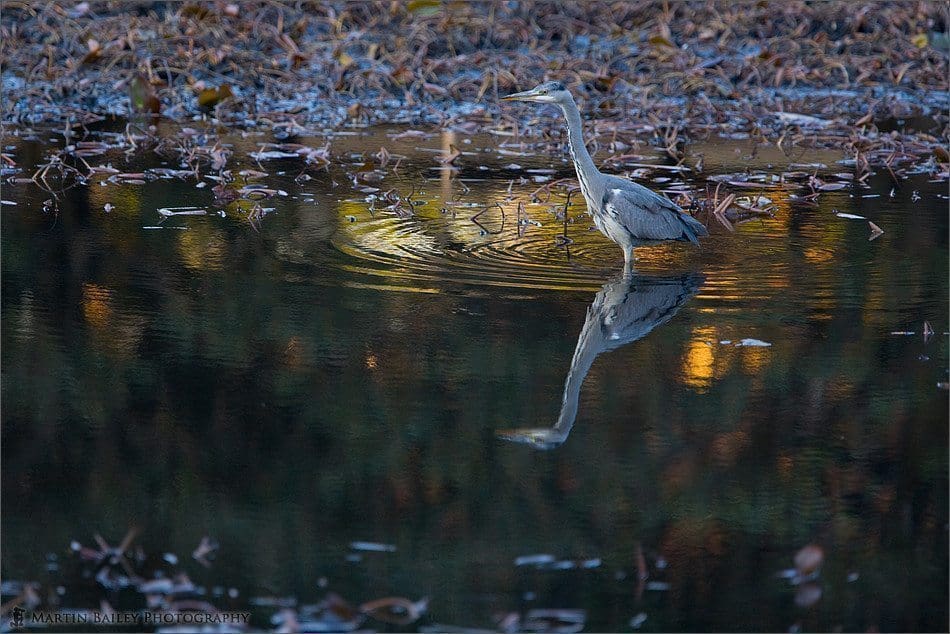
Grey Heron
The images we’ve look at up to now were all shot in the Shinjuku Gyoen park here in Tokyo on Friday the 23rd of November. The following day, I visited the Jindai Botanical Garden Park, and continued shooting. I was shooting with other lenses too, but just selecting the 300mm F2.8 lens shots for this review.
Note that I haven’t yet shot a front or back focus test chart, that I described in Episode #101 of this Podcast. I’ll be doing that very soon before my two weeks grace period to take the lens back expires, but having used the lens for a couple of days, I’m not worried about any focusing issues. The lens focuses quickly and actually, rarely searching for focus. It also has a very large focus ring, making it very easy to focus manually when you want to. Another neat feature of the Canon Super Telephotos is a focus preset button. Having turned it on with a switch on the lens barrel, you focus the lens to the point you want to remember and then press a small white button next to the switch. If you have the switch on beep mode, the lens will beep to let you know that it has recorded the focus distance. Then you can continue shooting at whatever focus distance you want, until you next to get back to the focus distance you recorded, and then to recall it, you just turn the cog type grip on the lens, between the two black grips that you can see on the photo of the lens that we looked at early. Jumping to the preset focus distance is instant, and you’re ready to shoot whatever it is you want to shoot at that distance.
There are also AF Stop buttons around the black grip closest to the front element of the lens. These can be used to stop autofocus from working momentarily, but I always select the custom function on my 5D that remaps these buttons to switch between One-Shot focusing and AI Servo. This is useful when shooting wildlife, like birds in flight, when you need to quickly switch between focusing modes, but don’t have time to make a menu selection.
Let’s look now at image number 1626. As I was walking through the Jindai Park, I spotted this scene through a gap that was just out of reach, even for the 70-200mm with a 1.4X Extender fitted. I set the 300mm on a tripod and composed the shot through a gap, and was very happy with the results. Here I stopped down to F16 to get more depth-of-field, giving some detail in the trees in the distance but keeping it slightly blurred so as to keep it separate from the foreground pampas grass and yellow cedar needles, which I wanted in focus. I actually shot the same scene with the 70-200mm with the 1.4X Extender, using the surrounding elements, the bow of a tree and a bush, to frame this scene, but the results looked a little crass, so I decided against uploading the shot.
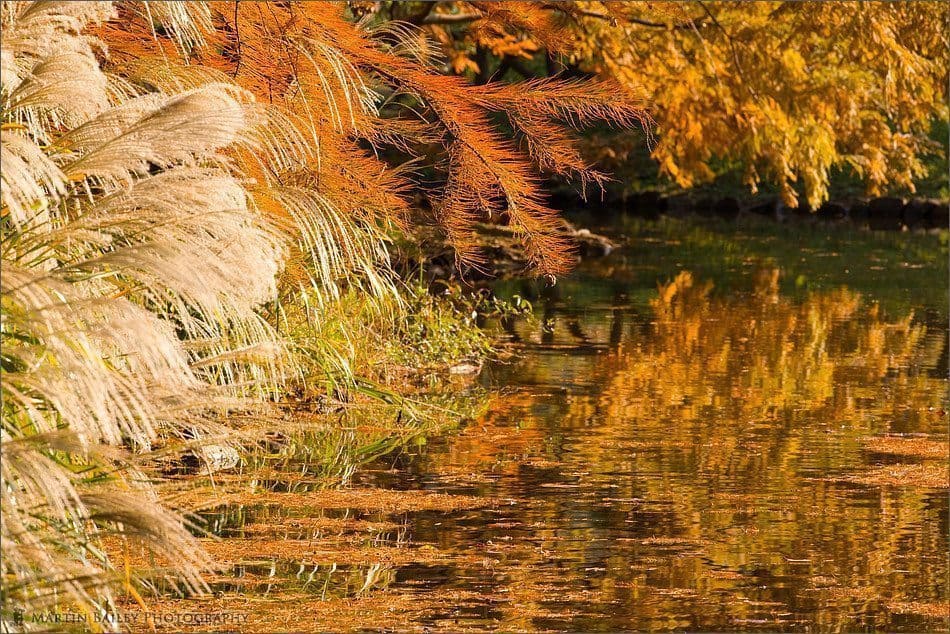
Autumn Pond
Take a look at another autumn foliage shot, in number 1631. The beauty of a long lens like this is that it allows us to get in close from a distance, editing the scene in camera, removing unwanted elements to isolate the subject we want to concentrate on. Here I found a patch of leaves with a nicely lit second patch in the background, and was able to compose the scene in this way because of the focal length of the lens. I stopped down to F4 for this shot to give me more of the foreground leaves in focus, while still throwing the middle and background patches nicely out of focus for the overall effect that I was hoping for.
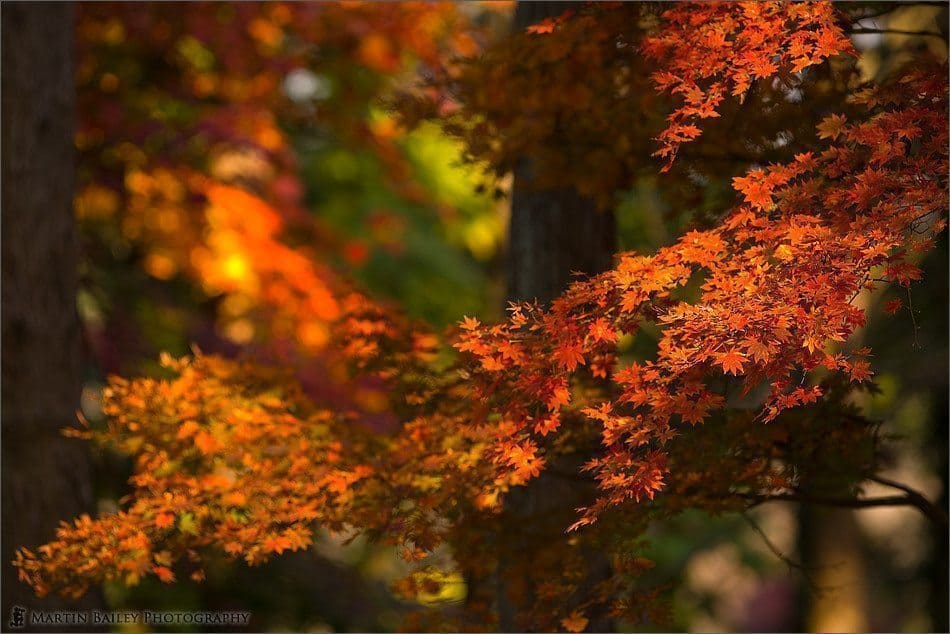
Maple Colour
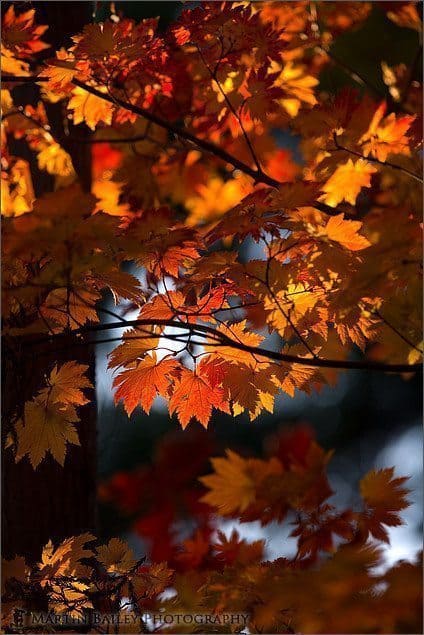
Backlit Autumn Leaves
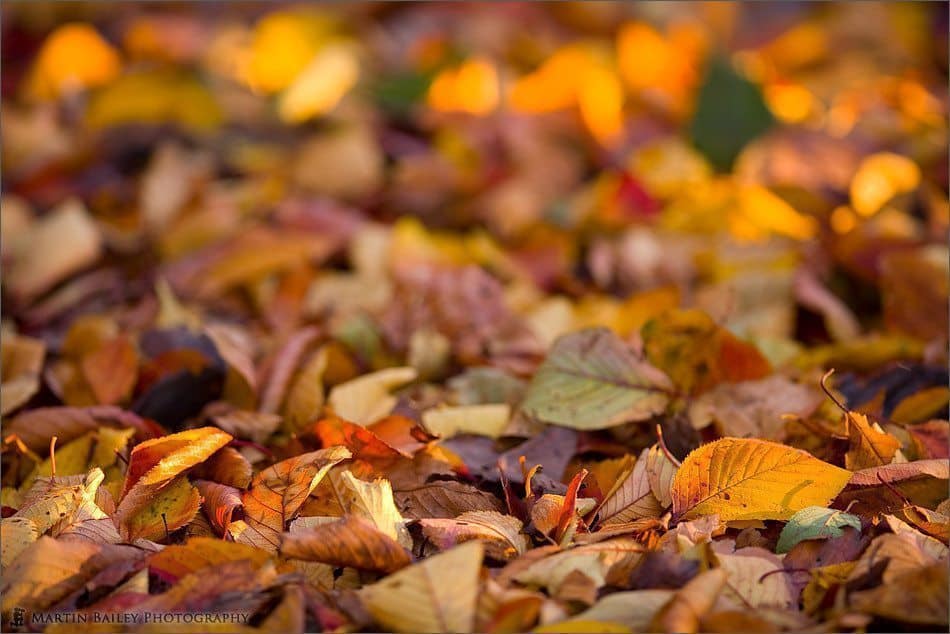
Backlit leaves also make beautiful subjects, as we can see in the next image, number 1632. Here again I was able to edit in camera and get myself a nice patch of leaves from the footpath. Shot again at F4, the light hitting the leaves was changing rapidly. Moments before this I was focussed on the yellow leaf about a quarter of the way up from the bottom of the frame, as it was fully lit, then I recomposed and refocused as the light moved lighting up different leaves.
I find this kind of autumn foliage can make some stunning vividly coloured shots, especially when you work in the warmer light towards the end of the, but as I’ve mentioned before, I like to find leaves out of direct sunlight as well, as we can see in the last image we’ll look at today, which is number 1633. Here I found a Japanese maple in beautiful yellow that was totally shaded. The sun was down close to the horizon now, and totally behind all the other trees in the park, but the sky was still quite well lit, so there was lots of ambient light for the shot. There was almost no wind as well, so I left the ISO at 100 and selected a shutter speed of 1/30th of a second at F2.8 for this image. Again, the focal length allowed me to shoot from a distance, which gave me a good angle on the bows of the tree, so that the blurred background leaves form nice layers across the middle of the shot, but the left foreground leaves have a dark enough background to add some interesting contrast to the image. The absence of direct sunlight keeps the yellows subdued, though I did expose them to the right shoulder of the histogram to make them bright and vivid, but in a subdued kind of way, if you know what I mean.
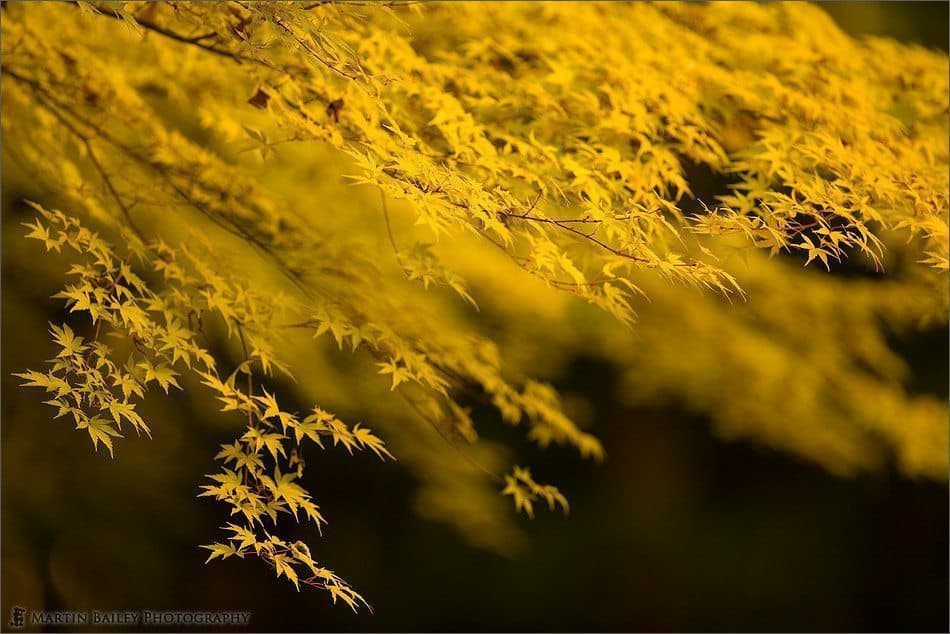
Mellow Yellow Maple
So that’s it for the first impressions style review of the Canon EF 300mm F2.8L IS USM lens. I have been looking forward to getting this lens for absolutely ages, and now that I have it, I can’t wait to see what else I can make with its help. A big lens for sure, with a big price tag, so definitely not for everyone, but if you have considered getting this lens and wondered if it’s all that it’s made out to be, believe me it is. Like when I first got the 70-200mm F2.8, my only regret is not buying it sooner. To be honest, I couldn’t afford this sooner. I have been waiting until I had enough funds put by for the third generation 1Ds which will be out soon, and if I had to choose between the two, I would have waited for the 300mm. Luckily though things have come together nicely, and the 1Ds has taken a lot longer to be released than I’d originally expected while planning for this some time ago, enabling me to take the plunge now, and I’m very please I did.
I hope that will be of some use to anyone that might be considering this lens, and even if you’re not, I hope you enjoyed the photos. Before we finish I wanted to remind you that the Fire Assignment album was locked a few hours ago, and I have turned on the voting system. Check out the instructions on using the voting system in the Assignment Forum at martinbaileyphotography.com and I also encourage you to come along and vote for your favourite three images at mbpgalleries.com. Thanks to all of you that have uploaded your images. I am impressed as usual with the quality of shots that you guys are putting out, even for such a tough assignment as this has been. Voting will go on until the end of Sunday the 9th of December, which I’ll turn it off and prepare the podcast to announce the winner who will receive a fine art print of the photo of their choice from my online gallery.
I will also announce the theme for the next assignment, and I’m still thinking that the next assignment will probably be the one to close for the grand prize, as I have a great prize for the winner of the grand prize, which will be awarded to the participant who has accumulated the most points in the last Grand Prize was given in May this year. It means that we will be one Assignment short from what I first expected, but the times that I can get a prize from a sponsor are out of my control, so I hope you’ll understand and I know you’ll be happy with the prize.
And that’s about it for today. So with that, all that remains to be said is thanks for listening, and you have a great week, whatever you’re doing — Bye-bye.
Show Notes
This link will take you to the lens on the Canon US Web site: http://www.usa.canon.com/consumer/controller?act=ModelInfoAct&fcategoryid=154&modelid=7317
Note there is a lens cap listed under the accessories for this lens on the Canon Web site, but looking at the other lenses that it fits, I don’t see how it can fit the 300mm F2.8, unless it is a variable size lens cap of some kind. If anyone knows anything about this, please do let me know and I’ll update this information.
Subscribe in iTunes for Enhanced Podcasts delivered automatically to your computer.
Download this Podcast in MP3 format (Audio Only).
Download this Podcast in Enhanced Podcast M4A format. This requires Apple iTunes or Quicktime to view/listen.

0 Comments